
Applying delay effects effectively can transform a flat, dry audio mix into an immersive, dynamic sonic experience. Whether you are transitioning between electronic tracks on a DJ controller or singing your heart out in a home karaoke setup, understanding how to manipulate echoes is a fundamental skill for any live performer. When used with precision, delay adds depth, masks transitions, and gives vocals a professional, polished space to sit within the overall mix.
However, live audio environments leave very little room for error. An uncalibrated delay can quickly turn into a chaotic wall of noise, muddying the lyrics of a song or throwing off the rhythm of a dance floor. By mastering the core parameters of this time-based effect, learning how to route your signal chain, and practicing specific performance techniques, you can confidently use delay to elevate your live sound.
Mastering Core Delay Parameters for Live Audio
To control a delay effect in a live setting, you must first understand its three primary parameters: time, feedback, and mix. The time parameter determines the exact duration between the original sound and its subsequent echo. In digital audio workstations and modern DJ hardware, this is typically measured either in milliseconds (ms) or as a musical note division relative to the track’s tempo, such as a quarter note (1/4) or an eighth note (1/8). Aligning this parameter with the beats per minute (BPM) of your music ensures that the echoes fall in perfect rhythm with the song, maintaining a cohesive groove.
Products mentioned in this guide
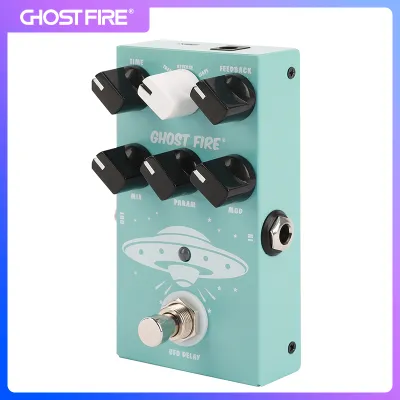
Prices are valid at publication and may change. Please refer to the product page for the latest price.
Feedback, sometimes labeled as regeneration, dictates how much of the delayed signal is routed back into the input of the effect. This control directly influences the number of times the echo repeats before fading away. While a low feedback setting produces a single, clean repeat, high feedback settings can create an infinite loop of sound. In live environments, keeping feedback levels below 50% is generally recommended to prevent the echoes from building up and causing digital clipping or speaker-damaging feedback loops.
The mix parameter, often referred to as the wet/dry ratio, balances the unprocessed “dry” signal with the affected “wet” signal. In karaoke performances, keeping the mix relatively low (around 15% to 25%) ensures that the lead vocal remains clear and intelligible, preventing the echoes from overpowering the singer’s voice. For DJs, the mix can be pushed much higher during transitions or build-ups to wash out a track and create a sense of anticipation before a drop.
Executing Delay Transitions and Builds in DJ Sets
In DJ mixing, delay is an invaluable tool for blending tracks of different genres or tempos. One of the most practical applications is the slapback delay, which uses a very short delay time (between 50ms and 150ms) with zero feedback. Applying a slapback delay to a dry vocal sample or a percussion loop thickens the sound and adds a sense of physical space, allowing the element to stand out in a busy mix without cluttering the lower frequencies.

For dramatic transitions, DJs frequently employ high-feedback delays to create a “wash-out” effect. By applying a 1/2 or 3/4 note delay to an outgoing track and slowly turning up the feedback and wet mix, you can create a continuous, echoing tail of the song’s final beat. This tail acts as a temporary ambient pad, masking any minor beat-matching imperfections and giving you ample time to introduce the incoming track. Once the new track drops, you can instantly cut the delay effect to restore clarity to the mix.
To prevent these delay tails from turning into a muddy rumble, always combine your delay with a high-pass filter (HPF). Low-frequency elements like kick drums and basslines carry a massive amount of acoustic energy; echoing these frequencies will quickly overload your sound system and exhaust your headroom. By filtering out everything below 250 Hz on the delay return channel, you keep the low end tight and punchy while allowing the mid-and-high-frequency echoes to float cleanly over the top of the mix.
Optimizing Delay Settings for Clear Karaoke Vocals
Karaoke performances require a completely different approach to delay, as the primary goal is to support the singer’s voice while preserving the clarity of the lyrics. The style of the song should dictate your delay settings. For fast-paced, upbeat tracks, a short, rhythmic delay (such as a 1/8 note) synced to the tempo adds excitement and energy without lingering too long. For slow ballads, a longer, ambient delay (such as a 1/4 note or a dotted 1/8 note) helps fill the empty spaces between vocal phrases, giving the performance a lush, professional feel.
To keep the lead vocal upfront, you must carefully manage the relationship between feedback and the wet/dry mix. A common mistake in home karaoke setups is turning both settings up too high, which causes the singer’s current words to collide with the echoes of their previous words. To avoid this vocal masking, keep the feedback low—usually between two and three audible repeats—and adjust the mix so the delay sits subtly in the background, acting as a supportive cushion rather than a competing voice.
Advanced performers and sound engineers often use a technique known as active delay triggering. Instead of leaving the delay effect turned on continuously, keep the effect muted or turned down while the vocalist is actively singing a line. As the singer reaches the final word of a phrase and pauses, quickly raise the delay send or tap the effect button to capture only that last syllable. This allows the echo to ring out beautifully during the silence, creating a dramatic, studio-quality effect without compromising the intelligibility of the verses.
Routing and Configuring Delay in DJ and Karaoke Setups
How you integrate delay into your audio system depends heavily on your hardware and software configuration. Most modern DJ mixers and controllers feature built-in hardware effects processors. These are highly convenient as they are pre-routed and can be assigned to individual channels or the master output with the turn of a physical switch. However, if you prefer the unique character of external gear, such as a dedicated vocal delay pedal or a vintage rack unit, you will need to route your audio using a send/return loop on your mixer.
When using digital DJ software or a digital audio workstation (DAW) for karaoke, you must configure your software routing to minimize latency. Ensure your audio interface drivers are fully updated and set your buffer size as low as your computer can handle without producing audio crackles—typically 128 or 256 samples. Map your delay’s wet/dry mix, feedback, and time parameters to physical knobs or faders on a MIDI controller, allowing you to make instantaneous, tactile adjustments during a live performance rather than relying on a computer mouse.
Before your performance begins, perform a thorough gain-staging check. The signal entering your delay processor should be clean and clear; if your input gain is too hot, the delay will capture and repeat a distorted signal, compounding the harshness with every echo. Ensure that the output level of your delay channel matches the level of your dry channels, preventing sudden, unwanted volume spikes when the effect is engaged.
Troubleshooting Muddy Audio and Runaway Feedback
Even with careful preparation, live audio environments can present unexpected challenges. If you notice a muddy rumble or a loss of definition in your sound, phase cancellation may be occurring between your dry signal and the delayed reflections. To resolve this, apply a steep equalizer (EQ) cut to the high and low extremes of the delay return channel—a technique often called the “Abbey Road curve”—which limits the delay’s frequency response to the midrange (roughly 300 Hz to 3 kHz). Additionally, widening the stereo image of your delay can help separate the echoes from the mono-centered lead vocal or kick drum.
One of the most critical situations to prepare for is a runaway feedback loop, which occurs when the delay’s feedback control is set too high, causing the signal to amplify itself infinitely. If you hear a high-pitched squeal or a rapidly rising wall of sound, you must act immediately to protect your audience’s hearing and your sound system. Locate the physical feedback knob or the master FX mute button on your mixer and turn it down completely. Do not try to fix the issue by lowering the main master volume first, as this will not stop the internal loop from clipping your mixer’s channels.
Finally, automatic BPM sync features can occasionally fail, especially when playing vinyl records, older tracks with fluctuating tempos, or live acoustic karaoke backing tracks. If your delay falls out of sync, do not panic. Use the physical “Tap Tempo” button on your controller or mixer, tapping it in time with the snare drum or the bass beat to manually recalibrate the delay time. Alternatively, you can manually adjust the delay time in milliseconds using a quick mental calculation to keep your echoes perfectly aligned with the music.
Frequently Asked Questions (FAQ)
What is the difference between delay and reverb in live performances?
While both are spatial effects, they function differently. Delay records the incoming audio signal and plays it back as distinct, repeating echoes separated by a defined interval of time. Reverb, on the other hand, creates a dense, continuous wash of overlapping reflections that simulate the natural acoustics of a physical space, such as a hall or a tiled room. In live performances, delay is often preferred for adding depth to vocals or instruments because it preserves clarity, whereas excessive reverb can easily wash out the sound and make lyrics difficult to understand in highly reflective venues.
How do I sync my delay effect to the track's BPM manually?
If your equipment lacks an automatic sync or tap tempo button, you can calculate the required delay time in milliseconds using a simple mathematical formula. Divide 60,000 (the number of milliseconds in one minute) by the BPM of your track to find the duration of a quarter note (1/4) delay. For example, if your track is playing at 120 BPM, dividing 60,000 by 120 gives you 500 milliseconds. To set an eighth note (1/8) delay, simply divide that number by two (250 ms), or divide it by four for a sixteenth note (1/125 ms) delay.
Community discussion
Share your experience or ask a question. Comments are reviewed before publication.