
Starting your drumming journey with an electronic drum kit is an excellent way to build rhythm, coordination, and timing without the overwhelming volume of an acoustic set. In Singapore’s high-density residential landscapes, where HDB flats and condominiums place neighbors in close proximity, electronic drums offer a practical compromise. They allow aspiring drummers to practice silently using headphones while enjoying a variety of built-in training tools. Selecting the right beginner kit involves balancing playability, sound quality, physical footprint, and budget.
To make an informed decision, beginners should focus on reputable brands that offer reliable trigger response, durable hardware, and clear upgrade paths. Brands like Roland, Yamaha, and Alesis dominate the entry-level market, each approaching the beginner experience with a distinct design philosophy. By understanding what to look for in a drum module, pad materials, and hardware compatibility, you can find a kit that fits both your learning goals and your living space.
Key Criteria for Choosing a Beginner Electronic Drum Kit
The drum module, often referred to as the “brain” of the electronic kit, is the most critical component to evaluate. For a beginner, the module should not only produce realistic drum sounds but also serve as an interactive practice partner. Look for modules that feature built-in metronomes with adjustable time signatures and coaching functions that grade your timing accuracy. Connectivity is equally vital; a module with a USB-MIDI port allows you to connect the kit to a computer or tablet to use learning software or recording applications. Some modern entry-level modules also include Bluetooth audio, enabling you to stream backing tracks directly from your phone to your headphones while you play.
Products mentioned in this guide
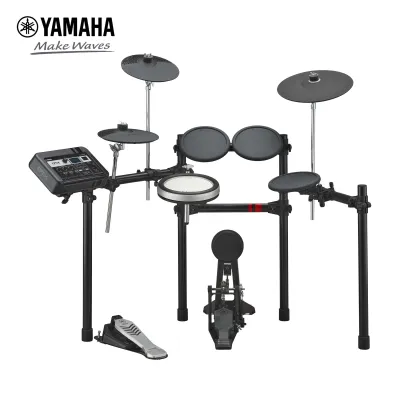
![Roland Electronic Drums TD-02KV Digital Drum TD 02KV TD02KV Absolute Piano The Music Works [PREORDER]](https://img.lazcdn.com/g/p/a312f0f427cd970f3c0457a477b0f10d.jpg_400x400q80.jpg_.webp)

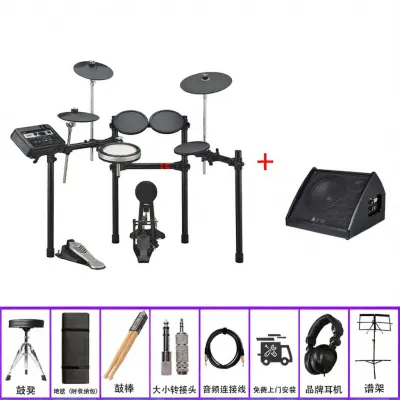
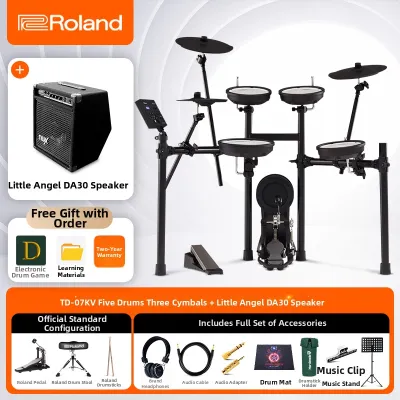
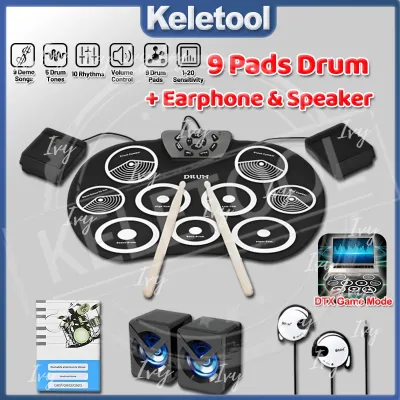
Prices are valid at publication and may change. Please refer to the product page for the latest price.
The material of the drum pads directly influences both the playing feel and the acoustic noise generated in your room. Traditional rubber pads are durable and cost-effective, but they offer a stiff rebound that can fatigue your wrists during long practice sessions and produce a distinct “clack” sound when struck. Mesh heads, made of woven fabric, provide a much quieter response and a rebound that closely mimics the tension of an acoustic drum head. Many modern beginner kits now feature tension-adjustable mesh heads, allowing you to fine-tune the bounce to match your playing style.
Pedal design is another crucial factor that affects both playability and noise transmission. Entry-level kits typically use either a beaterless trigger pedal or a physical kick pad paired with a standard bass drum pedal. Beaterless pedals are significantly quieter because they do not involve a physical mallet striking a pad, making them ideal for upstairs apartments. However, they lack the realistic resistance of an acoustic kick pedal. If you plan to transition to acoustic drums eventually, choosing a kit with a physical kick pad that supports a standard single or double bass drum pedal will help you develop proper foot technique. Similarly, evaluate whether the hi-hat controller operates as a simple on/off switch or supports continuous variable control for open, half-open, and closed sounds.
Evaluating Entry-Level Series from Leading Brands
When browsing the market, you will encounter various entry-level series designed by major manufacturers to capture different segments of the beginner market. Each brand uses proprietary terminology to describe their sound engines, sensor technologies, and pad designs. Understanding these brand-specific ecosystems helps you decode product specifications and align them with your personal priorities, whether you value acoustic realism, physical durability, or budget-friendliness.

Because electronic musical instruments contain sensitive sensors and digital components, purchasing through local authorized dealers in Singapore is highly recommended. Authorized distributors ensure that your kit is covered by a valid local warranty, providing peace of mind and access to official replacement parts if a trigger or cable fails. Buying from unauthorized parallel importers may save a small amount upfront but can leave you without technical support or compatible power adapters.
Roland: Focus on Authentic Feel and Module Longevity
Roland is widely recognized for its focus on durability, trigger precision, and realistic playing feel, even in its entry-level product lines. The brand’s beginner series typically emphasize the use of double-ply mesh heads on the snare and tom pads, which are engineered to withstand heavy use while maintaining consistent tension. Roland’s design philosophy prioritizes a natural physical response, ensuring that the transition between practicing on an electronic kit and performing on an acoustic set feels as seamless as possible.
The sound modules accompanying Roland’s entry-level kits are built with a strong educational focus. They regularly feature dedicated coaching modes, such as time checks, quiet counts, and tempo changes, which are designed to systematically improve a beginner’s rhythmic accuracy. These modules also include high-quality onboard backing tracks across various musical genres, allowing you to practice playing along with a full band. The user interfaces are generally streamlined, prioritizing quick access to essential practice tools over complex menu diving.
In terms of physical design, Roland’s beginner kits often utilize compact, space-saving racks that can be easily tucked into the corner of a bedroom or study. Their proprietary mesh pads are specifically engineered for low acoustic noise, minimizing the sharp impact sounds that can travel through thin walls. When purchasing a Roland kit, it is essential to verify the exact package contents with the retailer. Many of their entry-level packages do not bundle a drum throne, headphones, or a physical kick pedal as standard accessories, meaning you will need to budget separately for these essential items.
Yamaha: Emphasis on Acoustic Modeling and Playability
Yamaha leverages its extensive history as a manufacturer of world-class acoustic drums to design electronic kits with an emphasis on sonic realism. Their entry-level series focus heavily on capturing the natural acoustic characteristics of real drum shells, cymbals, and room acoustics. Yamaha’s sound modules are populated with high-resolution samples recorded from their legendary acoustic drum lines, offering beginners an expressive and tonally rich auditory experience that encourages longer practice sessions.
The sound modules on Yamaha’s beginner kits are known for their intuitive layouts and robust integration with external learning applications. Many of these modules feature dedicated USB ports that allow direct connection to proprietary iOS and Android apps, which offer interactive lessons, visual training aids, and easy customization of drum kit sounds. Additionally, Yamaha’s entry-level modules often support advanced cymbal choking, allowing you to mute a cymbal sound by grabbing the edge of the pad, which is a critical technique for developing expressive play.
Yamaha’s pad technology takes a slightly different path, often utilizing specialized rubber compounds or their proprietary Textured Cellular Silicone (TCS) surfaces on higher-tier beginner models. These surfaces are designed to offer a highly consistent rebound and a natural stick slide without the trampoline-like bounce sometimes associated with loose mesh heads. The rack systems are highly ergonomic, allowing for precise adjustment of pad heights and angles to suit younger players or adults. Before purchasing, check what cable adapters or wireless dongles are required to connect the module to your specific smart device for app integration.
Alesis and Value-Oriented Brands: Maximizing Features on a Budget
For beginners working with a tighter budget, value-oriented brands like Alesis offer an appealing alternative by maximizing the physical features provided at entry-level price points. These brands frequently offer full mesh-head configurations, larger pad diameters, and additional cymbal pads (such as a second crash cymbal) at prices comparable to the most basic setups of premium brands. This allows beginners to practice on a kit layout that closely mirrors a standard five-piece acoustic drum set without a massive financial investment.
While these value-focused kits offer impressive physical specifications, buyers should carefully evaluate the trade-offs in sound resolution and hardware responsiveness. The sound modules in budget-friendly kits may feature simpler sound synthesis engines with fewer velocity layers, meaning the volume and tone of the drum sound do not change as dynamically with the strength of your stick strike. Additionally, the hi-hat controller pedals on budget kits are often simple on/off switches, which can limit your ability to practice subtle half-open hi-hat techniques.
Durability is another factor to monitor when choosing a budget-friendly brand. The plastic clamps, rack tubes, and pad casings on value kits may require gentler handling compared to the heavy-duty hardware of premium brands. To safeguard your investment, always verify the warranty terms offered by the local distributor in Singapore. Ensure that the retailer has a reliable process for sourcing replacement triggers, cables, and power adapters, as budget kits can sometimes be more difficult to service independently over years of regular use.
Adapting Your Setup for Apartments and Shared Spaces
Setting up an electronic drum kit in a Singapore apartment requires careful consideration of noise transmission. While headphones completely eliminate the airborne sound of the drum samples, they do not silence the physical impact of your drumsticks striking the pads or your feet stomping on the pedals. This physical impact creates structure-borne noise—low-frequency vibrations that travel through the drum rack, down into the floor, and directly into the ceiling of the neighbors living below you.
To maintain good relations with your neighbors, it is crucial to implement effective vibration isolation. Standard carpet or a basic yoga mat is rarely sufficient to block the heavy downward force of a kick pedal. Instead, consider using specialized drum noise-isolation boards or constructing a DIY “tennis ball riser,” which uses split tennis balls sandwiched between two wooden platforms to decouple the drum kit from the floor. Alternatively, replacing standard hard plastic or felt kick beaters with soft foam tennis-ball-style beaters can drastically reduce the thud of the bass drum pedal without sacrificing trigger accuracy.
Space management is another practical challenge in high-density homes. Before purchasing a kit, measure your intended practice area carefully; a standard beginner electronic kit typically requires a footprint of approximately 1.2 meters by 1.2 meters once you factor in the drum throne and your physical playing stance. If space is extremely limited, look for kits featuring foldable rack designs that allow the entire setup to be collapsed and stored in a closet or behind a door when not in use. Keep your cable routing organized using hook-and-loop fasteners to prevent tripping hazards and protect the delicate trigger cables from being pinched by the folding mechanism.
Pre-Purchase Verification and Compatibility Checklist
Before finalizing your purchase, whether online or at a local showroom in Singapore, run through a comprehensive verification checklist to avoid unexpected costs and compatibility issues.
- Verify Package Contents: Many beginner kits are sold as "shell packs" or basic configurations. Confirm whether the listed price includes essential accessories such as a drum throne (stool), a kick pedal, a hi-hat stand (if required), drumsticks, and headphones. Purchasing these items separately can easily add S$150 to S$300 to your total startup cost.
- Check Power Specifications: Ensure the included power adapter is compatible with Singapore's standard electrical supply of 230V at 50Hz and features a standard Type G three-pin plug. Importing a kit from overseas may result in receiving a 110V adapter or an incompatible plug type, requiring you to source a safe local replacement adapter.
- Confirm Device Connectivity: If you plan to use interactive learning apps or connect the kit to a computer, check the module's output ports. Ensure you have the correct cables, such as a USB Type-B to USB Type-C cable for modern laptops and tablets, or proprietary adapters for older mobile devices.
- Test Headphone Compatibility: Electronic drum modules typically output audio via a 6.35mm (1/4-inch) stereo jack. If your headphones use a standard 3.5mm plug, make sure to purchase a gold-plated 3.5mm-to-6.35mm adapter to ensure a secure, static-free connection.
Frequently Asked Questions (FAQ)
Do I need an amplifier, or can I just use headphones?
For personal practice, a high-quality pair of closed-back headphones or in-ear monitors is highly recommended, as they isolate external noise and deliver the full stereo image of the drum kit. You do not need an amplifier to use an electronic drum kit. However, if you want to play along with other musicians in a room or practice without wearing headphones, you will need to connect the module’s line output to a dedicated drum amplifier or a portable PA system. Standard guitar amplifiers are not suitable, as they cannot handle the deep low-end frequencies of a bass drum or the crisp high-end of cymbals.
Can I upgrade individual pads or the module later?
Yes, most electronic drum kits allow for some degree of upgrading, but compatibility depends heavily on the brand’s ecosystem. Premium brands like Roland and Yamaha offer excellent cross-compatibility within their own product lines, allowing you to swap a rubber tom pad for a mesh pad or upgrade to a larger snare pad later. However, mixing brands (e.g., connecting a Yamaha pad to an Alesis module) can result in poor trigger response or lost features like dual-zone triggering. Always check if your module uses standard 6.35mm TRS cables or a proprietary multi-pin cable harness, as a harness can limit your ability to add extra cymbals or pads without upgrading the entire module.
How do I connect my electronic drums to a computer for recording?
To record your drumming, the simplest method is to connect the drum module to your computer using a standard USB-MIDI cable. This allows the module to act as a MIDI controller, triggering high-quality virtual drum instruments inside a Digital Audio Workstation (DAW). If you prefer to record the actual sounds generated by your drum module, you must connect the module’s audio outputs to an external USB audio interface connected to your computer. When recording via MIDI, ensure you install any proprietary drivers provided by the manufacturer and adjust your DAW’s buffer size to minimize latency, which is the delay between striking a pad and hearing the sound from your computer speakers.

Community discussion
Share your experience or ask a question. Comments are reviewed before publication.