
Selecting the right piano stickers is one of the most practical decisions a beginner can make to accelerate their early practice sessions. These visual aids bridge the gap between the abstract symbols on a sheet of music and the physical layout of the keyboard. However, the market offers several distinct styles—ranging from traditional note labels to complex chord guides and vibrant color-coded systems—and choosing the wrong type can hinder your progress or even damage your instrument.
To find the ideal match, you must evaluate your primary musical goals, your keyboard’s physical specifications, and the environmental conditions of your practice space. While some beginners thrive with detailed notation guides, others require simple, high-contrast visual cues that can be easily removed as their spatial memory develops. By understanding the structural and pedagogical differences between these systems, you can select a tool that supports your learning style without becoming a permanent visual crutch.
How to Match Piano Stickers to Your Learning Goals
Your musical objectives dictate the type of visual aid that will be most effective for your daily practice. Beginners typically fall into one of three primary learning paths, each requiring a different style of keyboard labeling. If your goal is to play classical music, read traditional sheet music, and understand formal music theory, you will require a system that emphasizes standard notation and keyboard geography.
Products mentioned in this guide
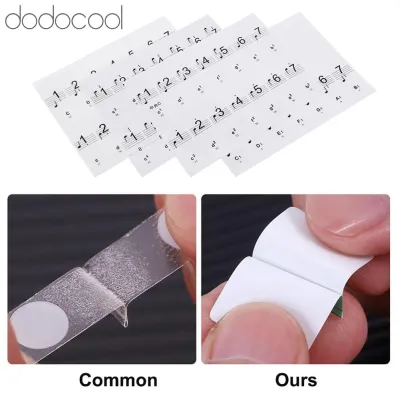
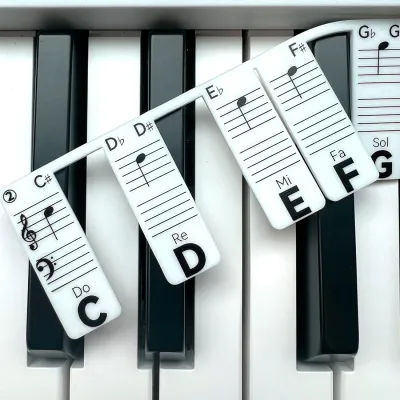
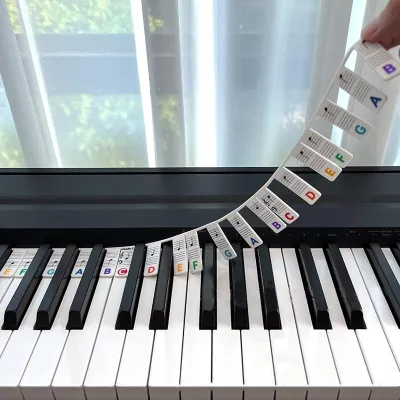
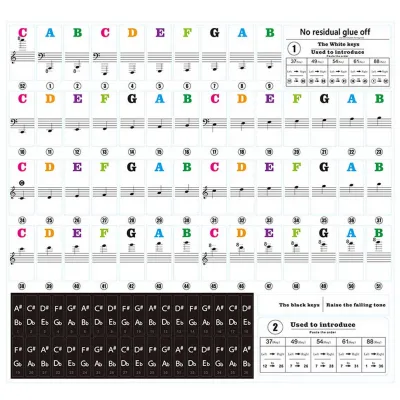
Prices are valid at publication and may change. Please refer to the product page for the latest price.
For those who want to play pop songs, accompany singers, or write their own music, chord-based guides are far more efficient. These guides focus on harmonic structures rather than individual note names, allowing you to visualize full hand shapes quickly. Meanwhile, early childhood education and visual-first learning methods rely heavily on color-coded systems, which simplify the cognitive load for young minds by replacing letters and symbols with high-contrast colors.
Hardware compatibility is another critical factor that many beginners overlook before purchasing. Standard piano keys have a uniform width of approximately 2.2 centimeters, but budget portable keyboards, travel controllers, and children’s toy pianos often feature narrower keys. Additionally, keyboards come in various sizes, most notably 61-key, 76-key, and full-size 88-key layouts. You must verify that the sticker set you choose matches your keyboard’s specific key count and width, as a set designed for an 88-key piano will have extra labels that can cause confusion if forced onto a 61-key instrument.
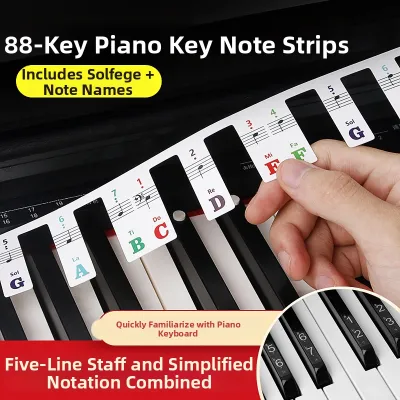
Material composition is equally important for preserving the condition of your instrument. Traditional keyboard labels rely on adhesive backing, which semi-permanently bonds the vinyl to the key surface. A highly popular and safer alternative is the silicone note strip, which features a molded, non-adhesive design that rests flat on the keyboard bed behind the black keys. Identifying your key material, keyboard layout, and learning path before purchasing will ensure you select a compatible, safe, and effective learning tool.
Note Label Stickers for Sight-Reading and Keyboard Geography
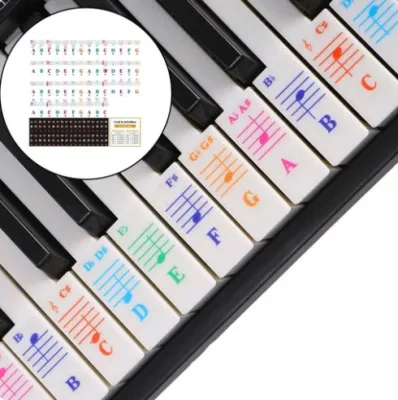
Note label stickers are the most common visual aids found on beginner keyboards, specifically designed to assist with traditional sight-reading and classical training. These stickers typically feature the alphabetical letter of the note (A through G) alongside a miniature graphic of the musical staff, showing exactly where that note sits in either the treble clef or the bass clef. This dual-representation system helps your brain connect the physical key under your finger to the printed note on a sheet of music.

This style is highly recommended for adult beginners, classical piano students, and anyone committed to learning standard notation. By placing these labels on your keys, you can instantly locate “Middle C” and understand how octaves repeat across the keyboard. This immediate feedback reduces the frustration of constantly counting keys from the edge of the board, allowing you to focus on finger placement, rhythm, and hand posture during your first few weeks of study.
However, note labels carry a significant pedagogical risk: they can easily become a visual crutch. If you rely on them for too long, your eyes will look down at your hands and the stickers rather than up at the sheet music. This habit delays the development of muscle memory and spatial awareness, which are essential for fluid, blind playing. To prevent this, note labels should be viewed as a temporary training tool to be used for no more than a few months.
When shopping for note labels, look for sets with transparent backgrounds so the natural white and black of your keys remain visible, which prevents the keyboard from looking cluttered. The typography should be clean, sharp, and easy to read from a standard sitting posture. Ensure the set includes clear notation for both the white keys and the black keys (sharps and flats), and verify that the print has a non-glare, matte finish to prevent reflections under overhead room lighting.
Chord Guide Stickers for Pop, Accompaniment, and Songwriting
If your musical interests lean toward contemporary pop, jazz, worship music, or singer-songwriter accompaniment, chord guide stickers offer a highly specialized alternative to standard note labels. Rather than focusing on individual notes on a staff, these guides display common chord formulas, root notes, and finger placement diagrams directly on the keys. They are designed to help you visualize how groups of notes come together to create harmonic progressions.
This style is ideal for hobbyists who want to play from lead sheets or chord charts without spending months mastering classical sight-reading. Pop music relies heavily on repeating chord structures, and these stickers allow you to locate major, minor, and seventh chords almost instantly. By showing you exactly which keys to press simultaneously, chord guides speed up your muscle memory for hand shapes and transition times between different chords.
Despite their practical benefits for accompaniment, chord guides have a high information density that can easily overwhelm absolute beginners. Because a single piano key can serve as the root, third, or fifth of several different chords, these stickers often feature multiple letters, numbers, and color indicators packed into a very small area. This visual clutter can make it difficult to identify basic individual notes if you decide to transition to classical music later.
When evaluating chord guide stickers, prioritize sets that feature clear, intuitive color-coding to separate major, minor, and seventh variations. The printing must be exceptionally durable, featuring a scratch-resistant laminate coating, as chord playing involves repetitive, heavy down-pressures that can quickly wear away cheap ink. Verify that the diagrams are large enough to read clearly without requiring you to lean forward over the keys.
Color-Coded Systems for Children and Visual Learners
Color-coded piano stickers are specifically designed to simplify the early stages of musical education for toddlers, young children, and visual-first learners. These systems replace or supplement traditional letters and staff lines with bright, distinct colors assigned to specific notes of the scale. For example, all “C” keys might be colored red, while all “D” keys are colored orange, creating a highly recognizable visual pattern across the keyboard.
This approach dramatically reduces the cognitive load associated with learning to play an instrument. For a young child, identifying a specific color is an instantaneous process, whereas recognizing alphabetical letters or reading staff notation requires a higher level of cognitive development. Color-coded systems make practice feel like an interactive game, keeping young students engaged and motivated for longer periods during their practice routines.
Many modern piano learning applications and children’s method books are designed to pair directly with these color systems, allowing students to play complete melodies on day one. However, the primary disadvantage is the significant disconnect from standard musical notation. Because traditional sheet music is printed in black and white, children who rely solely on color cues will face a challenging transition phase when those colors are eventually removed from the keys.
To ensure a successful experience, select a color-coded sticker set that aligns with established educational standards, such as the Boomwhackers color system, which is widely used in school music classrooms. The materials must be strictly non-toxic and child-safe, as young children frequently touch their faces and mouths during practice. Additionally, look for high-contrast, saturated colors that remain easy to distinguish even under warm or dim home lighting.
Quick Comparison: Matching Sticker Types to Your Practice Routine
To help you determine which style best fits your current setup and musical aspirations, refer to the comparison table below. This matrix highlights the primary trade-offs of each system, allowing you to choose the tool that aligns with your specific learning environment.
| Sticker Type | Best For | Primary Learning Focus | Visual Clutter Level | Transition to Standard Sheet Music | Ideal Keyboard Size |
|---|---|---|---|---|---|
| Note Labels | Classical students, adult beginners | Sight-reading, staff notation, keyboard geography | Low to Medium | Moderate transition (requires gradual removal) | 88-Key (Acoustic or Digital) |
| Chord Guides | Pop musicians, songwriters, worship leaders | Chord shapes, hand placement, progressions | High | Difficult transition (highly specialized focus) | 61-Key or 76-Key |
| Color Systems | Toddlers, young children, visual learners | Gamified play, basic melodies, app integration | Medium | Hard transition (requires structured weaning) | 61-Key or smaller |
When interpreting this table, consider your long-term musical goals. If you are unsure where your journey will lead, starting with standard note labels is generally the safest path, as it keeps your options open for both classical and contemporary styles.
For unique learning scenarios, you can also mix and match these approaches. For instance, some adult learners place color-coded stickers on the outer octaves to quickly identify extreme treble and bass ranges, while keeping standard note labels in the middle octaves where they do their primary reading. If your chosen educational program or app supports it, combining visual elements can create a highly customized learning path.
Safe Application and Removal: Protecting Your Keyboard Keys
Applying stickers to your piano requires careful preparation to ensure they adhere properly and can be removed later without leaving permanent damage. Before applying any adhesive product, you must clean the key surfaces thoroughly to remove dust, skin oils, and moisture. Wipe the keys down using a clean, dry, or slightly damp microfiber cloth. Avoid using harsh household chemical cleaners, rubbing alcohol, or glass sprays, as these solvents can degrade plastic keys or strip away protective gloss coatings.
To apply adhesive stickers evenly, use a small plastic card or a ruler as a guide to align the top edge of each sticker consistently across the keys. Press down gently from the center of the sticker outward to push out any trapped air bubbles, which can cause the edges to peel prematurely. If you are using non-adhesive silicone note strips, simply lay the flexible strip flat along the back of the keyboard bed, ensuring the molded tabs fit securely between the black keys without pinching.
Removing adhesive stickers requires patience to avoid lifting the key surfaces or leaving a stubborn, sticky residue. Peel each sticker away slowly at a shallow, 45-degree angle. If adhesive residue remains on the keys, do not scrape it with sharp metal objects or use abrasive scrubbing pads. Instead, apply a tiny amount of mild, warm soapy water to a microfiber cloth and gently rub the area until the residue dissolves, then wipe the key completely dry with a separate cloth.
Environmental factors play a major role in how adhesives behave over time. In highly humid tropical climates like Singapore’s, where relative humidity levels frequently exceed 80%, traditional chemical adhesives can degrade rapidly. This degradation can cause the glue to liquify, slide across the key, or seep down into the mechanical gaps between the keys, leading to sticky or squeaking key actions. If you live in a humid environment and do not keep your instrument in a constantly air-conditioned room, non-adhesive silicone note strips are highly recommended over traditional stickers.
Always check your keyboard’s user manual and the sticker packaging before applying any adhesive. If your instrument features specialized wooden keys or premium textured keytops—such as the synthetic ivory or ebony finishes found on mid-to-high-end digital pianos—do not use adhesive stickers under any circumstances. The chemicals in the glue can permanently discolor, stain, or lift these textured surfaces, which will void your manufacturer’s warranty. If your keyboard has these premium finishes, stop and consult the manufacturer, or use only non-adhesive silicone overlay strips.
Frequently Asked Questions (FAQ)
Do piano stickers leave residue on the keys?
Whether a sticker leaves residue depends heavily on the adhesive quality, how long the sticker remains on the keys, and your local climate. Low-cost adhesive vinyl stickers often leave a sticky, gummy residue when peeled off, especially if they have been exposed to high humidity and warm temperatures over several months. To minimize this risk, opt for high-quality static-cling labels or non-adhesive silicone note strips. If you must use adhesive stickers, test a single label on an inconspicuous, outer key first, and check your keyboard’s user manual for specific material warnings before labeling the entire board.
Should I put stickers on all 88 keys or just the middle octaves?
For most beginners, it is highly recommended to label only the middle two or three octaves centered around Middle C. Labeling all 88 keys creates massive visual clutter and can overwhelm your eyes during practice. By labeling only the central octaves where most beginner music is written, you encourage your brain to learn the outer octaves naturally through interval recognition and physical distance. This targeted approach prevents you from developing a total reliance on stickers, making the eventual transition to playing on an unlabeled keyboard much faster and less intimidating.
Can I use piano stickers on a digital keyboard with weighted keys?
Yes, you can use piano stickers on weighted keys, but you must select your materials carefully. Weighted or hammer-action keys often feature a matte, textured, or synthetic ivory finish designed to mimic the feel of an acoustic piano. Traditional adhesives can struggle to bond with these textured surfaces, or worse, they can permanently damage the specialized coatings upon removal. Additionally, thick vinyl stickers can rub against adjacent keys during deep key presses, causing mechanical friction, clicking noises, or sluggish key return. For weighted keyboards, non-adhesive silicone note strips are the safest option, as they do not touch the key faces and will not interfere with the physical movement of the action.
Community discussion
Share your experience or ask a question. Comments are reviewed before publication.