
When setting up a home studio, choosing the right acoustic foam panel shape is critical to achieving professional-sounding recordings. For vocal recording, thick wedge or pyramid panels are highly effective because they target the mid-to-high frequency range of the human voice, capturing reflections before they can bounce back into the microphone. For acoustic instruments, a combination of flat panels and wedge panels is highly suitable to tame harsh flutter echoes while preserving the natural brightness and resonance of the instrument. If you are recording loud amplifiers or drums, thick panels must be paired with corner bass traps to manage the powerful low-mid buildup that can easily muddy your tracks. Understanding how these different shapes interact with sound waves allows you to make informed decisions and avoid common acoustic treatment mistakes.
How Different Acoustic Foam Shapes Control Sound
Acoustic foam panels work by converting sound energy into heat through friction as sound waves pass through the open-cell polyurethane structure. However, the physical shape carved into the face of the panel alters how sound waves strike, penetrate, and bounce off the material. The most common profiles—wedges, pyramids, flat panels, and bass traps—each serve a distinct acoustic purpose based on their surface area, depth, and overall mass.
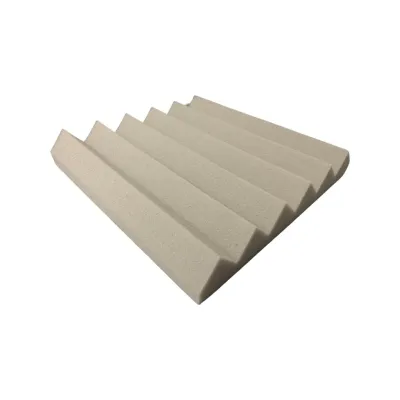
Wedge panels feature alternating triangular ridges that run across the surface. This design significantly increases the exposed surface area of the foam compared to a flat sheet of the same footprint. When sound waves strike a wedge panel at an angle, they are directed deeper into the foam’s structure, which maximizes mid-to-high frequency absorption. Because of their high surface area and consistent thickness at the base, wedge panels are highly efficient at taming flutter echoes and controlling general room reflections.
Products mentioned in this guide

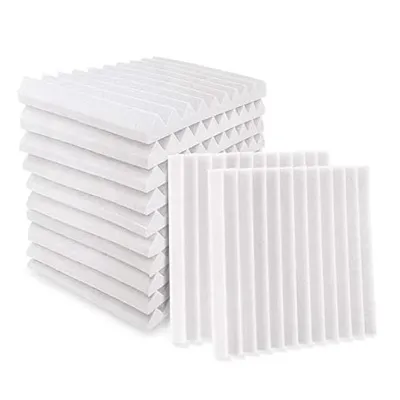

Prices are valid at publication and may change. Please refer to the product page for the latest price.
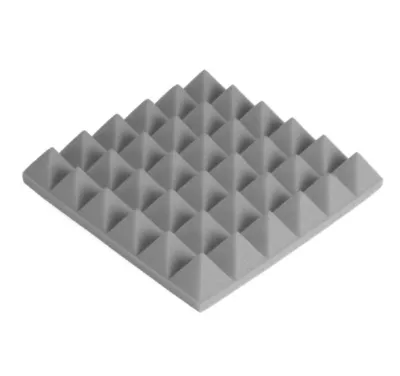
Pyramid panels offer a four-sided pyramid shape that provides a slightly different acoustic response. While they also increase surface area, the pointed shape means there is less overall foam mass per square foot compared to a wedge panel of the same peak height. As a result, pyramid panels offer slightly less absorption, but they excel at scattering or diffusing sound waves that strike them at off-angles. This makes them well-suited for spaces where you want to reduce harsh reflections without completely deadening the room’s natural acoustic energy.
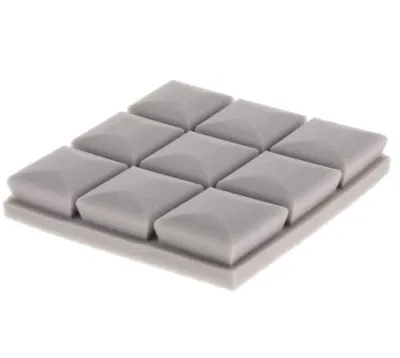
Flat panels, which lack any carved surface profile, provide uniform absorption across their entire surface. Because they do not have the increased surface area of profiled foam, they are less effective at capturing off-axis reflections, but they offer consistent, predictable absorption for direct sound waves. Flat panels are typically used when you want mild reflection control on walls or ceilings without stripping away the high-frequency brightness that keeps a room sounding lively.
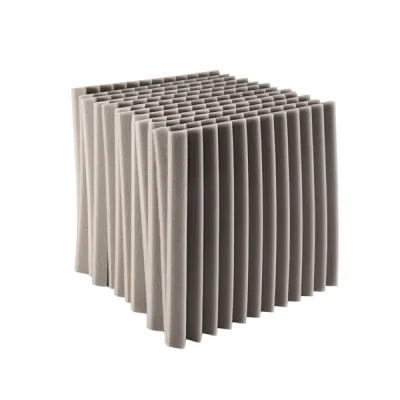
Bass traps are thick, dense blocks of foam designed specifically to fit into the corners of a room. Standard thin foam panels are ineffective against low-frequency sound waves, which have long wavelengths and high energy that pass right through thin materials. Because low-frequency sound pressure naturally builds up in corners, placing thick, high-density bass traps in these areas is essential. The sheer depth and mass of a bass trap allow it to absorb low-mid frequencies, preventing muddy buildup and standing waves.
Choosing the Right Foam Shape for Vocal Recording
Vocal recording requires a highly controlled acoustic environment because the human voice is incredibly dynamic and easily colored by room reflections. The primary goal when treating a vocal recording space is to capture a dry, clean signal that is free from room coloration, allowing for maximum flexibility during the mixing process. Since the human vocal range primarily occupies the midrange and high-frequency spectrum, your treatment should focus on these specific frequencies.

Thicker wedge or pyramid panels, typically two to three inches thick, are a common choice for vocal recording. Placing these panels on the walls directly behind and to the sides of the vocalist helps absorb immediate off-axis reflections. This is particularly important because directional microphones, such as cardioid condensers commonly used for vocals, are highly sensitive to sounds coming from the front, meaning they will easily pick up reflections bouncing off the wall directly behind the singer’s head.
To achieve a localized vocal booth effect in a larger or untreated room, you can arrange a combination of wedge and pyramid panels in a tight pattern around the recording area. Placing wedge panels at head height on the adjacent walls captures early reflections, while pyramid panels can be placed slightly higher or on the ceiling directly above the microphone to scatter overhead reflections. This targeted setup mimics the dry environment of a professional vocal booth without requiring you to treat the entire room.
However, it is crucial to avoid over-treating the vocal space. Covering every square inch of the walls with thick foam will strip away all high-frequency energy while leaving low-mid frequencies untouched, resulting in a vocal track that sounds muddy, boxy, and claustrophobic. To maintain a natural tone, leave some areas of the wall bare or use a mix of flat and profiled panels. This ensures that the recorded vocals retain their natural clarity and presence, making them much easier to sit in a final mix.
Selecting Foam Profiles for Instrument and Amp Recording
Recording acoustic instruments and amplifiers presents a different set of challenges than recording vocals. Instruments like acoustic guitars, violins, and brass rely heavily on the natural resonance of their bodies and the surrounding room acoustics to project their full, rich tone. If you record these instruments in a completely dead room, they can sound flat, lifeless, and artificial.
For acoustic guitars and stringed instruments, a balanced mix of flat panels and wedge panels is highly effective. Placing flat panels on the primary reflection points helps tame harsh, fluttery echoes that can interfere with the microphone’s clarity, while leaving some bare wall space allows the bright, high-frequency harmonics of the strings to bounce naturally. This combination preserves the instrument’s dynamic range and natural sparkle while keeping the recording clean and focused.
When recording high-energy sources like guitar amplifiers and drums, managing low-mid frequency buildup is the primary concern. Guitar cabinets and snare drums push a significant amount of air, which can quickly overwhelm a small room and cause muddy, boomy recordings. Placing thick wedge panels directly behind the amplifier cabinet helps absorb immediate cabinet reflections, preventing phase cancellation issues when using close microphones.
For drum kits, managing the overhead and room microphones is critical. Placing wedge panels on the ceiling directly above the drum kit prevents harsh cymbal reflections from bouncing off the ceiling and causing comb filtering in the overhead mics. Additionally, because drums produce a massive amount of low-end energy, corner bass traps are absolutely essential in a drum tracking room to keep the kick drum and low toms from sounding boomy and undefined.
Building a Balanced Treatment Plan for Your Studio
A common mistake when setting up a home studio is purchasing a single pack of identical foam panels and covering an entire wall. This approach leads to an unbalanced room that is dead in the high frequencies but boomy and muddy in the low-mids. A successful acoustic treatment plan must combine different shapes, thicknesses, and placements to address the entire frequency spectrum evenly.
Start by placing thick bass traps in the vertical corners of the room to handle low-frequency buildup. Once the low end is stabilized, use wedge or pyramid panels at the primary reflection points—the spots on the side walls and ceiling directly between your studio monitors and your ears. This creates a “reflection-free zone” at your mixing position, allowing you to hear your monitors accurately without room interference.
Before purchasing any acoustic foam, always check the manufacturer’s specifications, specifically the Noise Reduction Coefficient (NRC) rating. The NRC is a standard rating from 0.0 (representing complete reflection) to 1.0 (representing complete absorption). However, look closely at the frequency-specific absorption coefficients; some foam panels may have a high overall NRC but only absorb frequencies above 500 Hz, leaving lower frequencies completely untouched. Ensure the foam’s thickness and profile match the specific frequency range of your source material.
Finally, recognize the point of diminishing returns. Acoustic foam is excellent for absorption, but too much of it will make a room feel unnatural and fatiguing to work in. If you find that your room is becoming too quiet or “dead” but still suffers from poor stereo imaging or flutter echo, it may be time to stop adding foam and introduce acoustic diffusers. Diffusers scatter sound waves instead of absorbing them, maintaining room energy while eliminating problematic echoes.
Frequently Asked Questions (FAQ)
Does acoustic foam block sound from entering or leaving the room?
No, acoustic foam does not block sound from entering or leaving a room. There is a critical difference between sound absorption and soundproofing. Acoustic foam is lightweight, porous, and designed solely for sound absorption, which means it reduces internal reflections, flutter echoes, and reverberation inside the room to improve recording quality. It does not have the mass or density required to stop sound transmission through walls. To block sound from entering or leaving a room, you need soundproofing materials that add mass, density, and decoupling, such as thick drywall, mass-loaded vinyl, or specialized isolation barriers.
How much of the wall should be covered with acoustic foam?
For most home studios, vocal booths, and practice spaces, covering 20% to 40% of the wall surface area is usually sufficient. The exact coverage depends on the room’s primary use. A dedicated vocal recording area or voiceover booth benefits from higher coverage, around 30% to 40%, to ensure a dry, reflection-free signal. An instrument tracking room or mixing space typically requires less coverage, around 20% to 30%, to preserve some of the room’s natural response and keep the environment sounding lively. Covering 100% of the walls should be avoided, as it over-treats the room, making it sound unnaturally dead and acoustically unbalanced.
Community discussion
Share your experience or ask a question. Comments are reviewed before publication.