
Selecting the most suitable Alesis drum pad for electronic music production requires a clear understanding of your creative workflow, studio space, and technical integration needs. Because different music producers prioritize different features—such as standalone sample playback, expressive MIDI triggering within a digital audio workstation (DAW), or tactile control during live performances—there is no single model that fits every setup. By evaluating how you intend to generate, manipulate, and trigger sounds, you can identify the specific hardware tier that aligns with your production style.
Identify Your Electronic Music Production Workflow
The first step in choosing a drum pad is defining its primary role in your music-making process. For many electronic music producers working in home studios, space is at a premium. In compact setups, such as a typical apartment studio in Singapore where desk space is limited, a small-footprint MIDI controller might be the most practical choice. If your goal is simply to input drum patterns into your DAW, trigger synth stabs, or control virtual instruments, a compact USB-powered MIDI pad controller will likely suffice. These devices do not generate sound on their own but serve as highly responsive tactile interfaces for your computer software.
Conversely, if your workflow involves live performance, DJ sets, or hybrid studio setups, you may require a standalone multipad. These larger instruments feature internal sound engines, onboard storage, and dedicated audio outputs, allowing you to perform without relying on a computer. Standalone pads are ideal for artists who want to load custom backing tracks, trigger long vocal samples, or play acoustic drum sounds with physical drumsticks. Understanding whether you need a pure MIDI controller or a fully independent sampling instrument prevents you from overpaying for features you will not use, or conversely, buying a device that lacks the processing power your performance demands.
Products mentioned in this guide
![Yamaha DTX-MULTI 12 Electronic Tabletop Drum Pads 12 Pads Compact Portable E-Drums [PREORDER]](https://img.lazcdn.com/g/p/b63361679d189a1e9dd53d4164950c4e.png_400x400q80.png_.webp)
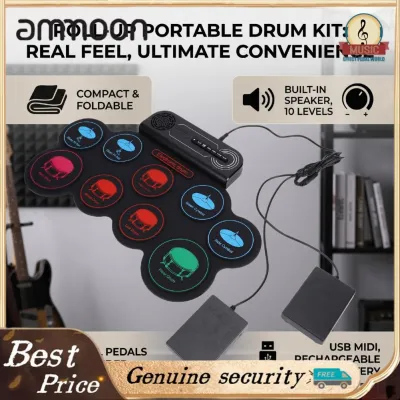
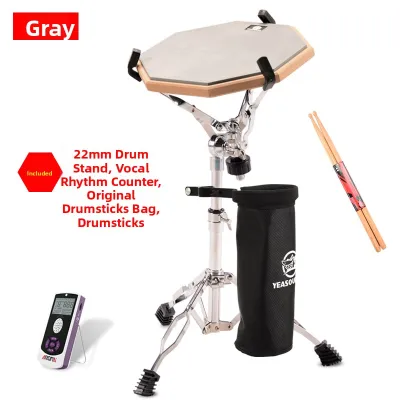
Prices are valid at publication and may change. Please refer to the product page for the latest price.
Additionally, consider your physical playing style. Producers who prefer finger drumming—using their fingers to tap out intricate rhythms on soft, highly sensitive pads—have different hardware requirements than those who perform with drumsticks. Finger drumming demands pads with excellent low-threshold velocity response, meaning the pad registers even the lightest touch. Stick playing, on the other hand, requires larger, more durable rubber pads that can withstand high-impact strikes and offer realistic rebound. Assessing these physical and functional needs early in your decision-making process will narrow down your options significantly.
Evaluate Key Technical Features for Your Setup
When comparing different Alesis drum pads, several technical specifications directly impact how the hardware feels and performs during music production. The most critical of these is pad sensitivity and velocity response. Velocity response determines how the volume or timbre of a sound changes based on how hard you strike the pad. High-quality pads offer customizable velocity curves, allowing you to adjust the sensitivity to match your playing dynamics. Some advanced controllers also feature aftertouch, which detects continuous pressure applied to a pad after the initial strike, enabling you to modulate parameters like filter cutoff or vibrato in real time.

Connectivity is another vital factor, especially when integrating the pad into an existing studio environment. Standard USB MIDI is sufficient for modern computer-based setups, sending control data directly to your DAW over a single cable. However, if you plan to control hardware synthesizers, drum machines, or legacy MIDI gear, you will need a pad equipped with traditional 5-pin MIDI Input and Output (I/O) ports. For standalone multipads, check the audio output configuration. Having multiple auxiliary outputs allows you to route specific sounds—such as a click track to a drummer’s headphones and the main backing track to the front-of-house mixer—independently.
Finally, for pads with internal sound engines, you must evaluate the sample import capabilities and onboard processing. Check the supported audio formats, bit depths, and sample rates to ensure compatibility with your existing sample libraries. Many modern electronic music producers rely on high-resolution WAV files, so verifying that the hardware can import these files without manual conversion is a major convenience. Onboard effects processing, such as reverbs, delays, and loopers, can also enhance your live performance by allowing you to manipulate sounds directly on the unit without needing external software plugins.
Compare Alesis Pad Tiers for Studio and Live Use
Alesis offers a range of drum pads categorized into distinct tiers, each designed for specific user profiles and budgets. At the entry-level tier, you will find compact, budget-friendly MIDI pad controllers. These devices typically feature a grid of smaller, square pads optimized for finger drumming and basic MIDI triggering. Because they lack internal sound engines and rely entirely on USB power, they are highly portable and fit easily onto crowded studio desks. They are an excellent starting point for beginners or producers who primarily work “in the box” using software instruments.
Moving up to the mid-range and professional tiers, Alesis provides advanced multipads designed for both studio production and demanding live performances. These larger units feature robust rubber pads designed for stick play, built-in sound libraries, and extensive input/output routing. High-tier models often include advanced sampling capabilities, allowing you to record audio directly into the unit via analog inputs and assign those recordings to specific pads instantly. They also offer expanded internal memory or external storage slots, such as SD card readers, to accommodate large backing tracks and custom sample libraries.
Because product specifications can change and vary by model, it is essential to verify the exact pad counts, memory limits, and expansion options before making a purchase. For instance, while some compact models offer eight pads, others may feature four or sixteen. Similarly, check the maximum supported capacity for external SD cards or USB flash drives, as some older or entry-level hardware may have strict file system or storage size limitations. Consulting the official manufacturer specifications ensures the model you select has the physical capacity to handle your production assets.
Plan Your DAW Integration and Studio Routing
Integrating your Alesis drum pad into your digital audio workstation is crucial for a seamless creative workflow. For pure MIDI controllers, the setup is usually straightforward: connecting the device via USB to your computer typically allows the DAW to recognize it as a MIDI input device immediately. However, if you are using a hybrid setup with a standalone multipad, you may need to configure both MIDI and audio routing. This involves connecting the pad’s audio outputs to your audio interface inputs so you can record the internal sounds of the drum pad directly into your DAW tracks.
Once connected, mapping the pads to your software instruments is the next step. Most modern DAWs, such as Ableton Live, Logic Pro, or FL Studio, feature built-in drum samplers or drum racks. You can manually map each physical pad to a specific MIDI note or software slot, allowing you to trigger custom samples, loops, or synthesizer notes. Some Alesis controllers come with pre-configured control templates for popular DAWs, which can save time by automatically mapping transport controls (like play, stop, and record) or volume faders to the physical buttons and knobs on the controller.
Managing latency is another critical consideration when recording real-time performances. Latency is the short delay between the moment you strike a pad and the moment you hear the sound from your studio monitors or headphones. To minimize latency, ensure your audio interface drivers are up to date and adjust your DAW’s audio buffer size. A lower buffer size (such as 64 or 128 samples) reduces latency for tighter performance tracking, though it requires more computer processing power. Balancing these settings ensures that your physical performance translates accurately and expressively into your digital project.
Verify Compatibility and Package Contents Before Buying
Before finalizing your purchase, it is highly recommended to verify all technical compatibility requirements and physical package inclusions. Start by visiting the official Alesis website to check the system requirements for any bundled software or drivers. Ensure that the hardware is fully compatible with your computer’s operating system version and your preferred DAW. Checking for recent firmware updates on the manufacturer’s support page is also wise, as updates often resolve known bugs, improve pad sensitivity, or add new features to the hardware.
Next, carefully review the list of included accessories in the product package. While most controllers include a standard USB cable, some high-power standalone multipads require a dedicated external power adapter, which may or may not be included depending on the specific retail bundle. If you plan to mount the drum pad to a cymbal stand or a dedicated drum rack, verify whether the mounting plate and screws are included or if they must be purchased separately. Knowing exactly what comes in the box prevents unexpected delays when setting up your new gear.
Finally, consider your local purchasing options in Singapore. When buying from authorized local retailers, you can verify the current pricing in S$ and ensure you receive a valid local warranty. Local warranties are highly valuable for electronic musical instruments, providing peace of mind and accessible repair services should you encounter any hardware issues. Be sure to review the retailer’s return policy as well, especially if you are unsure whether the pad’s physical size or pad sensitivity will suit your specific playing style.
Frequently Asked Questions (FAQ)
Can I use an Alesis drum pad to control software synthesizers?
Yes, you can use an Alesis drum pad to control software synthesizers within your DAW. When connected via USB MIDI or a traditional 5-pin MIDI cable, the drum pad sends standard MIDI note and velocity data to your computer. You can route this MIDI data to any software synthesizer track, allowing you to trigger notes, chords, or sound effects by striking the pads. To control specific synthesizer parameters like filter cutoff, resonance, or envelope decay, check your model’s specifications to see if it supports MIDI Continuous Controller (MIDI CC) mapping. This feature allows you to assign the pad’s physical knobs, faders, or even the pads themselves to modulate synth parameters in real time.
Are these pads designed for drumsticks or finger drumming?
The ideal playing technique depends entirely on the specific model of Alesis drum pad you choose. Larger multipads, such as those in the samplepad or multipad categories, are engineered with thick, durable rubber surfaces designed specifically to withstand the impact of wooden or nylon-tipped drumsticks. Conversely, compact MIDI pad controllers are optimized for finger drumming, featuring softer, highly sensitive silicone pads that respond to the light touch of your fingertips. Using drumsticks on a controller designed strictly for finger drumming can cause permanent physical damage to the internal sensors, while finger drumming on a stiff stick-optimized pad may result in poor velocity response. Always consult the user manual to verify the manufacturer’s recommended playing method and velocity limits.
What is the process for loading custom WAV samples?
For Alesis drum pads that support custom sample playback, the loading process typically involves transferring audio files via an external storage medium or a dedicated software editor. Most standalone multipads feature an SD card slot or a USB drive port. You will need to format the storage card according to the manufacturer’s guidelines, copy your custom WAV files from your computer into the designated folders, and insert the card into the drum pad. Once inserted, you can use the hardware’s onboard interface to browse, load, and assign the samples to individual pads. To ensure successful playback, always verify the supported audio specifications—such as bit depth (typically 16-bit or 24-bit) and sample rate (usually 44.1 kHz or 48 kHz)—in the product documentation before importing your files.
Community discussion
Share your experience or ask a question. Comments are reviewed before publication.