
Practicing electronic drums at home offers the perfect balance of convenience and versatility, but finding the right way to hear your playing out loud can be a challenge. Unlike acoustic drums, an electronic kit relies entirely on external amplification to project its sound beyond a pair of headphones. Choosing an electric drum amplifier for home practice requires balancing sound clarity, volume control, and physical space. In high-density residential environments, such as apartments or HDB flats in Singapore, managing sound projection is just as critical as achieving a realistic drum tone. Rather than relying on generic rankings, building a personalized shortlist based on your specific room acoustics, module compatibility, and practice habits ensures you invest in an amplifier that fits your home seamlessly.
Key Features to Evaluate for Home Use
When evaluating an electric drum amplifier for an indoor practice space, several technical specifications directly impact how the instrument sounds and how well you can control its presence in your home.
Wattage and volume management are critical for controlled indoor environments. For home practice, high wattage is not about achieving deafening volume; rather, it is about headroom. An amplifier with sufficient headroom can reproduce the sudden, sharp peaks of a snare hit or kick drum without distorting, even at lower listening levels. In a typical residential room, an amplifier rated between 20 to 50 watts is generally more than adequate. This range provides enough power to deliver a clean, clear signal without risking structural vibrations that could disturb family members or neighbors.
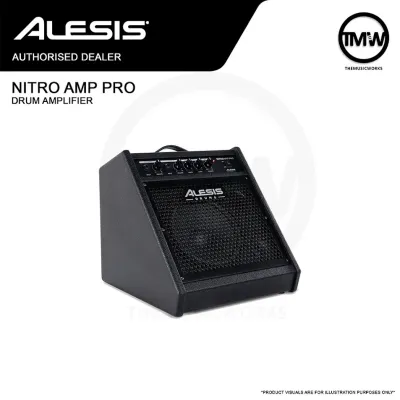
Products mentioned in this guide
![Yamaha MS45DR Electronic Drum Amplifier Monitor System [LIMITED STOCK]](https://img.lazcdn.com/g/p/ec612651d4417a6ea332fa14c9710923.jpg_400x400q80.jpg_.webp)
![Roland PM-200 Electronic Drum 180W Monitor Speaker Musical Instrument Amplifier [LIMITED STOCK]](https://img.lazcdn.com/g/p/b295ee4ea8c2fd1e995ea11d489490bf.jpg_400x400q80.jpg_.webp)
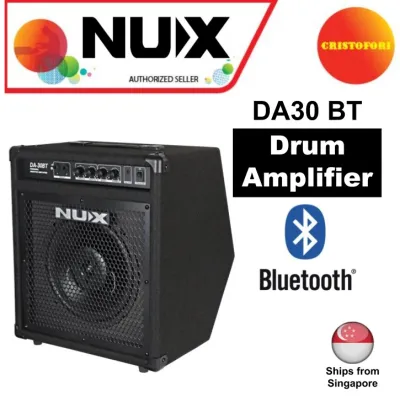
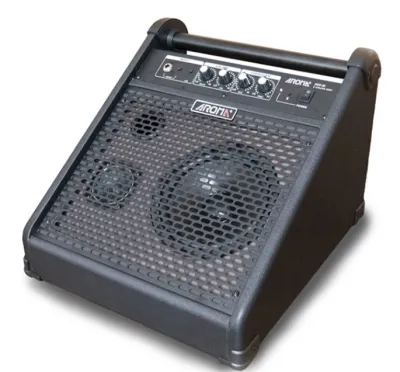
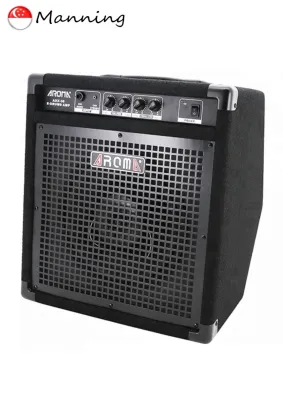
Prices are valid at publication and may change. Please refer to the product page for the latest price.
Speaker size and frequency response dictate how realistically your drum kit is reproduced. Electronic drums produce an incredibly wide frequency range, from the deep, low-end thud of a virtual bass drum to the high-frequency sizzle of a crash cymbal. A standard single-cone speaker cannot handle this spectrum effectively. Look for amplifiers that feature a multi-driver design, typically combining a dedicated woofer with a smaller tweeter. An 8-inch or 10-inch woofer handles the heavy low-end transients of the kick drum, while the tweeter ensures that the stick definition on the ride cymbal and hi-hat remains crisp and distinct.
Built-in EQ controls allow you to tailor the sound to your specific room acoustics. Every room has unique acoustics; concrete walls, tiled floors, and minimal soft furnishings can cause low frequencies to boom or high frequencies to sound harsh. An amplifier equipped with at least a basic three-band equalizer (Bass, Middle, Treble) allows you to adjust the output to your environment. If your practice space is prone to excessive bass buildup, rolling off the low-end frequencies slightly can prevent muddy sound reproduction and reduce structural vibrations through the floor.
Physical footprint and weight are essential considerations for easy repositioning in a practice space. Space is often at a premium in home studios or bedrooms. Consider the physical dimensions of the amplifier and where it will sit relative to your drum rack. A compact, wedge-shaped design is highly advantageous because it can be angled upward toward your ears, allowing you to monitor your playing clearly at lower overall volumes. Additionally, if you need to pack your gear away or move it between rooms, choosing a model with a manageable weight and a sturdy carrying handle is essential.
Matching Amplifier Types to Your Practice Space
Selecting the right amplifier category depends heavily on the physical dimensions and acoustic characteristics of your practice area. Matching the amplifier’s output and physical size to these constraints prevents you from overpaying for power you cannot use or underestimating the physical space required for your setup.

Compact Options for Small Rooms and Apartments
In small bedrooms or high-density apartments, space is limited and sound isolation is minimal. For these environments, compact electric drum amplifiers are the most practical choice. These models typically feature smaller speaker configurations, such as a single 6.5-inch or 8-inch coaxial driver, and operate at lower wattages.
The primary benefit of a compact amplifier is its strict volume limitation, which naturally prevents you from accidentally projecting sound through shared walls. They are also incredibly easy to tuck under a drum rack or store in a closet when not in use. However, the trade-off lies in low-end frequency reproduction. Smaller speakers cannot physically move enough air to recreate the deep, physical punch of a bass drum. The overall headroom is also lower, meaning the sound may begin to compress or lose clarity if you attempt to push the volume to match other acoustic instruments. For solo practice where space and neighbor relations are the top priorities, these trade-offs are often entirely acceptable.
Mid-Sized Options for Dedicated Music Rooms
If you are fortunate enough to have a dedicated music room, a spare room with acoustic treatment, or a larger living space, a mid-sized amplifier offers a significantly upgraded playing experience. These units usually feature 10-inch or 12-inch woofers paired with dedicated high-frequency drivers, supported by 50 to 100 watts of power.
The immediate advantage of a mid-sized amplifier is its enhanced low-end response. The larger cabinet volume and speaker size allow the kick drum to sound full, round, and satisfyingly realistic, even at moderate volumes. Furthermore, these amplifiers often come equipped with multiple input channels, allowing you to plug in a second instrument, a microphone, or a playback device simultaneously. When using a larger amplifier in a dedicated room, you must pay closer attention to room treatment. Placing the amplifier on a carpeted surface or using basic acoustic panels can help manage the increased sound projection and prevent unwanted flutter echoes or bass buildup.
Essential Connectivity and Compatibility Checks
Before purchasing any electric drum amplifier, you must verify that its physical connections align with your electronic drum module and your preferred practice workflow.
Input types and signal matching are the first things to verify. Most electronic drum modules output sound via standard 1/4-inch (6.35mm) jacks. Depending on your module, you may have a single mono output (often labeled L/MONO) or separate left and right stereo outputs. To get the best stereo imaging and depth from your drum kit’s internal sounds, look for an amplifier that offers stereo inputs or dual mono channels. If you connect a stereo module output to a single mono input using an incorrect cable, you may experience phase cancellation, which makes your cymbals sound thin and your drums lose their punch. Always check your drum module’s manual to confirm its output specifications before selecting your cables and amplifier inputs.
Auxiliary inputs and wireless connectivity make playing along with backing tracks, metronomes, or instructional videos seamless. An amplifier with a dedicated auxiliary input—either a 3.5mm stereo jack or wireless Bluetooth connectivity—is highly convenient. Bluetooth connectivity allows you to stream audio directly from a smartphone or tablet without cluttering your practice space with extra cables. However, keep in mind that Bluetooth can introduce slight audio latency. While this latency does not affect backing tracks, it makes wireless monitoring of your actual drum hits impossible; your physical drum connection to the amplifier must always remain wired.
Headphone outputs are essential for silent practice sessions when open amplification is not viable. Even with a dedicated home amplifier, there will be times when silent practice is necessary, such as late-night sessions or when family members need quiet. An amplifier that features a dedicated headphone jack allows you to switch to silent practice without having to unplug cables from the back of your drum module. When you plug headphones into the amplifier, it should automatically mute the main speaker, providing a seamless transition from open-air monitoring to private listening.
Building Your Shortlist: What to Verify Before Buying
When you are ready to narrow down your choices and make a purchase, executing a systematic verification process will protect you from buyer’s remorse. Whether you are browsing online marketplaces or visiting local music stores, use this checklist to evaluate potential models.
First, verify the technical specifications. Do not rely solely on marketing descriptions. Check the manufacturer’s official specification sheet for the frequency response range. A dedicated electric drum amplifier should ideally cover frequencies from at least 40 Hz up to 20,000 Hz to capture both the lowest bass drum tones and the highest cymbal harmonics. Additionally, verify the input impedance; the amplifier’s inputs should be rated for line-level signals to match the output of your drum module.
Second, check return policies and warranty terms. Purchasing musical equipment is an investment. If you buy from an online retailer, ensure they offer a clear return policy that allows you to test the amplifier in your actual practice space. An amplifier that sounds excellent in a large, treated showroom may behave very differently in a small, concrete-walled bedroom. If purchasing locally, confirm the duration of the distributor’s warranty and clarify what parts or services are covered, especially regarding speaker cone damage or electronic component failure. Whether you are budgeting a few hundred S$ for a compact starter unit or planning a larger investment for a dedicated studio setup, verifying these details ensures long-term satisfaction.
Third, test for unwanted rattling, buzzing, or distortion. If you are able to test the amplifier in person, bring your own drum module or ask to connect one in the store. Play a variety of dynamic patterns, focusing on heavy kick drum hits and rapid snare rolls. Listen closely to the cabinet itself. High-quality drum amplifiers are constructed with reinforced joints and heavy-duty grilles to prevent physical rattling when low frequencies are pushed. If you hear any buzzing, vibration, or cabinet resonance at your intended practice volume, it is a sign of poor build quality.
Finally, assess the build quality and durability of hardware. Examine the physical construction of the amplifier. The control knobs should turn smoothly with a comfortable amount of resistance, and the input jacks should hold the cable plugs securely without any play. Look for protective corner bumpers, a durable exterior wrap (such as heavy-duty Tolex or carpet covering), and a robust metal grille to protect the speaker cones from accidental kicks or stray drumsticks.
Frequently Asked Questions (FAQ)
Can I use a regular guitar or bass amplifier for my electronic drums?
It is highly discouraged to use a standard guitar amplifier for electronic drums. Guitar amplifiers are specifically voiced to enhance the mid-range frequencies of electric guitars and are not designed to handle the ultra-low frequencies of a kick drum or the high-frequency transients of cymbals. Attempting to play drums through a guitar amp can easily blow the speaker. A bass amplifier is sturdier and can handle the low-end frequencies, but it lacks the high-frequency tweeters necessary to reproduce the crisp, clear sound of cymbals, resulting in a muffled and unsatisfying drum tone.
Do I need a specific cable to connect my electronic drum module to the amplifier?
Yes, you should use high-quality, shielded instrument cables (typically 1/4-inch TS cables) to connect your drum module’s line outputs to the amplifier’s inputs. Do not use unshielded speaker cables for this connection, as they are susceptible to picking up electromagnetic interference and causing loud hums or buzzes. Always check your drum module’s user manual to determine if it requires unbalanced (TS) or balanced (TRS) cables to ensure optimal signal transfer and minimal background noise.
How can I minimize sound transmission to neighbors when practicing at home?
To minimize sound transmission, start by decoupling your drum kit and amplifier from the floor. Placing a thick, high-density rubber drum mat or a specialized noise-isolation platform beneath your setup prevents physical vibrations from traveling through the building’s structure. Additionally, position the amplifier away from shared walls and angle it upward toward your ears so you can keep the overall volume lower. Finally, use the amplifier’s EQ controls to roll off the lowest bass frequencies, which travel through walls most easily, or switch to the headphone output during quiet hours.

Community discussion
Share your experience or ask a question. Comments are reviewed before publication.