
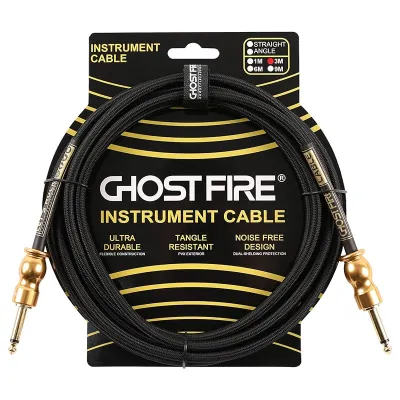
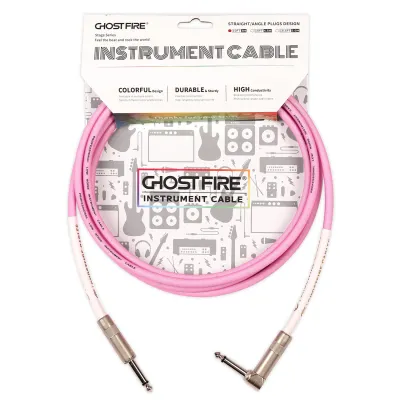
For a beginner guitarist, the most suitable Ghostfire cable is typically a 10-foot (3-meter) or 15-foot (4.5-meter) instrument cable featuring one straight and one right-angle 1/4-inch connector. This configuration provides the ideal balance of physical reach, signal clarity, and physical adaptability for standard electric guitars and practice amplifiers. Selecting the correct cable involves matching the physical layout of your playing space, the output jack of your instrument, and your immediate hardware setup to avoid signal degradation and unnecessary clutter.
While experienced musicians often debate the subtle tonal differences of high-end cabling, beginners should focus primarily on reliability, physical durability, and correct connector shapes. A dependable cable ensures that your practice sessions remain uninterrupted by crackling noises, sudden signal dropouts, or physical tripping hazards. By understanding how different lengths and materials impact your daily playing experience, you can make an informed decision that supports your learning journey without overcomplicating your gear setup.
Assessing Your Beginner Guitar Setup Requirements
Before browsing specific cable models, you must evaluate the physical environment where you plan to practice. In many residential settings, such as compact bedrooms or study rooms in Singapore, space is highly optimized. Measuring the physical distance between your chair or standing position and your amplifier is the first step. A cable that is too short will restrict your movement and pull on your equipment, while a cable that is excessively long will gather on the floor, creating a messy environment and a potential tripping hazard.
Products mentioned in this guide
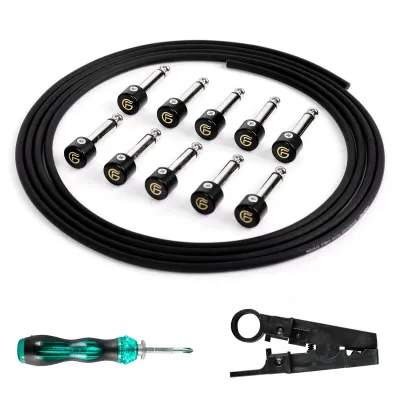
Prices are valid at publication and may change. Please refer to the product page for the latest price.
You must also consider how your guitar connects to your sound source. If you plug directly into a practice amplifier sitting on a desk or a small stand next to you, a short cable of around 10 feet is highly efficient. However, if you plan to stand up, move around the room, or position your amplifier across a larger living space, a 15-foot cable offers the necessary slack to prevent tension on the input jacks.
The presence of intermediate gear also changes your cable requirements. If your setup includes a multi-effects processor or a small pedalboard on the floor, you will need multiple cables rather than a single long run. In this scenario, you require one cable to run from your guitar to the input of the pedalboard, and a second cable to run from the pedalboard’s output to the amplifier. Identifying these routing points early prevents the frustration of realizing you are one cable short during your initial setup.
Core Specifications to Evaluate in Ghostfire Cables
When examining the Ghostfire cable lineup, the connector configuration is one of the most critical specifications to check. These cables generally come with either two straight 1/4-inch plugs or a combination of one straight and one right-angle plug. The correct choice depends entirely on the design of your guitar’s output jack. For example, guitars with side-mounted jacks or top-mounted face jacks benefit immensely from a right-angle plug, which allows the cable to drape downward naturally along the body, reducing physical leverage and strain on the internal jack components.

Conversely, certain guitar designs feature deeply recessed output jacks, such as the classic angled jack plate found on Stratocaster-style instruments. For these guitars, a right-angle plug often cannot seat fully into the recessed cup, resulting in an incomplete connection or no sound at all. In this case, a straight connector is mandatory for the instrument end. Understanding your guitar’s physical anatomy ensures you select a connector configuration that plugs in securely and remains stable while you play.
The outer jacket material is another key specification that influences both durability and handling. Ghostfire offers cables with traditional PVC jackets as well as woven tweed fabric jackets. PVC jackets are highly flexible, easy to wipe clean, and slide smoothly across various floor surfaces, making them highly practical for everyday home use. Woven tweed jackets, on the other hand, provide a classic aesthetic and excellent resistance to kinking or tangling, though they can accumulate dust more easily in humid environments.
Finally, pay close attention to the internal shielding and capacitance specifications. Shielding is the protective barrier wrapped around the inner copper wire to block electromagnetic interference from household electronics, wireless routers, and mobile phones. For beginners using high-gain distortion or overdrive settings on their amplifiers, a cable with robust spiral or braided shielding is essential to minimize unwanted background hum and buzz. Capacitance refers to how much high-frequency detail is lost over the length of the cable; lower capacitance preserves a brighter, clearer treble response, which is particularly noticeable when playing clean tones.
Matching Cable Configurations to Common Beginner Scenarios
Direct Amp Practice and Home Jamming
For most new guitarists, the most common setup is a straightforward connection from the guitar directly into a small practice amplifier. In this scenario, simplicity and physical safety are your primary goals. A cable length of 10 to 15 feet is the standard recommendation for home jamming. This range provides enough freedom to move around your practice chair or stand up without pulling the amplifier off its shelf or desk.
It is highly advisable to avoid using cables longer than 15 feet for direct home practice unless your physical space absolutely demands it. Longer cables naturally introduce higher capacitance, which can subtly roll off the high-frequency treble of your guitar signal, making your tone sound muddy or dull. Additionally, managing 20 or 30 feet of coiled cable in a typical bedroom is cumbersome and increases the likelihood of stepping on the cable, which can damage the internal copper strands over time.
Building a First Pedalboard
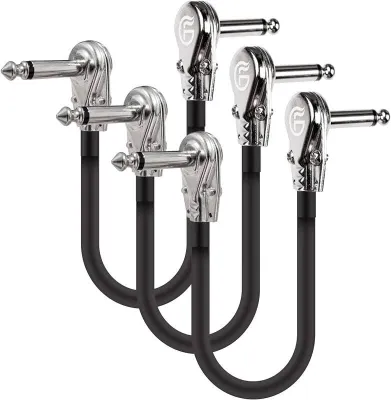
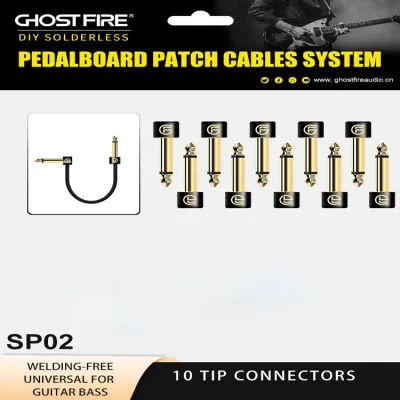
As you progress in your guitar journey, you may decide to build your first pedalboard to explore different effects like delay, chorus, and distortion. Connecting multiple pedals requires specialized, short cables known as patch cables. Ghostfire offers compact patch cables designed specifically to link pedals together with minimal spacing. Using standard, long instrument cables to connect adjacent pedals is highly impractical, as it creates a massive tangle of wires that degrades your signal quality and takes up valuable board space.
When selecting patch cables, look for flat-style connectors rather than bulky round plugs. Flat connectors allow you to place your pedals extremely close to one another, maximizing the limited surface area of a beginner-sized pedalboard. It is also important to plan your signal chain carefully, ensuring that each patch cable is plugged in securely and routed underneath or between the pedals to prevent them from being kicked or disconnected during practice.
Home Studio and Audio Interface Recording
Recording your guitar directly into a computer via a USB audio interface has become an incredibly popular way for beginners to practice and learn. In a home studio environment, your guitar cable connects directly to the high-impedance input of your interface. Because computer setups are surrounded by potential sources of electromagnetic interference—such as monitors, external hard drives, and power strips—using a well-shielded cable is critical to keeping your digital recordings clean and free of background noise.
To minimize noise pickup in a home studio, keep your cable run as short as possible, with a 10-foot cable usually being the ideal length. Route your instrument cable away from power adapters and computer power cables, as running them parallel to each other can introduce a noticeable hum into your audio interface. Keeping your recording area organized not only improves your sound quality but also protects your interface’s input jack from accidental tugs that could damage your computer ports.
Pre-Purchase Verification and Compatibility Checks
Before finalizing your purchase, it is essential to perform a few quick compatibility checks to ensure the cable fits your specific gear. Start by physically inspecting your guitar’s output jack and your amplifier’s input. If you are using a guitar with a deeply recessed jack, double-check that the cable you are ordering has at least one straight connector end. If you are unsure, consulting the manufacturer’s official product descriptions or looking at detailed user photos can help verify the physical dimensions of the plug housing.
Next, verify the exact specifications listed on the retailer’s page. Ensure that you are purchasing an instrument cable with 1/4-inch TS (Tip-Sleeve) mono plugs, which are standard for electric guitars. Avoid purchasing TRS (Tip-Ring-Sleeve) stereo cables or balanced microphone cables by mistake, as these are designed for different audio applications and may not function correctly with standard guitar jacks and amplifiers.
Finally, always review the return and exchange policies of the online marketplace or local music store where you are making your purchase. If you live in Singapore, choosing a seller with a straightforward local return policy provides peace of mind in case the cable length is shorter than you anticipated or the connector shape does not fit your guitar body comfortably. Taking a few minutes to verify these details beforehand saves time and ensures you can start playing as soon as your new gear arrives.
Frequently Asked Questions (FAQ)
How do I properly coil and store my guitar cables to prevent damage?
To extend the lifespan of your guitar cables, you should always use the over-under coiling method. This technique involves alternating the direction of the loops as you coil the cable, which prevents the internal copper conductors and shielding from twisting or kinking. Avoid wrapping the cable tightly around your hand and elbow, as this common mistake puts severe physical tension on the internal wires, eventually leading to broken connections and crackling sounds. Store your coiled cables in a dry, cool environment away from direct sunlight, and avoid placing heavy objects on top of them to prevent physical deformation of the outer jacket.
Can I use a standard instrument cable to connect my amplifier to a speaker cabinet?
No, you must never use a standard instrument cable to connect an amplifier head to a speaker cabinet. Instrument cables are designed to carry low-voltage, high-impedance audio signals from your guitar pickups and feature thin-gauge wire surrounded by shielding. Speaker cables, by contrast, are designed to carry high-current, low-impedance power from the amplifier’s output stage and use much thicker, unshielded wires. Using an instrument cable in place of a speaker cable can cause the thin wire to overheat and melt, potentially short-circuiting your amplifier and causing catastrophic, expensive hardware damage.
Does a more expensive cable noticeably improve tone for a beginner setup?
For a beginner setup utilizing a small practice amplifier, a highly expensive premium cable will not provide a night-and-day difference in tone. While high-end cables do offer lower capacitance and slightly better high-frequency retention, these subtle improvements are rarely noticeable on entry-level amplifiers and guitars. A reliable, mid-range option like those offered by Ghostfire provides excellent shielding, durable connectors, and solid signal transfer at a fraction of the cost. Your primary focus as a beginner should be on finding a cable that is durable, noise-free, and the correct length for your playing space.

Community discussion
Share your experience or ask a question. Comments are reviewed before publication.