
When you first pick up a guitar, the physical barrier to making music can feel incredibly frustrating. Your fingertips hurt, the strings feel like stiff wire, and getting a clean sound out of a simple C major chord seems nearly impossible. In this early stage, a mechanical guitar chord presser—a device that clips onto the neck to press down strings at the push of a button—can look like an easy shortcut. However, while these tools offer immediate, temporary relief for playing basic chords, they do not address the root causes of your difficulty. Building natural finger strength, developing proper fretting technique, and ensuring your instrument is correctly set up are far more effective and rewarding paths for long-term musical growth.
Signs Your Finger Strength or Guitar Setup Needs Attention
Beginners often assume their hands are simply too weak when the actual culprit is a poorly adjusted instrument. Normal finger soreness is a localized, dull ache on the fingertips that gradually fades after a few hours. This is a natural part of the skin adapting to the pressure of metal or nylon strings.
In contrast, sharp pain in the wrist, thumb joint, or forearm usually signals poor hand positioning or excessive tension. If you find yourself squeezing the neck with white-knuckle force just to get a single note to ring out, you are likely fighting the guitar rather than building strength.
Products mentioned in this guide
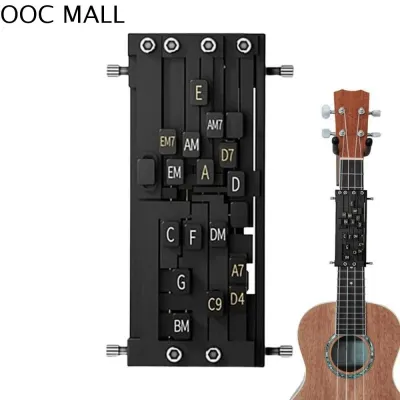
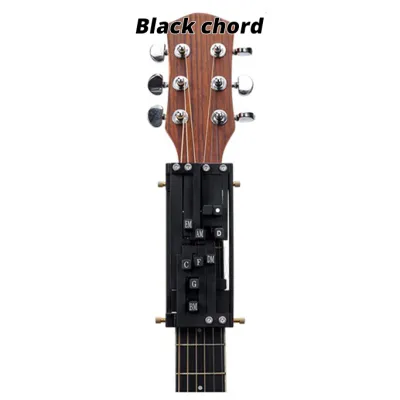
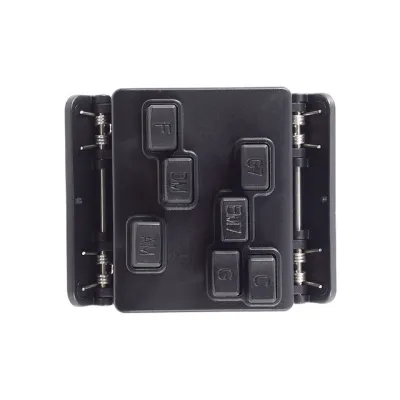
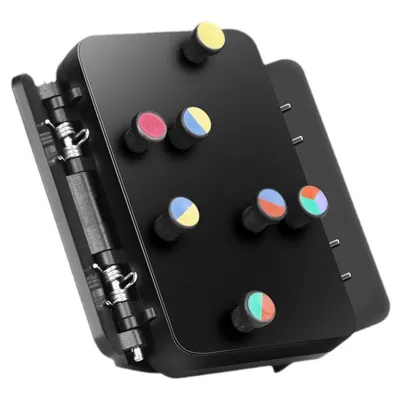
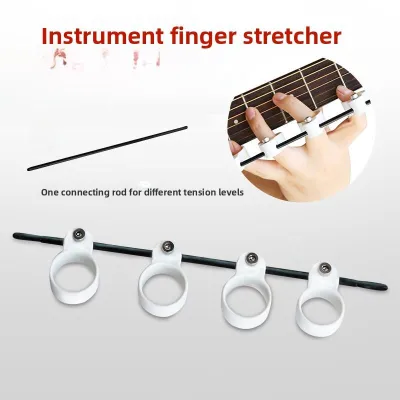
Prices are valid at publication and may change. Please refer to the product page for the latest price.
Fret buzz, muted strings, and sluggish chord transitions are also frequently misdiagnosed as physical weakness. If a string buzzes even when you press directly behind the fret, or if adjacent strings are constantly muffled, the issue is often a high string action or an uneven fretboard. A mechanical pressing tool cannot correct these physical alignment issues; in fact, forcing a rigid plastic device onto an uneven setup can worsen fret wear and lead to even poorer sound quality.
How a Guitar Chord Presser Works and Its Limitations
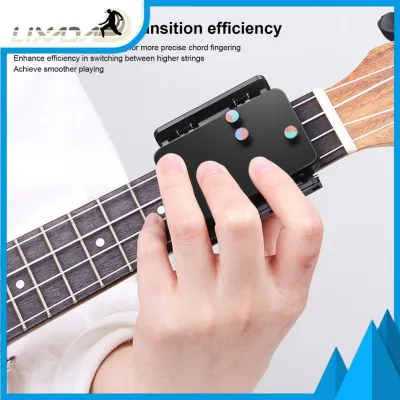
A guitar chord presser operates by clamping onto the first few frets of the guitar neck, using spring-loaded buttons or levers to depress multiple strings simultaneously. By pressing a single button, a beginner can instantly play a clean open chord without having to position individual fingers. This mechanical assistance can be highly encouraging for those who want to sing along to simple songs right away without the initial physical struggle.

However, this convenience comes with significant long-term trade-offs. Because your fingers are pressing flat buttons rather than thin strings, your fingertips never develop the protective calluses required for traditional playing. Furthermore, you bypass the development of fine motor skills and muscle memory in your fretting hand. Once you remove the device, you are essentially back at square one, unable to form chords or transition between them naturally.
There are also strict physical compatibility limits to consider before purchasing. These devices are typically designed for standard acoustic or electric guitar neck profiles. If you play a classical guitar with a wider, flatter fretboard, or a travel guitar with narrow string spacing, the presser may not align correctly with the strings. Always verify the manufacturer’s specified neck width and fretboard radius compatibility to avoid purchasing a tool that dampens strings or damages your guitar’s finish.
Effective Alternatives to Build Finger Strength and Improve Playability
Consistent, targeted practice and proper instrument maintenance often eliminate the need for auxiliary pressing devices entirely. By focusing on how your body interacts with the guitar and ensuring the instrument is in peak playing condition, you can overcome early physical hurdles naturally.
Targeted Finger Exercises and Practice Routines
To build genuine dexterity and endurance, you do not need heavy grip trainers; you need targeted, mindful practice on the fretboard itself. One of the most effective routines is the “spider walk,” where you play four consecutive frets up and down each string, focusing on keeping your fingers as close to the frets as possible. This exercise teaches your hand to use minimal force to produce a clean tone, conserving energy and reducing strain.
Chromatic scales and isolated chord transition drills also help program your muscle memory. Instead of practicing for hours once a week, commit to short, daily sessions of 15 to 20 minutes. This consistent, low-intensity exposure allows your muscles and skin to recover and adapt overnight, building lasting strength without the risk of repetitive strain injuries.
Checking and Adjusting Your Guitar's Action
Often, the secret to effortless chord playing lies not in your fingers, but in the height of your strings. The “action” refers to the distance between the strings and the fretboard. To check this, look closely at the gap around the 12th fret; if the space looks wider than a couple of stacked coins, your action is likely too high, requiring immense physical effort to press the strings down.
If your guitar’s action is high at the nut or the bridge, taking the instrument to a local guitar technician for a professional setup is highly recommended. A technician can adjust the truss rod, file the nut slots, and lower the bridge saddle to make the guitar incredibly comfortable to play. This service is a highly effective investment in your musical journey, far surpassing the utility of a temporary plastic gadget.
Additionally, you can ask the technician to install lighter gauge strings, such as extra-light acoustic strings or standard light electric strings. Lighter strings require significantly less tension to tune to pitch, making them much easier on soft beginner fingers while you build up your natural calluses.
Decision Guide: Is a Chord Presser Right for Your Situation?
Deciding whether to buy a guitar chord presser depends largely on your physical capabilities and your long-term musical goals. If you suffer from severe arthritis, joint pain, or other physical limitations that make traditional fretting painful or impossible, a chord presser is an excellent accessibility tool. It allows you to enjoy the therapeutic benefits of making music and singing along to songs without physical strain.
However, if you are an able-bodied beginner who aspires to learn fingerpicking, play barre chords, or eventually transition to electric lead guitar, a chord presser will only delay your progress. In this case, spending your budget on a professional guitar setup—which typically costs around S$50 to S$100 depending on the workshop—is a far better use of funds. A well-setup guitar will remain easy to play for years, supporting your growth as you transition to more advanced techniques.
Before making a purchase, use this quick checklist to evaluate your situation:
- Physical Health: Do you have chronic hand or joint conditions that prevent firm gripping? (If yes, a presser may help.)
- Instrument Setup: Have you checked if your string action is too high? (If yes, prioritize a professional setup first.)
- String Gauge: Are you currently playing on heavy strings? (Try switching to extra-light strings first.)
- Practice Habits: Have you committed to at least two weeks of daily 15-minute practice sessions? (If not, try establishing this routine before buying a tool.)
Frequently Asked Questions (FAQ)
Will a guitar chord presser help me play barre chords?
No, a standard guitar chord presser is designed strictly for basic open chords in the first few frets. Barre chords require you to lay your index finger flat across all six strings while your other fingers form shapes further up the neck. Because a presser is a fixed mechanical unit, it cannot assist with the unique hand positioning, wrist angle, and rolling technique required to execute a clean barre chord. Building natural finger strength and flexibility is the only way to master this technique.
How long does it typically take to build finger calluses for guitar?
For most beginners practicing consistently for 15 to 20 minutes every day, noticeable calluses will begin to form within two to three weeks. During this initial period, your fingertips may feel tender, but this discomfort will subside as the skin toughens. It is crucial to practice on dry hands—avoid playing immediately after washing dishes or showering, as soft, wet skin is highly susceptible to peeling or blistering, which can set your progress back.
Community discussion
Share your experience or ask a question. Comments are reviewed before publication.