
Deciding whether to invest in bass traps depends entirely on your room’s physical dimensions, your speaker setup, and how accurately you need to hear your low frequencies. Almost every small home studio suffers from low-frequency acoustic issues because standard residential rooms are not designed for critical listening. However, before you spend money on specialized acoustic treatment, it is essential to understand whether your space actually requires physical traps or if you can solve your problems through simple layout adjustments.
Low-frequency sound waves are incredibly long and powerful. When these waves bounce off your walls, ceiling, and floor, they collide with each other, creating areas where certain bass notes sound overwhelmingly loud and other areas where they disappear entirely. By learning how to diagnose these issues and testing free positioning fixes first, you can make an informed decision about when and how to integrate bass traps into your setup.
How to Identify Low-Frequency Acoustic Problems
To determine if your room has low-frequency issues, start with a simple listening test using a familiar, well-mixed reference track with a prominent bassline. Play the track at your normal monitoring volume and slowly walk around your room. You will likely notice that the low end sounds incredibly boomy and loud near the corners or the back wall, while it might feel thin or almost non-existent at your main listening chair. These dramatic shifts in volume and clarity are clear indicators of standing waves and room modes.
Products mentioned in this guide
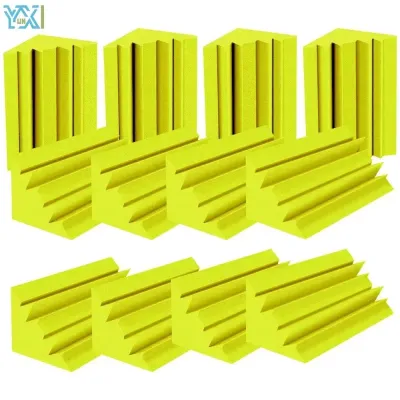
Prices are valid at publication and may change. Please refer to the product page for the latest price.
Physical vibrations in your room can also reveal hidden acoustic trouble spots. Rattling closet doors, vibrating window panes, or a buzzing desk during bass-heavy playback indicate that specific low frequencies are exciting the physical structures of your room. This mechanical resonance colors your perception of the audio, making it difficult to tell if the bass you hear is coming from your speakers or your vibrating furniture.
For an objective assessment, transition to basic acoustic measurement. This involves using a dedicated, omnidirectional measurement microphone paired with free room analysis software. By placing the microphone at your listening position and running a frequency sweep, the software generates a visual graph of your room’s frequency response. Look closely at the region below 250 Hz; if you see massive peaks and deep valleys—often swinging by 15 decibels or more—your room is significantly altering the sound of your monitors.
Free and Low-Cost Alternatives to Test First
Before purchasing any acoustic treatment, exhaust all free layout and positioning adjustments. The relationship between your studio monitors and the front wall is a primary driver of low-frequency distortion, known as speaker-boundary interference response. If your monitors are pushed directly against a wall, the bass energy radiating from the back of the speaker bounces off the wall and cancels out or reinforces the direct sound. Try moving your monitors at least 30 to 60 centimeters away from the front wall, and ensure they are positioned symmetrically along the shorter wall of your room.

Your seating position is just as critical as speaker placement. Standard rectangular rooms naturally develop severe acoustic nulls—points where specific bass frequencies cancel each other out—exactly halfway between the front and back walls. If your chair is positioned in the dead center of the room, you will likely experience a massive lack of bass, tempting you to overcompensate by turning up the low end on your monitors. A reliable starting guideline is to position your listening chair approximately 38% of the way into the room from the front wall.
You can also repurpose everyday household items to act as makeshift acoustic treatment. Large, dense furniture can help break up reflections and absorb a small amount of low-frequency energy. A plush fabric sofa placed against the back wall, a floor-to-ceiling bookshelf packed tightly with books of varying sizes, or heavy velvet curtains draped over windows can all help damp the room’s overall decay time.
Finally, if your monitors have built-in digital signal processing, you can use software calibration to manage your low end. Many modern studio monitors feature manual parametric EQ switches or automated room correction software that can flatten out major frequency peaks. Remember that EQ is a corrective tool, not a cure; while it can successfully tame boomy peaks, it cannot fix deep nulls, as boosting a cancelled frequency will only cause more phase cancellation.
When to Invest in Dedicated Bass Traps
While placement tweaks and furniture adjustments can work wonders, physical limitations often require dedicated bass traps. The most telling sign that you need professional treatment is persistent low-end muddiness that ruins your mix translation. If your mixes sound perfectly balanced in your studio but turn out boomy, muddy, or completely lacking in bass on other playback systems, your room is actively deceiving you. Dedicated bass traps are necessary to absorb excess low-frequency energy so you can make mixing decisions based on reality.
Severe space constraints and rental limitations are another common reason to invest in dedicated treatment. If your studio is set up in a small room, you may not have the physical space to move your desk away from the wall or position your chair at the ideal listening spot. When you are forced to work in an acoustically compromised position, high-density bass traps placed in the corners are the only viable way to control the low-frequency buildup.
Ultimately, if you are pursuing audio production, mixing, or mastering at a professional level, guesswork is your enemy. Achieving a flat, reliable low-frequency response is non-negotiable for critical audio work. Without proper bass trapping, you will spend hours second-guessing your low-end decisions, leading to listener fatigue and inconsistent work. Investing in high-quality acoustic treatment transforms your studio into a reliable environment.
Evaluating Bass Trap Types and Placement Strategies
If you decide to purchase or build bass traps, understanding how different designs work will prevent you from wasting money on ineffective products. The most common and versatile option is the porous absorber, typically constructed from high-density fiberglass, rock wool, or specialized open-cell acoustic foam. These traps work by converting the kinetic energy of moving air particles into heat through friction. Because low-frequency wavelengths are so long, porous absorbers must be exceptionally thick—ideally 10 to 15 centimeters or more—to have any meaningful effect on deep bass, and mounting them with an air gap behind them further extends their capabilities.
For targeting extremely low, stubborn frequencies that porous absorbers cannot reach, resonant absorbers are the ideal choice. These include membrane absorbers and Helmholtz resonators, which are designed to vibrate or resonate at a specific, narrow band of frequencies. When the target frequency hits the trap, the internal mechanism dampens the vibration, absorbing the energy. While highly effective, resonant absorbers are specialized tools that require precise calculations to solve specific, measured room modes.
Regardless of the type of trap you choose, strategic placement is essential. Low-frequency pressure naturally accumulates where boundaries meet, making your room’s corners the primary target. Your highest priority should be the tri-corners, which are the points where two walls meet the ceiling or the floor. Installing corner-fitting triangular traps or straddling flat panels across the vertical corners from floor to ceiling will yield the greatest improvement in low-end clarity.
Frequently Asked Questions (FAQ)
Can standard acoustic foam panels absorb bass?
Standard acoustic foam panels, which are typically only 2.5 to 5 centimeters thick, are completely ineffective at absorbing low frequencies. These thin panels only absorb high and upper-mid frequencies, leaving the powerful, long wavelengths of the bass completely untouched. If you cover your walls exclusively with thin foam, you will create an unbalanced room that sounds unnaturally dead in the high end while remaining boomy and muddy in the low end. Controlling bass requires significant physical depth and material density.
How do I determine the right number of traps for my room?
The ideal number of bass traps depends on your room’s dimensions and the severity of your acoustic issues, but a systematic approach is always best. Start by treating the two main corners behind your studio monitors from floor to ceiling, as this is where the initial speaker energy hits the room boundaries. If your budget allows, treat the rear corners next. It is highly recommended to take acoustic measurements before and after each installation phase so you can visually track the improvements and stop adding treatment once your frequency response flattens out.
Will treating low frequencies make the room sound too dead?
Properly designed bass traps will not make your room sound too dead. Unlike thin foam panels that absorb high frequencies indiscriminately, high-quality bass traps focus their absorption power on the low end. Many professional bass traps even feature a semi-reflective front plate or a thick fabric wrapping that allows high frequencies to bounce back into the room while letting the powerful low-frequency waves pass through to the absorbing core. This ensures your room remains lively and natural-sounding while keeping the bass tight and controlled.
Community discussion
Share your experience or ask a question. Comments are reviewed before publication.