
Choosing an electric drum kit for electronic music production requires a fundamental shift in perspective. While traditional drummers prioritize acoustic realism, natural rebound, and physical stage presence, a modern music producer needs a tool optimized for digital workflow, precise MIDI triggering, and versatile sound design. The ideal electronic kit for your studio functions more like a highly expressive MIDI controller and a multi-channel audio interface than a simple substitute for acoustic drums. By focusing on low-latency connectivity, flexible hardware configurations, and customizable trigger parameters, you can turn a physical performance into a highly editable, production-ready digital asset.
Why Electronic Production Requires a Specialized Drum Setup
Electronic music production—spanning genres like techno, house, drum and bass, synth-pop, and modern hip-hop—relies heavily on precise timing, intricate sound design, and layered textures. Traditional acoustic drum kits, while expressive, present significant hurdles in a studio environment. Capturing their sound requires expensive microphones, acoustically treated rooms, and extensive post-processing to isolate individual hits. For electronic producers, an electric drum kit bypasses these obstacles, offering a direct digital path that bridges physical human expression with the infinite sound-shaping capabilities of a digital audio workstation (DAW).
The primary goal of integrating an electric drum kit into your production workflow is to capture the human element of a performance—the micro-timing variations and dynamic nuances—while maintaining absolute control over the final sound. Instead of committing to a single recorded drum tone, electronic producers use the kit to trigger high-quality samples, software synthesizers, or virtual instruments. This approach allows you to swap out a kick drum sample, adjust the decay of a snare, or apply complex effects processing to individual elements long after the physical performance has been recorded.
Products mentioned in this guide
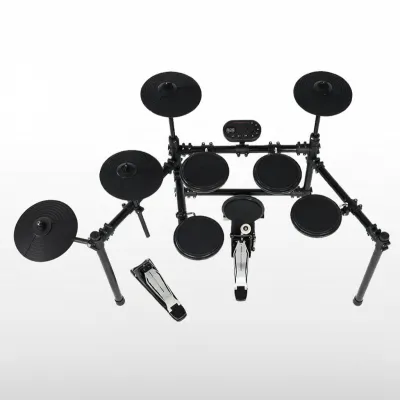

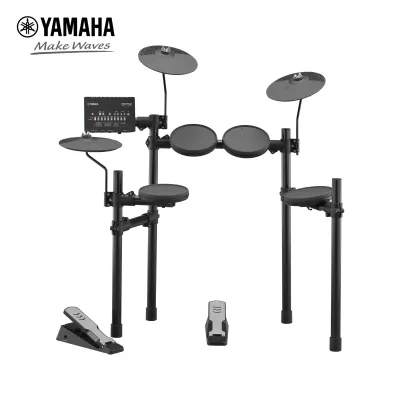
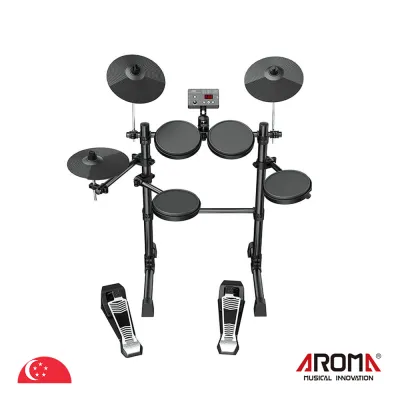
![AROMA TDX-18SC Electronic Drum Kit [AROMA TDX18SC Digital Drum]](https://img.lazcdn.com/g/p/f3eb7bc4d0fcaf4316f92647395675b8.jpg_400x400q80.jpg_.webp)
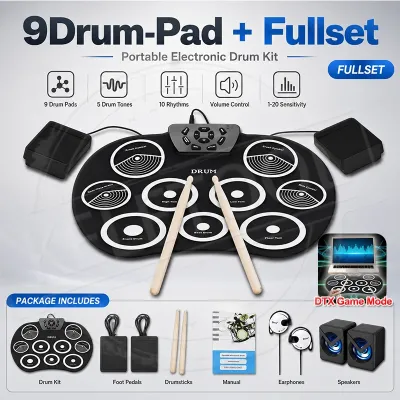
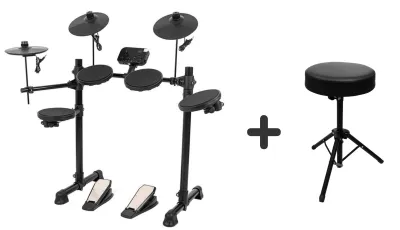
![[SG] Portable Electronic Drum Set USB Roll-Up Silicon Drums Pad w Drumsticks Compact Size Kit Hand Practice With Pedals](https://img.lazcdn.com/g/p/73aace46fc1f8c7268623b73f5d18efb.jpg_400x400q80.jpg_.webp)
Prices are valid at publication and may change. Please refer to the product page for the latest price.
Furthermore, electronic genres demand a level of dynamic consistency and rhythmic precision that differs from rock or jazz. An electric drum kit allows you to customize the velocity curves of your pads, ensuring that your ghost notes are captured accurately while your heavy hits remain within a controlled dynamic range. This consistency is vital for driving dance tracks, where a steady, powerful pulse is required to anchor the groove. Whether you choose to record the internal audio output of a high-end drum module or use the kit purely as a MIDI controller, understanding this digital-first priority is the foundation for selecting the right equipment.
Core Tech Specs: MIDI Connectivity, Modules, and DAW Integration
The technical capabilities of an electric drum kit’s module, often referred to as the “brain,” dictate how effectively the instrument integrates with your studio hardware and software. Before making a purchase, it is essential to evaluate the connectivity options and processing power of the module to ensure it aligns with your specific production workflow.

MIDI over USB vs. 5-Pin DIN MIDI (Musical Instrument Digital Interface) is the universal language that allows your electric drum kit to communicate with other digital devices. Most modern drum modules feature MIDI over USB, which allows you to connect the kit directly to a computer using a single USB cable. This is the most convenient option for DAW-centric producers, as it eliminates the need for an external MIDI interface and provides a high-speed connection for triggering virtual instruments. However, if your production setup includes external hardware synthesizers, drum machines, or legacy sampler units, you should look for a module that also includes traditional 5-pin DIN MIDI ports. A physical 5-pin MIDI Out port allows you to route MIDI data directly to hardware gear without routing the signal through a computer first, offering a stable and versatile connection for live hardware jams.
Multi-Track Audio Output While MIDI allows you to record performance data, there are times when you will want to record the actual audio sounds generated by your drum module. Basic drum modules typically offer only a stereo left/right audio output, which mixes all the drum pads into a single stereo track. This is a major limitation for mixing, as you cannot process the kick, snare, and hi-hat separately in your DAW. For serious production, look for a module that supports multi-track audio output over USB or features multiple physical auxiliary outputs. Multi-channel USB audio allows the module to send individual digital audio tracks for each pad directly to your DAW over a single USB cable. This capability is crucial for applying distinct EQ, compression, and spatial effects to individual drum elements during the mixing phase.
Internal Sound Engines vs. Sample Import Drum modules vary widely in their internal sound generation capabilities. Some modules rely on proprietary physical modeling or multi-sampled acoustic drums, which may not align with the synthetic, highly processed aesthetic of electronic music. If you plan to use the module’s onboard sounds, prioritize units that feature deep synthesis engines, built-in electronic drum kits (such as classic drum machine emulations), and robust multi-effects processors. Additionally, verify the module’s sample import capabilities in the manufacturer’s specifications. High-quality modules allow you to load your own user samples (typically in 16-bit or 24-bit WAV format) via an SD card or USB flash drive. Be sure to check the internal storage limits and maximum sample duration, as some entry-level modules restrict the size and number of custom samples you can load.
DAW Mapping and Control Integrating an electric drum kit into your DAW workflow can be streamlined if the module supports dedicated control features. Some advanced modules include physical sliders, rotary knobs, and buttons that can be mapped to control DAW parameters such as track volume, panning, or transport controls (play, stop, record). This hands-on control reduces the need to reach for your mouse and keyboard during a recording session, keeping your creative momentum flowing. Furthermore, check if the module offers customizable MIDI note mapping, allowing you to easily align each pad with the specific note layout of your favorite software drum samplers or Ableton Live drum racks.
Hardware Feel: Pad Materials, Trigger Zones, and Hi-Hat Dynamics
The physical construction of the electric drum kit directly influences the accuracy of the MIDI data you capture. If the pads do not translate your physical performance dynamics accurately, your recorded tracks will feel stiff, unnatural, or require extensive manual editing in your DAW.
Mesh vs. Rubber Pads The choice of pad material is one of the most critical decisions affecting playability, physical feedback, and acoustic noise.
- Mesh Pads: Constructed from a woven fabric stretched over a drum shell, mesh heads offer a realistic rebound that closely mimics the feel of an acoustic drum. They are highly adjustable, allowing you to tighten or loosen the head tension to suit your playing style. Mesh pads are also exceptionally quiet, making them the preferred choice for home studios and apartment settings where physical impact noise must be kept to a minimum.
- Rubber Pads: Typically found on budget-friendly kits or compact multi-pads, rubber surfaces offer a firmer, more immediate rebound. While durable and highly consistent, rubber pads produce a louder, sharper physical clicking sound when struck, which can transfer through floors and walls. For electronic music production, mesh heads are generally preferred for the snare and tom pads due to their superior dynamic sensitivity and lower acoustic noise floor.
Trigger Sensitivity and Zones The sensors inside the drum pads, known as triggers, detect the velocity and location of your strikes. Entry-level pads often feature single-zone triggers, which produce the same sound regardless of where or how you hit the pad. For expressive electronic production, look for multi-zone pads:
- Dual-Zone Pads: Common on snare and tom pads, these feature separate sensors for the drum head and the rim. This allows you to trigger a standard snare sound on the head and a rimshot, side-stick, or completely different electronic sample (like a cowbell or synth stab) on the rim.
- Triple-Zone Pads: Typically used for ride cymbals, these provide distinct trigger zones for the bell, bow, and edge, allowing for highly realistic performance inputs.
- Positional Sensing: High-end modules support positional sensing, which detects how close to the center of the pad you strike and continuously alters the MIDI data or internal sound timbre accordingly. This feature adds a layer of organic variation that prevents your electronic beats from sounding mechanical.
Hi-Hat Control The hi-hat is one of the most complex components of a drum kit to replicate electronically. Basic electric drum kits use a simple, non-attached foot switch pedal to control the hi-hat’s open and closed states. This binary approach (either fully open or fully closed) is highly limiting for electronic music, which often relies on subtle, semi-open hi-hat sizzles and smooth transitions to build tension. For production work, prioritize a kit that features a continuous variable hi-hat controller. These systems utilize a physical motion sensor mounted on a standard acoustic hi-hat stand, tracking the precise height of the cymbals in real-time. This continuous data allows your software instruments to transition smoothly through a full range of open, half-open, quarter-open, and closed sounds.
Cymbal Chokes and Ride Bells Cymbal pads should offer physical choke capabilities, allowing you to mute the cymbal sound instantly by grabbing the edge of the pad. This action sends a specific MIDI note-off or aftertouch message to your software, which is essential for creating tight, syncopated electronic rhythms. Additionally, a dedicated ride bell zone is crucial for genres that utilize syncopated bell patterns, such as house and drum and bass. Ensure the cymbal pads you select are compatible with your module’s trigger inputs to fully utilize these multi-zone features.
Recommended Kit Configurations for Electronic Producers
Different production workflows require different hardware configurations. To help you choose the right setup, we have categorized the most common electric drum kit configurations based on how you intend to integrate them into your studio.
DAW-Centric MIDI Controller Kits
For producers who rely entirely on software instruments and virtual drum libraries, a DAW-centric MIDI controller kit is the most efficient and cost-effective choice.
- Target Audience: Home studio producers with capable computers who prefer using industry-standard software samplers (such as Superior Drummer, EZdrummer, Addictive Drums, or Ableton Live's native drum racks) over internal module sounds.
- Key Features to Prioritize: Focus on kits that offer high-resolution MIDI output over USB, excellent pad sensitivity, multi-zone triggering, and a comfortable physical layout. Since you will be bypassing the internal sounds of the module, you can save money by choosing a kit with a simpler, "lite" module that prioritizes accurate trigger-to-MIDI translation over a massive library of built-in sounds.
- Limitations: These kits are not standalone instruments; they require a connected computer, a running DAW or standalone software player, and an audio interface to produce sound. You must also manage software latency and configure your audio interface's buffer settings to ensure there is no noticeable delay between striking a pad and hearing the sound.
- Buying Advice: Look for modern, streamlined kits from established manufacturers that are explicitly marketed as VST-compatible or optimized for software control. Before purchasing, verify that the manufacturer provides up-to-date MIDI mapping templates for your specific DAW or drum software to simplify the initial setup process.
Standalone Modules with Deep Synthesis and Sampling
If you prefer a hardware-first approach that allows you to create, perform, and record without being tethered to a computer screen, a standalone kit with advanced sound design capabilities is the ideal solution.
- Target Audience: Live electronic performers, hardware-based beatmakers, and producers who enjoy immediate, tactile sound creation and spontaneous jamming sessions.
- Key Features to Prioritize: Look for premium drum modules that feature advanced internal synthesis engines (allowing you to design drum sounds from scratch), real-time effects processors, and robust user-sample import options. The module should support multi-track USB audio recording, allowing you to capture individual tracks directly into a recorder or computer when you are ready to mix.
- Limitations: These high-end modules come at a significantly higher price point. Additionally, while modern modules offer impressive processing power, their internal storage capacity and sample layering capabilities are still limited compared to the virtually infinite resources of a computer-based DAW.
- Buying Advice: Carefully review the manufacturer's manual to verify the exact supported audio formats (such as 44.1kHz/16-bit WAV), maximum sampling times, and internal memory capacity. Ensure the module's user interface is intuitive enough for your workflow, as deep menu-diving can hinder your creative process.
Compact and Portable Production Kits
Space is a premium commodity in many modern production environments, making compact and portable drum setups highly appealing.
- Target Audience: Bedroom producers working in tight spaces, traveling musicians, or those who need a secondary percussion controller that can easily be packed away when not in use.
- Key Features to Prioritize: Look for kits featuring highly adjustable, foldable racks that allow the entire setup to be compressed into a small footprint. Alternatively, consider electronic multi-pads (all-in-one tabletop units with multiple integrated rubber pads), which can be mounted on a single snare stand or placed directly on your studio desk.
- Limitations: Compact kits often compromise on playability. Smaller pad diameters require greater striking precision, and the lack of a physical, independent hi-hat stand or kick drum tower can make the playing experience feel less authentic. Additionally, lightweight, foldable racks may exhibit more physical wobble during intense playing sessions.
- Buying Advice: Measure your available studio space carefully before purchasing, taking into account the full physical sweep of the cymbal pads. Verify the exact folded and unfolded dimensions provided by the manufacturer, and consider a tabletop multi-pad if you primarily need to tap out basic rhythms rather than perform complex, full-body drum parts.
Pre-Purchase Checklist and Studio Setup Tips in Singapore
Setting up an electric drum kit in Singapore requires careful consideration of local living conditions, power standards, and retail logistics to ensure a smooth and hassle-free integration into your home studio.
Space and Noise Management In high-density residential areas like Singapore’s HDB flats or condominiums, managing physical noise and structural vibration is paramount. While mesh heads are quiet to the ear, the physical impact of your kick drum pedal and the striking of the pads create low-frequency vibrations that travel easily through concrete floors, disturbing neighbors below. To mitigate this, plan to build or purchase a noise-isolation platform (often called a tennis ball riser or physical vibration isolator) to place under your kit. This simple DIY solution decouples the drum rack and pedals from the floor, absorbing the structural impact before it can propagate through the building.
Power and Connectivity When purchasing electronic musical equipment, always verify the electrical specifications of the power supply. Singapore operates on a 230V/50Hz electrical system and utilizes Type G power plugs (three-pin square plugs). If you are purchasing an electric drum kit from an international online retailer, ensure the included power adapter is compatible with this standard. To guarantee safety and prevent electrical faults, it is highly recommended to use a power adapter that carries the local Safety Mark certification, or purchase a compatible, certified replacement power supply from a local electronics distributor.
Warranty and Support Electric drum kits are complex electronic instruments containing sensitive sensors, trigger matrices, and digital processors that can occasionally malfunction. Purchasing your kit through an authorized local distributor in Singapore ensures that you have access to official warranty coverage, local repair services, and genuine replacement parts. While importing a kit from overseas may sometimes offer a lower initial price, the cost and logistical headache of shipping a heavy drum module or frame back to an overseas seller for warranty repairs can quickly outweigh any initial savings.
Latency Verification To achieve a responsive, natural playing experience when triggering software instruments, you must minimize audio latency—the delay between striking a pad and hearing the sound through your headphones or monitors. Ensure your computer is configured to use dedicated, low-latency audio drivers. For Windows users, this means installing the official ASIO driver provided by your audio interface manufacturer. For macOS users, Apple’s native CoreAudio drivers provide excellent low-latency performance out of the box. Aim for an audio buffer size of 64 or 128 samples, which typically keeps round-trip latency below 10 milliseconds, rendering the delay imperceptible to most players.
Frequently Asked Questions (FAQ)
Do I need a dedicated audio interface for my electric drum kit?
If you only plan to record MIDI data from your electric drum kit to trigger software instruments inside your DAW, a dedicated audio interface is not strictly mandatory, as the MIDI data can travel directly over a standard USB cable. However, an audio interface is highly recommended for real-time monitoring. Standard computer headphone jacks often introduce significant audio latency and lack the amplification power needed for high-impedance studio headphones. A dedicated audio interface utilizing professional ASIO (Windows) or CoreAudio (macOS) drivers ensures ultra-low latency monitoring, clean digital-to-analog conversion, and balanced outputs for your studio monitors, resulting in a far more responsive and accurate recording experience.
Can I use an electric drum kit to trigger external hardware synthesizers?
Yes, you can use an electric drum kit to trigger external hardware synthesizers, provided your drum module features physical 5-pin DIN MIDI Out ports or your studio setup is routed through a computer that can bridge USB-MIDI connections. To ensure successful integration, you must consult the MIDI implementation chart found in the user manuals of both your drum module and your synthesizer. This chart details which MIDI continuous controller (CC) messages and note numbers are transmitted and received. For example, you will need to map the variable MIDI CC data from your hi-hat controller pedal to a compatible parameter on your synthesizer (such as filter cutoff or decay time) to translate your physical foot movements into dynamic, expressive synth modulations.
Community discussion
Share your experience or ask a question. Comments are reviewed before publication.