
Selecting the right finger drum brand requires balancing your current skill level with your preferred musical workflow. Because finger drumming relies on rapid, precise physical contact, the quality of an instrument is defined by its pad responsiveness, sensor durability, and software integration rather than brand name alone. Whether you want to produce beats in a home studio or practice rhythm patterns on the go, understanding the underlying technology of these instruments is the first step toward making an informed purchase.
For beginners, a reliable instrument must offer intuitive controls and forgiving pad sensitivity to help build finger strength and coordination. Intermediate players, on the other hand, require advanced customization options, such as adjustable velocity curves and pressure-sensitive aftertouch, to inject subtle dynamics into their performances. By evaluating instruments based on physical construction, connectivity, and software ecosystems, you can find a setup that fits your budget and musical goals.
Understanding Finger Drum Types and Pad Technologies
Before comparing brands, you must decide between standalone hardware and MIDI controllers. Standalone finger drums feature built-in sound engines, internal processors, and audio outputs, allowing you to play them without a computer. MIDI controllers, conversely, do not produce sound on their own; they act as input devices that send performance data to a Digital Audio Workstation (DAW), synthesizer, or mobile application.
Products mentioned in this guide
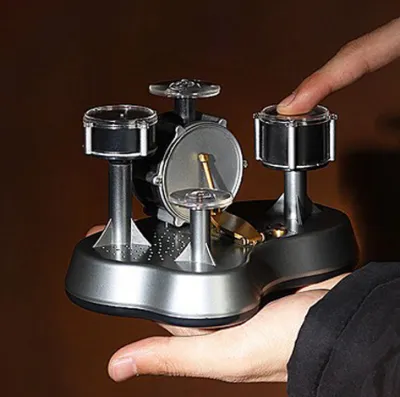
![[TrueSprout] Finger Desktop Portable Mini For Desk Musical Miniature Set Touch-sensitive Drum Toy](https://img.lazcdn.com/g/p/6e80c1f15020380b6989c5fd661e22aa.jpg_400x400q80.jpg_.webp)
Prices are valid at publication and may change. Please refer to the product page for the latest price.
The tactile feel of the pads is the most critical factor in playability. Most modern finger drums use silicone or rubber pads resting over highly sensitive pressure sensors, often utilizing piezoelectric technology. Silicone pads tend to be softer and more responsive to light touches, making them excellent for intricate, fast-paced rolls. Thicker rubber pads offer a firmer rebound, which many players prefer for heavy, deliberate beat-making.
Sensor technology determines how accurately the hardware translates your physical strikes into digital sound. Velocity sensitivity measures the force of your strike, mapping it to a volume level from whisper-quiet to loud. Pressure sensitivity, or aftertouch, measures how hard you press down on a pad after the initial strike, allowing you to modulate effects, open filters, or bend pitches in real time.
Connectivity options dictate how easily the instrument integrates into your workspace. Standard USB connections power the device and transmit MIDI data simultaneously, which is ideal for modern computer setups. Traditional 5-pin MIDI ports allow you to control legacy hardware synthesizers directly. Some portable models offer Bluetooth MIDI, though you must verify the potential latency trade-offs before relying on wireless connections for live performance.
What to Look For: Selection Criteria by Skill Level
Beginners should prioritize ease of use and immediate feedback over complex feature sets. Look for brands that offer plug-and-play USB connectivity and pre-mapped templates for popular music software. Built-in learning tools, such as visual metronomes or LED-illuminated pads that guide your finger placement, can significantly accelerate your early practice sessions.

Durability is another essential consideration for those starting out. Beginners often strike pads with excessive force before developing proper finger control and economy of movement. Choosing a brand known for robust chassis construction and reinforced USB ports will ensure the instrument survives this initial learning phase. Simple, budget-friendly controllers starting around S$100 to S$200 provide an excellent entry point without unnecessary financial risk.
Intermediate players require a higher degree of expressive control. At this stage, you should look for hardware that allows you to customize velocity curves. A customizable curve lets you adjust how the pads respond to your specific playing style, ensuring that medium strikes do not accidentally trigger maximum-volume sounds. High-resolution sensors that capture subtle variations in finger placement and pressure are also vital for advanced techniques.
When assessing overall value, look beyond the physical hardware to the bundled software package. Many reputable brands include introductory versions of professional DAWs, high-quality drum synthesizer plugins, or extensive sample libraries. These software bundles can easily save you over S$100 in separate purchases, making a slightly more expensive hardware unit a much better value overall. Additionally, consider whether the hardware features external inputs for sustain pedals or kick triggers, which allow you to expand your setup as your skills grow.
Navigating Finger Drum Brands and Design Philosophies
Different manufacturers approach finger drum design with distinct philosophies, shaping how their instruments feel, perform, and integrate into your studio. Some brands focus on legacy hardware workflows, prioritizing heavy, tactile pads and self-contained sequencing. Others specialize in high-density pad grids designed for deep software integration and complex live looping setups.
When evaluating a brand’s reputation, look closely at their history of software support. Because many finger drums rely on companion editor software to map pads and adjust settings, driver stability is crucial. A brand that regularly updates its firmware and maintains compatibility with new computer operating systems will protect your investment for years to come. Check user forums and manufacturer websites to see how actively they support their older hardware models.
Standalone Hardware and Portable Grooveboxes
Brands that specialize in standalone hardware design instruments that function as self-contained production studios. These devices typically feature onboard step sequencers, multi-effects processors, and internal storage for saving your custom sample libraries. Many models also include rechargeable battery compartments, allowing for complete portability.
These standalone units are ideal if you want to practice away from a computer screen, perform busking sets, or quickly sketch out beat ideas while traveling. The physical interface is usually highly optimized, with dedicated buttons for editing, mixing, and sequencing without needing a mouse. This tactile workflow can make the music-making process feel much more organic and focused.
However, standalone hardware comes with inherent limitations. The internal sound libraries, while often high in quality, are finite compared to the virtually limitless storage of a computer. Upgrading your sounds requires transferring files via SD cards or USB connections, which can slow down your creative momentum. Furthermore, standalone units represent a significant financial investment, with prices often starting around S$600 and reaching well over S$1,500.
MIDI Controllers and Software-Integrated Pads
Manufacturers of MIDI pad controllers focus on creating the ultimate interface for software-based music production. These controllers often feature dense grids of pads, assignable rotary knobs, faders, and high-contrast screens that display parameter values directly from your computer. They are designed to act as physical extensions of your DAW.
This category is perfect for studio production, complex electronic beat-making, and live performances where a laptop is already central to your setup. Because the sound generation is handled by your computer, you have instant access to massive software synthesizers, orchestral libraries, and advanced audio effects. The hardware itself is also much more affordable and lightweight than standalone units.
The primary limitation of a MIDI controller is its total dependence on an external host device. Without a computer, tablet, or hardware sound module, the controller is completely silent. You must also manage audio drivers and buffer settings to prevent latency, which is the slight delay between striking a pad and hearing the sound through your speakers or headphones.
Matching Your Skill Level and Workflow to the Right Setup
To choose the right instrument, you must map your purchase to your specific musical goals and physical environment. If your primary goal is bedroom production and beat-making, a compact 4×4 MIDI pad controller is highly efficient. It takes up minimal desk space and integrates seamlessly with production software, allowing you to lay down drum tracks quickly.
If you are an acoustic drummer looking to transition to finger drumming, your needs will be different. You may prefer a larger pad layout that allows you to mimic the physical arrangement of a traditional drum kit. In this scenario, look for a controller that supports external trigger inputs, allowing you to connect a physical bass drum pedal and a hi-hat controller to maintain your muscle memory.
Integrating your new finger drum with existing gear requires careful planning. If you choose a MIDI controller, you will need a reliable audio interface to route high-quality sound from your computer to your studio monitors or headphones with minimal delay. If you choose a standalone unit, verify that it has the correct audio outputs to connect to your home stereo, mixer, or keyboard amplifier.
For those who travel frequently, a minimal setup consisting of a bus-powered MIDI controller and an iPad is incredibly powerful. Many modern controllers are class-compliant, meaning they run directly off the iPad’s power without needing an external wall adapter. If you prefer a permanent studio setup, an expanded rig featuring a large pad controller, dedicated hardware synthesizers, and a multi-channel audio interface will give you the ultimate creative flexibility.
Pre-Purchase Checks and Compatibility Verification
Before finalizing your purchase, you must verify several technical specifications to ensure the instrument will work in your setup. First, check the operating system compatibility of the brand’s editor software. Some older or boutique controllers may not have updated drivers for the latest versions of macOS or Windows, which can render their customization features unusable.
Next, verify the power requirements of the device. While small controllers run efficiently on standard USB bus power, larger units with bright RGB screens and motorized faders often require dedicated external power adapters. Ensure you have enough available power outlets near your desk and measure the physical footprint of the controller to confirm it will fit comfortably in your workspace.
Finally, pay close attention to where you purchase the instrument. When buying from online marketplaces, always verify that the seller is an authorized dealer for the brand. Authorized status ensures that you receive a genuine product, a valid manufacturer’s warranty, and access to the bundled software licenses. These software bundles are often single-use codes registered to your user account, so buying secondhand or from unauthorized sellers may mean missing out on valuable software.
Frequently Asked Questions (FAQ)
Do I need to buy special drumsticks or use my fingers for finger drums?
Finger drums are specifically engineered to be played with your fingertips, and the internal sensors are calibrated for this soft, broad style of impact. Using wooden or plastic drumsticks on these sensitive silicone or rubber surfaces can permanently dent the pads, damage the delicate piezoelectric sensors underneath, and void your manufacturer’s warranty. If you prefer playing with drumsticks, you should look for electronic percussion multi-pads, which are built with thick, reinforced rubber designed to withstand high-velocity stick strikes.
How can I reduce latency when using a MIDI finger drum controller?
To minimize the delay between striking a pad and hearing the sound, you must optimize your computer’s audio settings. Open your DAW’s audio preferences and lower the buffer size to 64 or 128 samples, which typically reduces latency to an imperceptible level. Additionally, ensure you are using a dedicated audio interface with high-quality, manufacturer-specific drivers, such as ASIO drivers on Windows or Core Audio on macOS. Avoid connecting your controller through unpowered USB hubs, as this can cause data transmission delays and power instability.
Community discussion
Share your experience or ask a question. Comments are reviewed before publication.