
To optimize your music practice room, you must first determine how many acoustic panels are required to create a balanced, clear sound. A standard home practice space typically needs between 20% and 40% of its wall surface area covered with acoustic panels. The exact number depends on your room’s physical dimensions, the instruments you play, and the specific acoustic challenges of the space. For a standard spare bedroom, this usually translates to installing between 8 and 16 standard-sized panels to achieve professional-grade sound control.
Assess Your Room Dimensions and Acoustic Goals
To establish a baseline for your acoustic treatment plan, start by measuring the physical boundaries of your practice space. Use a tape measure to record the length, width, and height of the room in meters. Multiplying these three measurements gives you the total volume of the room in cubic meters. Larger rooms naturally contain more air and require a higher volume of absorbent material to control sound reflections, while smaller rooms often suffer from intense, localized frequency build-ups that require targeted placement.
Next, identify the primary sound sources that will occupy the room, as different instruments produce vastly different frequency profiles. A vocalist, violinist, or acoustic guitarist generates mostly mid-to-high frequency sound waves, which are relatively easy to manage with standard panels. Conversely, if you practice with a digital keyboard connected to studio monitors, an acoustic drum kit, a bass guitar, or brass instruments, your room will be filled with powerful low-frequency energy. These longer sound waves require thicker, denser panels to prevent the room from sounding muddy and boomy.
Products mentioned in this guide




![[Slatwall]🌳 600x600mm - 1pc Sound Proof Acoustic Panel Self-Adhesive Studio Office Home Wall Karaoke Restaurant](https://img.lazcdn.com/g/p/b314f78fb4f8b4431272aadf02da4498.jpg_400x400q80.jpg_.webp)
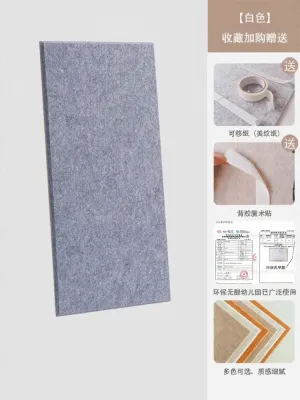
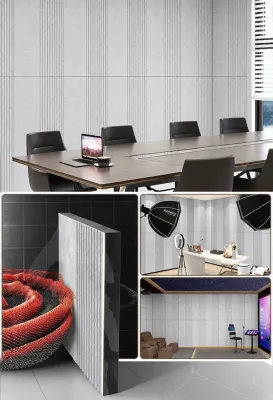
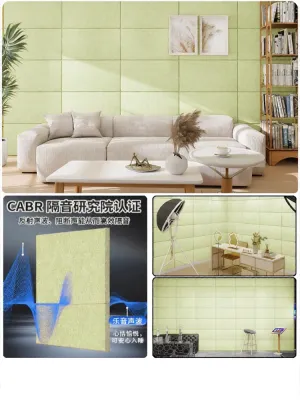
Prices are valid at publication and may change. Please refer to the product page for the latest price.
It is also critical to clarify the difference between soundproofing and acoustic treatment before purchasing any materials. Acoustic panels are designed to improve the sound quality inside the room by absorbing reflections and reducing echo. They do not block sound from escaping the room or entering from the outside. If your goal is to prevent family members or neighbors from hearing your practice sessions, you need soundproofing solutions that add physical mass and structural decoupling to the walls, rather than acoustic panels.
Calculate the Required Coverage Area
You do not need to cover every square inch of your walls to achieve an excellent acoustic environment. In fact, covering too much surface area will make the room sound unnaturally dead, dry, and lifeless, which can cause ear fatigue and make practicing feel uninspiring. For a standard music practice room, aiming for 20% to 30% coverage of the total wall surface area is generally the ideal range for light acoustic control, while 35% to 40% is recommended for louder instruments or high-energy mixing environments.

To calculate your target coverage area, first find the gross surface area of your walls by multiplying the perimeter of the room by the ceiling height. From this total, subtract the surface area of any large elements that cannot host panels, such as windows, doors, and large built-in wardrobes or bookshelves. The remaining figure is your net available wall space, which serves as the baseline for your percentage calculations.
For example, if your net wall surface area is 30 square meters, a 25% coverage target means you need approximately 7.5 square meters of acoustic treatment. If you practice a quieter acoustic instrument like a classical guitar or flute, you can lean toward the lower end of this range. If you practice with amplified instruments, brass, or percussion, aiming for the higher end of the coverage spectrum will help keep the sound pressure levels comfortable and articulate.
Determine Panel Sizes and Quantities
Once you know your target coverage area in square meters, you can translate this figure into a specific number of physical panels. Acoustic panels are commonly sold in standard dimensions, such as 60 cm by 120 cm (0.72 square meters per panel) or 60 cm by 60 cm (0.36 square meters per panel). Dividing your target coverage area by the surface area of a single panel will give you the exact quantity you need to purchase. For instance, if you need 7.5 square meters of coverage, you would require approximately 11 panels of the 60 cm by 120 cm size.
When selecting panels, pay close attention to thickness and core material density rather than just surface dimensions. Standard panels are typically 5 cm or 10 cm thick, usually filled with dense fiberglass or stone wool. Thinner 5 cm panels are highly effective at absorbing mid-to-high frequencies, making them suitable for vocals, flutes, and violins. However, if you need to control lower frequencies from a cello, acoustic bass, or studio monitors, 10 cm panels offer the necessary depth to absorb those longer wavelengths.
Symmetry is another crucial factor when planning your panel layout. To maintain a balanced stereo image and an even frequency response across the room, you should distribute the panels evenly on opposing walls. If you place all your panels on one side of the room and leave the opposite wall completely bare, sound waves will bounce unevenly, creating a disorienting acoustic environment where one ear receives more direct reflections than the other.
Strategic Placement for Maximum Effectiveness
Where you place your acoustic panels is just as important as how many you install. The most critical areas to treat first are the primary reflection points, which are the spots on the walls where sound waves from your instruments or speakers bounce directly to your ears. You can find these points easily using the mirror technique: sit in your primary practice position while a friend slides a small mirror along the side walls at eye level. Wherever you can see your instrument or speakers in the mirror, mark that spot as a primary reflection point that requires a panel.
After addressing the side walls, focus on the corners of the room. Low-frequency sound waves naturally migrate toward corners, where they build up and create a muddy, boomy sound. Installing specialized, thick corner panels—often called bass traps—in at least two of the room’s vertical corners will dramatically improve the clarity of your low-end notes. This is especially important in small rooms, where bass buildup is most severe.
Finally, evaluate the relationship between your ceiling and floor. If you have hard flooring like parquet, laminate, or tile, sound waves will bounce vertically between the floor and the ceiling, creating a metallic ringing sound known as flutter echo. You can counteract this by placing a thick rug on the floor directly beneath your practice chair, or by mounting a few acoustic panels on the ceiling to break up the vertical reflections.
Common Sizing and Placement Mistakes to Avoid
One of the most common mistakes musicians make is purchasing thin, lightweight polyurethane egg-crate foam expecting it to solve all their acoustic problems. While cheap foam can take the edge off high-frequency flutter echo, it lacks the density to absorb mid-range and low-frequency sounds. This leaves your room sounding muddy, as the high frequencies are completely sucked out while the boomy low-end remains completely untreated.
Another frequent error is over-treating the room by covering every wall surface with panels. This creates an acoustic environment that feels claustrophobic and unnatural to play in, as you lose the natural resonance that helps you monitor your own performance. Always start with a conservative estimate of 20% to 25% coverage, test the room by playing your instrument, and only add more panels if you still detect problematic echoes or harsh reflections.
Additionally, always follow the manufacturer’s specific instructions regarding mounting hardware and installation. Heavy professional panels made of stone wool or fiberglass require sturdy wall anchors or specialized mounting clips to stay securely in place. Attempting to hang heavy panels with simple double-sided tape or weak adhesive can result in damaged plaster, torn wallpaper, or panels falling unexpectedly during an energetic practice session.
Frequently Asked Questions (FAQ)
Do acoustic panels stop sound from leaking into other rooms?
No, acoustic panels do not stop sound from leaking into other rooms. Acoustic panels are designed solely to absorb sound reflections within a room to improve internal sound quality. To prevent sound transmission through walls, you need soundproofing solutions that add significant mass and structural decoupling, such as installing double-layered drywall with green glue, sealing door gaps with heavy-duty weatherstripping, or using mass-loaded vinyl.
Can I use heavy curtains and rugs instead of dedicated acoustic panels?
Heavy curtains and thick rugs can help reduce high-frequency flutter echo and take some of the harshness out of a room, but they cannot replace dedicated acoustic panels. Household textiles are too thin and low-density to absorb mid-range and low-frequency sound waves. While they are useful as a supplementary measure to soften hard floors and windows, you will still need dense acoustic panels to achieve a balanced and clear practice environment.
Community discussion
Share your experience or ask a question. Comments are reviewed before publication.