
Learning to play the piano or electronic keyboard is an exciting journey, but memorizing the layout of 88 keys can feel overwhelming for a beginner. Piano stickers offer a practical, visual way to bridge this gap, helping you identify notes instantly and accelerate your early practice sessions. However, applying them incorrectly can lead to sticky residue, peeling edges, or permanent damage to your instrument’s keys.
To apply piano stickers safely, you must select the right type of sticker, prepare the key surfaces meticulously, and use a systematic application method. Taking these precautions ensures that the stickers remain firmly in place during practice while remaining easy to remove when you no longer need them. By understanding the proper techniques for application and removal, you can protect your instrument’s aesthetic and mechanical integrity while building your musical skills.
When to Use Piano Stickers (and When to Avoid Them)
Piano stickers are designed as temporary visual aids to help absolute beginners map the physical keyboard to the musical staff. In the initial weeks of learning, these stickers can reduce cognitive fatigue by allowing you to quickly locate Middle C and identify the relationship between white and black keys. They are particularly helpful for young children or self-taught hobbyists who need immediate positive reinforcement to stay motivated during their first few practice sessions.
Products mentioned in this guide
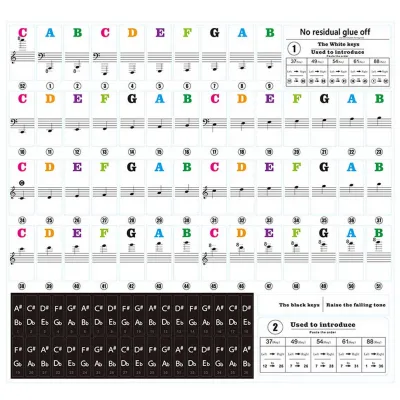
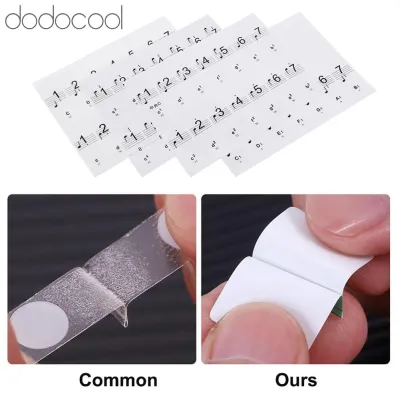
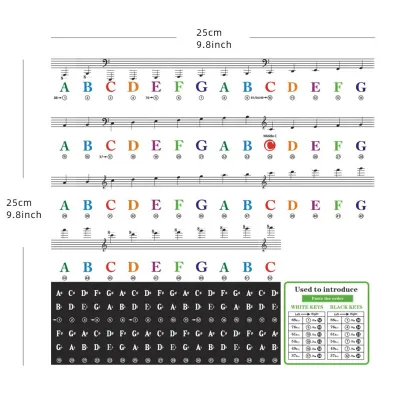
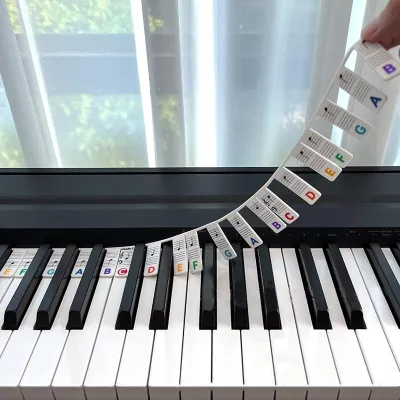
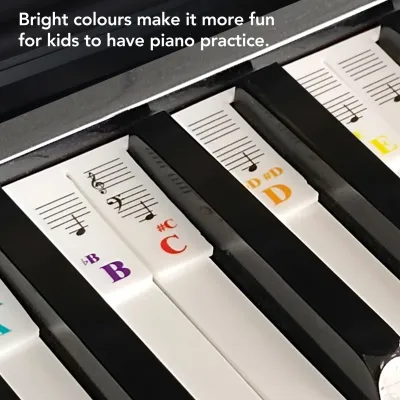

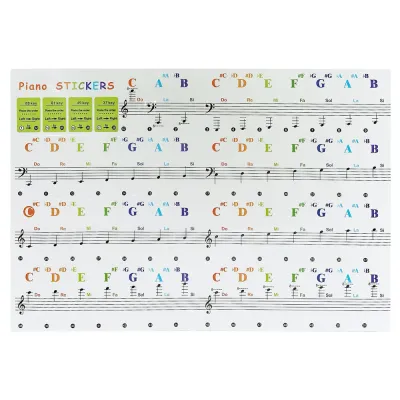

Prices are valid at publication and may change. Please refer to the product page for the latest price.
Despite their utility, long-term reliance on key stickers can hinder your development as a pianist. Relying solely on visual labels prevents your brain from developing essential spatial awareness and muscle memory. Experienced players do not look at letter names on the keys; instead, they navigate the keyboard by feeling the patterns of the black keys, which are arranged in alternating groups of two and three. If your eyes are constantly tracking stickers, you will struggle to look up at your sheet music, which severely slows down your sight-reading progress.
To get the most out of these learning aids, treat them as a temporary stepping stone rather than a permanent modification. Plan to remove the stickers within three to six months of starting your practice. You can also choose to apply them only to a single octave around Middle C to help you find your bearings, leaving the rest of the keyboard blank to encourage natural spatial navigation.
Essential Tools and Materials for Safe Application
Before purchasing any keyboard accessories, it is crucial to select materials that are specifically manufactured for musical instruments. Standard craft stickers, paper labels, or household tapes use high-tack adhesives that are incredibly difficult to remove and can permanently stain or dissolve the plastic keytops. Instead, look for low-tack, static-clinging, or easily removable vinyl piano stickers that are formulated to peel away cleanly without leaving a gummy residue.

To prepare your keyboard and apply the stickers safely, gather the following tools:
- A clean, lint-free microfiber cloth
- A mild, non-abrasive cleaning solution or a slightly damp cloth
- A small plastic card (such as a clean membership card) or a wooden craft stick
- A pair of tweezers (optional, for precise handling)
In Singapore’s tropical climate, high relative humidity can cause cheap, low-quality adhesives to degrade rapidly, turning into a sticky, liquefied mess that can seep into the narrow gaps between your keys. This moisture-rich environment makes it even more critical to use high-quality, moisture-resistant vinyl stickers. Avoid any harsh chemical cleaners like acetone, rubbing alcohol, or glass sprays during your preparation, as these volatile solvents can strip away the protective gloss of plastic keys, leaving them cloudy, brittle, or permanently discoloured.
Step-by-Step Guide to Applying Piano Key Stickers
Applying your stickers with care ensures they look neat, feel comfortable under your fingertips, and do not interfere with your playing. Follow this step-by-step process to achieve a professional, bubble-free finish.
Step 1: Surface Preparation
Begin by unplugging your digital keyboard or opening your acoustic piano’s fallboard. Use a dry, lint-free microfiber cloth to wipe away any loose dust and debris from the keys. If the keys have accumulated natural skin oils or grime, dampen your microfiber cloth slightly with water or a manufacturer-approved keyboard cleaner. Gently wipe each key from the back (closest to the piano body) to the front edge, ensuring no moisture drips down the sides of the keys. Allow the keyboard to dry completely for at least fifteen minutes before proceeding, as any trapped moisture will prevent the stickers from adhering properly and could lead to mold growth in humid climates.
Step 2: Alignment and Positioning
Before peeling any stickers, study your keyboard layout to determine where each note belongs. A standard acoustic piano has 88 keys, starting with an A on the far left, while electronic keyboards often have 76, 61, or 49 keys, which typically start on a C. Consult the instruction manual that came with your sticker sheet to match the stickers to your specific keyboard size. Plan to position the stickers on the upper portion of the white keys, just below the black keys. Placing them in this area ensures they remain highly visible while staying out of the direct path of your fingertips during normal play, which minimizes wear and prevents the edges from curling.
Step 3: Application Technique
To prevent the natural oils on your fingers from weakening the sticker’s adhesive, avoid touching the sticky side directly. Instead, use a pair of tweezers or a wooden craft stick to gently lift the first sticker from its backing sheet. Align the bottom edge of the sticker parallel to the key’s sides, ensuring it is perfectly centered. Slowly lower the sticker onto the key surface, anchoring one edge first. By starting from one side and gradually lowering the rest of the sticker, you allow air to escape, which prevents unsightly air bubbles from forming beneath the vinyl.
Step 4: Final Pressing and Inspection
Once the sticker is lightly positioned, use a clean, dry microfiber cloth wrapped around your finger or a soft plastic card to press down firmly. Smooth the sticker from the center outward to the edges to secure the bond. Repeat this process for all the white keys first, followed by the black keys if your set includes them. After completing the application, sit at the bench and look down the length of the keyboard. Check that the stickers form a straight, uniform line across the keys. A consistent alignment not only looks professional but also ensures that the tactile transition between keys remains smooth and predictable.
How to Remove Stickers and Clean Residue Safely
When you are ready to transition away from visual aids, removing the stickers safely is just as important as the initial application. Taking your time during this process prevents physical scratching and chemical damage to your instrument.
Peeling Technique
To remove the stickers without damaging the keytops, avoid using sharp metal objects like pocket knives, razor blades, or scissors, which can easily gouge the plastic or wood. Instead, use your fingernail or the edge of a thin plastic card to gently lift one corner of the sticker. Once you have a grip on the corner, peel the sticker back slowly at a very low, flat angle (almost parallel to the key surface). Pulling the sticker straight upward at a 90-degree angle puts unnecessary upward stress on the key mechanism and is more likely to leave adhesive residue behind or tear the vinyl.
Residue Removal
If you find any sticky residue left behind on the keys, do not panic or reach for harsh household solvents. Instead, dampen a clean microfiber cloth with warm water and wring it out thoroughly so it is barely moist. Rub the residue gently in a circular motion, using the friction of the microfiber to ball up the adhesive. For stubborn spots, you can use a tiny drop of mild dish soap diluted in warm water, making sure to wipe the key clean with a dry cloth immediately afterward.
Safety Boundary and Stop Conditions
Never use acetone, nail polish remover, rubbing alcohol, or abrasive scrubbing pads on your keys. These chemicals act as solvents on ABS plastic and acrylic—the materials used in almost all modern digital keyboards and acoustic piano keys—and can melt, cloud, or permanently scratch the surface. If you encounter extremely stubborn adhesive that does not budge with a damp cloth, or if you notice that the key surface feels soft, sticky, or discoloured underneath the sticker, stop immediately. Do not attempt to scrape or chemically dissolve the residue. Instead, consult your piano’s manufacturer guidelines or contact a qualified piano technician to handle the cleanup safely.
Damage-Free Alternatives to Adhesive Key Stickers
If you are hesitant to apply any adhesive directly to your instrument, or if you own a high-end piano that you want to keep pristine, there are several excellent non-adhesive alternatives available on the market today.
One of the most popular modern solutions is the silicone piano keyboard note strip. These flexible, pre-printed silicone strips lay flat across the top of your keys, resting snugly against the fallboard without any glue or tape. Because they rely entirely on gravity and the physical shape of the keyboard bed to stay in place, they can be installed or removed in seconds. This makes them incredibly convenient for households where multiple musicians share the same instrument, allowing beginners to use the guide and advanced players to remove it instantly. These silicone strips are also highly durable and completely unaffected by Singapore’s high humidity levels.
Another practical option is a set of rigid, removable plastic guide strips. These thin cards slide into the small gap behind the keys and stand upright, displaying the notes directly above each key rather than on the playing surface itself. This design keeps the keytops entirely clear, preserving the natural tactile feel of the keys and preventing any interference with your finger movements.
Ultimately, the most sustainable alternative is to integrate traditional sight-reading practice methods into your daily routine from day one. You can use simple mnemonic devices—such as “Every Good Boy Does Fine” for the treble clef lines—and practice finding “landmark keys” like Middle C, Treble G, and Bass F. By learning to read the physical topography of the keyboard using the black keys as your guide, you will build a deeper, more permanent connection to your instrument that no sticker can replace.
Frequently Asked Questions (FAQ)
Will stickers affect the touch or weight of my piano keys?
Standard, high-quality vinyl stickers are incredibly thin and lightweight, meaning they add negligible physical mass to the keys and will not alter the key action or touch weight. However, if the stickers are poorly aligned or wrap around the sides of the keys, they can rub against adjacent keys, causing friction that may slow down the key’s return mechanism. To prevent this, always ensure your stickers are centered on the flat, top surface of the keys and do not overlap the edges.
Is it safe to put stickers on an acoustic piano with real ivory keys?
No, you should never apply adhesive stickers of any kind to authentic ivory keys, which are commonly found on vintage or high-end acoustic pianos. Ivory is a highly porous, organic material that easily absorbs moisture and chemical compounds from adhesives, leading to permanent yellowing, staining, or warping. Additionally, the physical bond of the adhesive can cause the fragile, thin ivory veneers to chip or peel away when you try to remove the stickers. If your piano has ivory keys, always opt for non-adhesive silicone note strips or consult a professional piano technician for safe, alternative learning aids.
Community discussion
Share your experience or ask a question. Comments are reviewed before publication.