
Applying a dense, acoustic-grade sound absorbing wrap to the exterior of drum shells and amplifier cabinets is a practical way to control resonance, dampen high-frequency ring, and lower the immediate sound pressure level in a home practice space. However, achieving effective noise reduction requires precise application techniques to avoid damaging your gear or creating safety hazards. By understanding the physical limits of acoustic wraps, preparing your surfaces carefully, and leaving critical ventilation and functional areas completely uncovered, you can significantly lower the ambient volume of your practice sessions without sacrificing the core tone of your instruments.
Understanding Sound Absorbing Wrap and Its Limitations
Sound absorbing wrap is designed to reduce airborne sound reflections and dampen the physical vibrations of the surface it covers. It works by converting acoustic energy into trace amounts of heat within its porous or dense fibrous structure. This is highly effective for controlling high-frequency harshness, flutter echoes, and the ringing resonance of drum shells or vibrating amplifier cabinets.
However, it is vital to distinguish this from true soundproofing, which requires isolating and blocking sound transmission entirely. Soundproofing typically demands heavy, airtight structural barriers like double-walled drywall and specialized decoupled floors. A sound absorbing wrap applied directly to an instrument cannot block low-frequency structural noise, such as the deep thump of a kick drum or the low-end rumble of a bass amplifier. These low frequencies travel easily through floors and walls, meaning your neighbors may still hear the physical impact of your playing even if the room’s internal echo is significantly reduced.
Products mentioned in this guide

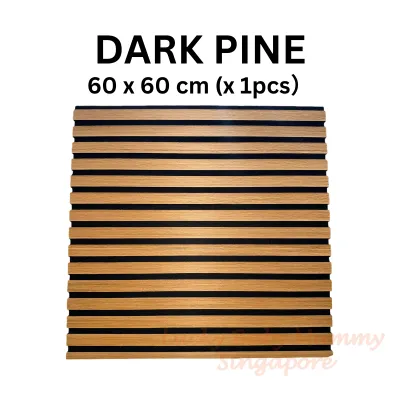
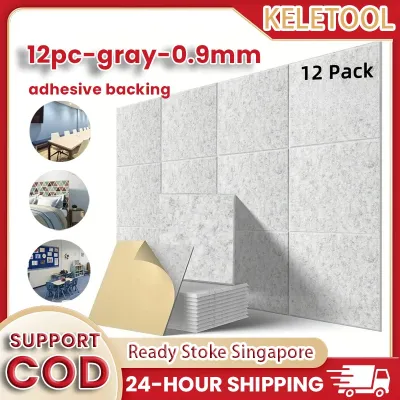
![[SG Stock] SoundProof Panel for Wall Self adhesive Hexagon Foam Acoustic Panels Home Sound-Absorbing Studio](https://img.lazcdn.com/g/p/4f6037997d2d531bf13e27506f4e4526.jpg_400x400q80.jpg_.webp)
Prices are valid at publication and may change. Please refer to the product page for the latest price.
Additionally, safety must be your primary consideration when selecting a wrap. Because amplifiers generate heat and drums are often kept in dry or humid indoor environments, always check product labels and manufacturer specifications for fire ratings and indoor safety compliance. Look for materials certified as Class A fire-rated or flame-retardant to ensure they do not pose a fire hazard when wrapped around electrical equipment.
Preparing Your Instruments and Equipment
Before applying any sound absorbing wrap, thorough preparation of your instruments is essential to ensure a secure bond and prevent long-term damage to the underlying finishes. Dust, oils from hands, and ambient moisture will compromise adhesives, leading to peeling edges and uneven dampening. Start by wiping down the exterior surfaces of your drum shells and amplifier cabinets with a dry microfiber cloth. For stubborn grime on drum shells, use a mild, finish-safe cleaner recommended by the drum manufacturer, and ensure the surface is completely dry before proceeding. In humid climates, moisture can easily get trapped beneath a non-breathable wrap, potentially warping wood shells or causing mold, so work in a well-ventilated, dry room.

During your inspection, identify and mark critical areas that must remain completely uncovered. On amplifiers, these include ventilation grilles, tube exhaust ports, control panels, and input/output jacks. On drums, you must avoid covering the small air holes (grommets) that allow air to escape when the drum is struck, as blocking these will choke the drum’s natural sustain and alter its feel.
Gather your preparation tools before starting the installation. You will need a sharp utility knife with replacement blades, a metal straight edge or T-square for precise cuts, a soft measuring tape to wrap around curved surfaces, and the manufacturer-recommended adhesive or double-sided tape. If you are using a temporary or removable wrap, verify that the adhesive is rated as low-tack and finish-safe to prevent stripping away lacquer or wood veneers later.
Step-by-Step Guide to Wrapping Drum Shells
Wrapping drum shells requires a delicate balance between adding mass to dampen unwanted ring and preserving the structural integrity of the drum’s hardware. Begin by removing all tension rods, hoops, drumheads, and mounting hardware from the shell. This leaves you with a bare wooden or metal cylinder, allowing for a clean, seamless application.
Measure the circumference of the drum shell using your flexible measuring tape, adding an extra two to three centimeters to allow for a slight overlap at the seam. Measure the height of the shell from bearing edge to bearing edge, but subtract about five to ten millimeters from both the top and bottom. This margin is crucial; the sound absorbing wrap must never touch or overlap the bearing edges, as this would prevent the drumhead from seating flat against the shell, ruining your ability to tune the drum properly.
Once you have cut the material using your utility knife and straight edge, test-fit the dry wrap around the shell. If the fit is correct, begin applying the wrap slowly from one end. If using an adhesive-backed wrap, peel away a small section of the backing at a time, smoothing the material flat with a plastic squeegee or your hand to prevent air bubbles and wrinkles. Wrinkles not only look unprofessional but also create air gaps that can cause inconsistent shell resonance and buzzing.
After the wrap is securely adhered, use your utility knife to carefully cut out openings for the lugs, air vents, and mounting brackets from the inside of the shell outward. This ensures clean, circular cuts that match the original holes perfectly. Reinstall the hardware over the wrap, taking care not to overtighten the screws, which could compress or tear the dampening material.
Always perform a small patch test with the adhesive on an inconspicuous part of the drum shell first. If you observe any discoloration, softening of the lacquer, or bubbling of the original finish, halt the installation immediately and consult the drum manufacturer for alternative mounting methods, such as using hook-and-loop straps instead of direct adhesives.
Step-by-Step Guide to Wrapping Amplifier Cabinets
Amplifiers present a different set of challenges, primarily centered around electrical safety and heat dissipation. Unlike drums, amplifiers contain active electronic components that generate significant heat during operation. Therefore, the goal when wrapping an amplifier cabinet is to dampen the vibrating wooden panels without trapping heat inside the chassis.
Begin by mapping out the cabinet’s exterior. Identify the control panels, input jacks, power switches, and cooling vents. Use your measuring tape to plan individual panels of sound absorbing wrap for the top, sides, and back of the cabinet, ensuring that you leave a clear margin of at least two to three centimeters around all ventilation grilles and heat sinks.
Cut the wrap panels to size. When applying the wrap to the exterior cabinet, start with the flat side panels. Press the material firmly onto the wood or Tolex surface, working from the center outward to ensure tight conformity to the corners. If your amplifier has metal corner protectors, you can either wrap up to the edge of the protectors or temporarily unscrew them, apply the wrap, and reinstall the protectors over the material, provided the wrap is thin enough to allow a secure fit.
Under no circumstances should you cover the speaker cone, the front grille cloth, or any bass reflex ports. Covering these areas will severely muffle your sound, strain the speaker driver, and ruin the amplifier’s frequency response. For open-back cabinets, do not seal the rear opening with wrap; instead, only apply the material to the solid wooden panels of the enclosure.
Amplifiers, especially those utilizing vacuum tubes, require constant airflow to prevent component failure or fire hazards. Once the wrap is applied, monitor the amplifier closely during your first few practice sessions. If you notice restricted airflow, a burning smell, or if the chassis feels excessively hot to the touch, immediately turn off the amplifier, unplug it from the wall, and remove the wrap.
Testing, Tuning, and Adjusting Your Setup
With the sound absorbing wrap successfully installed, you must now evaluate and adjust your setup to optimize both noise reduction and playability. Begin by playing your instruments at your normal practice volume. Walk around the room—or have a friend play while you listen—to evaluate the room’s acoustics. You should notice a significant reduction in high-frequency flutter, slapback echo, and overall room ring, making the environment feel much more controlled.
For your drums, the added mass of the wrap will naturally lower the fundamental pitch of the shells and shorten their sustain. You will need to perform a complete retuning of the kit. Start by seating the drumheads flat against the clear bearing edges and tuning them slowly, adjusting the tension rods incrementally to compensate for the altered resonance of the dampened shells.
For your amplifier, the wrap may absorb some of the high-frequency reflections that normally bounce off the cabinet’s exterior, making your tone sound slightly darker or muddier. Use the amplifier’s built-in equalizer (EQ) or an external EQ pedal to boost the treble and presence controls slightly, restoring clarity without increasing the overall volume.
Finally, establish a routine maintenance schedule. Every few weeks, inspect the edges of the wrap for peeling, check for adhesive residue seeping out under warm conditions, and ensure the material is not degrading or collecting excessive dust, which can happen quickly in humid environments.
Complementary Noise Control Methods for Home Practice
While sound absorbing wrap is excellent for controlling airborne reflections and surface vibrations, it cannot solve all the acoustic challenges of home practice, particularly in multi-family residential buildings like HDB flats. To address low-frequency structural noise, you must combine your wraps with other isolation strategies.
Use specialized isolation pads or heavy-duty rubber risers to decouple your amplifier cabinets and drum pedals from the floor. This prevents physical vibrations from traveling directly into the building’s concrete structure, which is the primary cause of neighbor complaints regarding low-end rumble.
Additionally, place bass traps strategically in the corners of your practice room. These thick acoustic treatments help manage low-frequency standing waves that pool in corners, cleaning up the muddy low-end in your room. For maximum noise control, consider pairing your wrapped setup with source-reduction tools, such as low-volume mesh drumheads, electronic drum triggers, or an amplifier power attenuator that lets you drive your amp’s tubes at whisper-quiet volumes.
Frequently Asked Questions (FAQ)
Can sound absorbing wrap completely soundproof a room for drum practice?
No, sound absorbing wrap cannot completely soundproof a room. Its primary function is to dampen surface vibrations and absorb high-frequency airborne reflections within the room, reducing echo and harshness. True soundproofing requires stopping sound transmission through walls and floors, which demands heavy, airtight structural barriers and decoupling techniques to block low-frequency vibrations.
Is it safe to leave sound absorbing wrap on tube amplifiers during long sessions?
It is only safe if the wrap is applied strictly to the exterior wooden cabinet panels and kept completely clear of all ventilation grilles, tube exhaust ports, and metal chassis parts. Tube amplifiers generate substantial heat, and trapping this heat can damage internal components or create a fire hazard. Always monitor the amplifier’s temperature and remove the wrap if it feels unusually hot.
How do I remove adhesive residue from drum shells without damaging the finish?
To remove residue safely, start by gently rubbing the area with a microfiber cloth dampened with warm, soapy water or a tiny amount of mineral oil. Avoid harsh chemical solvents like acetone, which can instantly dissolve lacquer or plastic wraps. If the finish type of your drum is unknown or highly delicate, stop immediately and consult the drum manufacturer for approved cleaning agents.
Community discussion
Share your experience or ask a question. Comments are reviewed before publication.