
Changing ukulele strings can feel frustrating because new strings are notoriously elastic. Unlike steel guitar strings, the synthetic materials used for ukuleles—such as nylon or fluorocarbon—naturally stretch and slip during their initial installation. To get your ukulele to hold its tune quickly, you must combine a secure knotting technique at the bridge, neat downward winds around the tuning posts, and a systematic manual stretching routine. By taking the time to properly seat the strings and accelerate their natural break-in period, you can transform an instrument that goes out of tune every thirty seconds into one that remains stable through hours of playing.
Restringing is also an excellent opportunity to perform basic maintenance on your instrument. Dust, sweat, and finger oils accumulate on the fretboard over time, which can affect playability and degrade the wood. Preparing your workspace and gathering the right tools beforehand ensures that the entire process is smooth, safe, and efficient.
Tools and Workspace Preparation for Restringing
Before you begin removing the old strings, gather a few basic tools to make the job easier and protect your instrument. A dedicated digital tuner is essential for tracking pitch changes as you install and stretch the new strings. A manual or rotary peg winder is highly recommended, as it allows you to wind the tuning pegs quickly without straining your wrists. You will also need a pair of sharp flush wire cutters to trim the excess string ends cleanly once the installation is complete.
Products mentioned in this guide


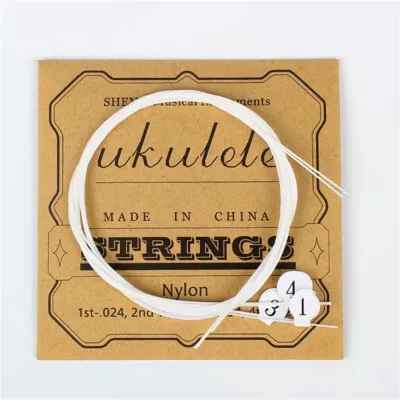


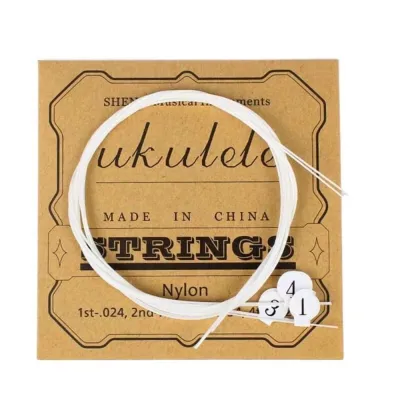
Prices are valid at publication and may change. Please refer to the product page for the latest price.
To protect your ukulele from scratches, dents, or accidental drops, prepare a clean, flat workspace. Lay down a soft microfiber cloth, a clean towel, or a dedicated instrument work mat on a sturdy table. To keep the ukulele stable and prevent the headstock from resting directly on the table, place a neck support block or a rolled-up towel underneath the neck. This elevation makes it much easier to turn the tuning pegs and thread the strings.
Before opening your new pack of strings, take a moment to inspect the critical contact points on your ukulele. Examine the nut slots at the headstock and the saddle at the bridge for any accumulated debris, dust, or sharp edges. Sharp plastic or wooden burrs in these areas can nick the soft synthetic strings, leading to premature breakage or tuning slippage. If you notice any rough spots, you can gently clean them out with a dry toothbrush or a soft cloth.
Removing Old Ukulele Strings Safely
When it is time to remove the old strings, safety and care should be your primary concerns. Never cut strings while they are under full tension. The sudden release of energy can shock the neck joint, damage the bridge, or cause the snapped string to whip upward, potentially scratching the soundboard or causing personal injury. Instead, always detune the strings gradually.

Turn the tuning pegs slowly to lower the pitch of each string until they are completely slack and floppy. You can detune them one by one or lower the tension incrementally across all four strings to keep the neck tension balanced. Once a string is completely slack, unwind it from the tuning post and pull the free end out of the peg hole.
At the bridge, the removal method depends on your ukulele’s design. For a traditional tie-block bridge, carefully untie the knot and slide the string out of the hole. If your instrument uses bridge pins, gently pry the pins upward using a peg puller—often integrated into peg winders—and lift the string end out of the bridge cavity. For slotted bridges, simply slide the knot out of its slot.
With all the strings removed, your fretboard is completely exposed and easy to clean. Use a dry or slightly damp microfiber cloth to wipe away dirt, sweat, and oils from the frets and the wood. Avoid using harsh household cleaners or furniture polishes, as these can dry out unfinished fretboard woods like rosewood, ebony, or walnut. A simple wipe-down with a clean cloth is usually all that is needed to restore the fretboard’s appearance and feel.
Installing New Ukulele Strings at the Bridge and Headstock
Installing new strings requires precision at both ends of the instrument to ensure optimal vibration transfer and prevent slippage. Start by identifying which string goes into which position, as ukulele strings vary in thickness. Most standard packs are labeled, so keep them organized as you work.
Begin the installation at the bridge. If your ukulele has a traditional tie-block bridge, pass the string through the hole from the soundhole side toward the bottom of the instrument, leaving a few inches of tail. Loop the short tail behind the long part of the string, then wrap it around itself inside the loop twice. For thin strings, like the high A string, wrap it three times to prevent the slick material from slipping. Pull the long end of the string firmly to tighten the knot against the back of the tie-block, ensuring the tail points downward away from the soundboard.
For slotted bridges, tie a secure double overhand knot at one end of the string, pull it tight, and slide the knot into the slot. If your ukulele uses bridge pins, insert the knotted or ball-end of the string into the hole, insert the pin with the groove facing the fretboard, and press down firmly while pulling upward on the string to lock it in place.
Next, guide the string up the neck, ensuring it sits squarely in the correct nut slot. Thread the free end through the hole in the corresponding tuning peg. Before you begin winding, it is crucial to leave some slack. If you pull the string completely taut before winding, you will not have enough wraps around the post, which leads to slippage. A reliable method is to pull the string straight, then pull it back about one fret’s distance to create slack.
Begin turning the tuning peg to wind the string. Ensure that each successive wrap around the tuning post coils downward, toward the face of the headstock. This downward wrapping increases the break angle of the string over the nut, which improves sustain, enhances tone, and prevents the string from buzzing or popping out of its slot. Aim for two to four neat, non-overlapping coils on the post. Overlapping wraps can pinch the string and cause unpredictable tuning slips.
Stretching Techniques to Stabilize Tuning
Once all four strings are installed and tuned roughly to pitch, you will notice they immediately begin to drop in pitch. This is completely normal for synthetic materials like nylon and fluorocarbon, which are highly elastic. To accelerate the break-in process and stabilize your tuning, you must manually stretch the strings.
Start by tuning the ukulele to standard pitch (G-C-E-A) using your digital tuner. Place your thumb on top of the first string near the 12th fret and slide your fingers underneath. Gently lift the string upward and away from the fretboard, applying moderate, even pressure. Do not yank or pull with excessive force, as this can damage the string or lift the bridge.
Slide your hand along the length of the string, stretching it gently from the bridge up to the nut. This movement helps distribute the tension evenly across the entire length of the string. Pay special attention to the areas near the nut and the bridge. Press down firmly on the string just behind the nut and just behind the bridge saddle to help seat the string into its slots and tighten the knots.
After completing one full pass of stretching, use your digital tuner to check the pitch. You will find that the string has dropped significantly, often by several semitones. Tune the string back up to its correct pitch. Repeat this stretching and retuning cycle three to five times for each string.
With each cycle, you will notice that the pitch drops less and less. Once the string holds its pitch with only a minor deviation after a stretch, the material has stabilized. This manual stretching compresses what would normally be weeks of frustrating tuning drops into a single, controlled session.
Troubleshooting Strings That Won't Stay in Tune
If your ukulele continues to go out of tune rapidly even after multiple stretching sessions, there may be an issue with the installation or the hardware. The first place to check is the bridge. Inspect the knots on a tie-block bridge to see if they are slowly unraveling or slipping. If the tail of the knot is sliding through, the string will lose tension continuously; you will need to untie and restring it with extra wraps.
Next, examine the tuning pegs at the headstock. If the string wraps are messy, overlapping, or crossing over themselves, they will slip under tension. Loose coils on the post will also cause instability. If the wraps look disorganized, loosen the string, pull it taut, and rewind it neatly so the coils lie flat against each other.
Another common culprit is nut slot binding. If you hear a sharp “ping” sound while tuning, the string is getting caught or pinched in the nut slot. This friction prevents tension from distributing evenly across the string. To fix this, you can lubricate the slot by drawing inside it with a graphite pencil, as the graphite acts as a dry lubricant.
Finally, check the mechanical stability of your tuning machines. If the gears are loose, the peg may slip backward under the tension of the string. Many tuning pegs have a small screw at the end of the tuning button; tightening this screw slightly can increase the resistance and prevent slippage. If you suspect structural issues, such as a lifting bridge or a warping neck, stop adjusting and consult a qualified luthier or instrument technician.
Frequently Asked Questions (FAQ)
How long does it take for new ukulele strings to settle?
With systematic manual stretching, new ukulele strings can settle and hold their tune within 24 to 48 hours. Without manual stretching, it can take one to two weeks of daily playing and constant retuning for the synthetic materials to lose their initial elasticity and stabilize naturally.
Should I change all ukulele strings at once or one by one?
Removing all strings at once is ideal if you want to thoroughly clean and condition the fretboard, as it gives you unobstructed access to the wood. However, changing strings one by one is safer for older, delicate, or vintage instruments, as it maintains constant tension on the neck and prevents the bridge saddle or nut from falling out if they are not glued down.
Do different ukulele string materials stretch differently?
Yes, different materials exhibit distinct stretching behaviors. Fluorocarbon strings are denser and less elastic than traditional nylon, meaning they generally stretch less and settle into tune much faster. Wound strings, which feature a metal wrap over a synthetic core, stretch very little compared to plain nylon or fluorocarbon strings and require a gentler stretching approach to avoid damaging the wrap.
Community discussion
Share your experience or ask a question. Comments are reviewed before publication.