
Changing your ukulele strings is a fundamental maintenance task that restores the instrument’s bright, resonant tone and ensures reliable tuning stability. Over time, synthetic strings lose their elasticity, develop flat spots from contact with the frets, and begin to sound dull or muddy. By learning how to safely remove old strings and install a fresh set, you can keep your ukulele sounding its best while protecting its delicate wood and hardware from damage. The process requires only a few basic tools, a bit of patience, and a systematic approach to tying secure knots and winding the pegs correctly.
Tools and Materials You Will Need
To begin, gather a fresh set of ukulele strings designed specifically for your instrument’s scale length. Ukuleles come in four primary sizes—soprano, concert, tenor, and baritone—and each requires a specific string length and tension profile. Installing tenor strings on a soprano ukulele, or vice versa, can lead to poor playability, improper tension, or even structural damage to the bridge and neck.
You will also need a few simple tools to make the job easier and safer for the instrument. A pair of wire cutters or high-quality nail clippers is essential for trimming excess string material once the installation is complete. An optional string winder can significantly speed up the process of loosening the old strings and winding the new ones, though it is not strictly necessary.
Products mentioned in this guide


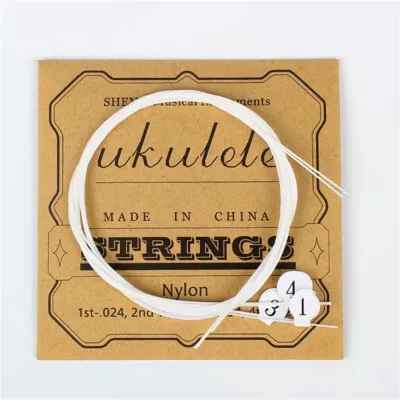


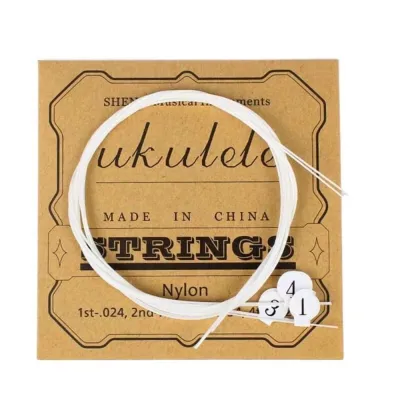
Prices are valid at publication and may change. Please refer to the product page for the latest price.
Before you begin, prepare a clean, stable, and soft workspace to protect your ukulele’s finish. Laying down a soft microfiber towel, a yoga mat, or a dedicated instrument work pad on a flat table prevents the back and sides of the instrument from getting scratched by loose debris. If you live in a warm, humid climate like Singapore, working in an air-conditioned room with stable humidity can also prevent the wood from experiencing sudden moisture shifts while the strings are off.
How to Remove Old Ukulele Strings Safely
Removing old strings requires a careful, gradual approach to prevent sudden changes in tension that could warp the neck or damage the bridge. Start by turning the tuning pegs to loosen the tension on each string completely. Never cut a string while it is still tuned to pitch, as the sudden release of energy can cause the string to snap violently, potentially scratching the soundboard or injuring your hands.

Once the strings are completely slack and loose, you can proceed to cut them if you prefer a faster removal process. If you choose to cut the strings, place a protective barrier, such as a thick piece of cardboard or a cleaning cloth, over the soundboard directly beneath the strings. This barrier shields the delicate wood finish from being nicked by the sharp jaws of your wire cutters or the whipping ends of the cut strings.
With the tension gone, carefully untie the knots at the bridge. For standard tie-bar bridges, this involves unwrapping the loop and sliding the string out of the hole. At the headstock, unthread the remaining string from the tuning peg holes. Take your time during this step to ensure that the rough, coiled ends of the old strings do not drag across the headstock or face of the ukulele, which can leave permanent hairline scratches.
How to Install New Ukulele Strings
When installing your new set, it is highly recommended for beginners to change one string at a time rather than removing all four at once. Keeping three strings under tension helps maintain consistent neck alignment and prevents the bridge from shifting if it is a floating design. It also provides you with an immediate visual reference for how the other strings are tied and wound.
Before opening your new string package, verify the correct orientation and order of the strings. Standard ukulele tuning is re-entrant (G-C-E-A), meaning the strings do not progress strictly from lowest to highest pitch. The G string (fourth string, closest to your face when playing) is typically higher in pitch than the C string (third string), which is the thickest string in the set. Double-check the color-coded packaging or labels on your new set to ensure you place each string in its correct slot.
Tying the Knot at the Bridge
Most beginner and intermediate ukuleles feature a tie-bar bridge, which requires you to tie a specific knot to secure the string. To start, thread one end of the new string through the hole in the bridge, passing from the soundhole side toward the bottom of the instrument. Pull about three to four inches of the string through the hole so you have enough material to work with.
Next, take the short end of the string and loop it up and over the long portion of the string. Tuck the short end under itself behind the bridge bar, creating a loop. For the thicker C and E strings, wrap the short end around itself inside the loop at least twice; for the thinner G and A strings, wrap it three times to prevent slipping.
Hold the short end firmly against the back of the bridge and pull the long end of the string toward the headstock. This action tightens the knot, locking the wraps securely against the back edge of the bridge bar. Ensure the final loop of the knot rests flat against the wood rather than riding up on top of the bridge, as an improperly seated knot can slip under tension or cause unwanted buzzing.
Before moving to the headstock, make sure you leave enough slack in the main length of the string. Do not pull the string completely taut between the bridge and the tuning peg yet. Having a moderate amount of slack ensures you can achieve a sufficient number of neat winds around the tuning post, which is critical for tuning stability.
Winding the Strings at the Tuning Pegs
Once the bridge knot is secure, thread the free end of the string through the hole in the corresponding tuning peg. Pull the string through until it is relatively straight, but leave about two to three inches of slack between the fretboard and the string. This slack will translate into several neat wraps around the tuning post as you turn the peg.
The direction you wind the string depends on the design of your ukulele’s headstock. For standard solid headstocks with two tuners on each side, the strings must wind inward toward the center of the headstock. This means you should turn the pegs so the string wraps around the inside of the post, maintaining a straight path from the nut slot to the peg.
As you turn the tuning peg to tighten the string, use your free hand to guide the string onto the post. Guide each successive wind so that it sits below the previous one, creating a neat, descending coil down the tuning post. This descending pattern is important because it increases the break angle of the string over the nut, which improves sustain and prevents the string from vibrating out of its slot.
Continue winding until the string is snug and begins to produce a clear pitch, but do not attempt to tune it fully to pitch just yet. Once the string is secure and under light tension, use your wire cutters to trim the excess string at both the headstock and the bridge. Leave about half an inch of excess string at the bridge knot to allow for minor settling, and trim the headstock end close to the post to prevent sharp ends from poking your fingers.
Stretching and Tuning Your New Strings
New ukulele strings are made of synthetic materials like nylon, fluorocarbon, or nylgut, which are highly elastic. Because of this elasticity, new strings will stretch significantly when first installed and will go out of tune almost immediately. This is completely normal and does not mean your tuning pegs are slipping; the material simply needs time to settle and reach its stable tension.
To speed up this settling process, you can perform gentle manual stretching. Place your fingers under a string near the middle of the fretboard and gently pull it upward, away from the neck, by about an inch. Hold it for a few seconds, then slide your hand up and down the length of the string, repeating the gentle tugging action at different points.
Be careful not to pull too hard, as excessive force can snap a thin string or put undue stress on the bridge. After stretching the string, you will notice that its pitch has dropped significantly. Use your tuner to bring the string back up to its correct pitch, and then repeat the stretching process.
You will need to repeat this cycle of tuning, stretching, and retuning several times for each string. In a humid environment like Singapore, the wood of the ukulele may also adjust slightly to the renewed tension, which can prolong the settling period. Typically, it takes a few days of regular playing and tuning before the new strings fully stabilize and hold their pitch consistently.
Common Mistakes to Avoid When Changing Strings
One of the most common mistakes beginners make is overtightening the strings during the initial tuning process. Because synthetic strings stretch so much, it can be easy to lose track of the pitch and wind the string far past its intended octave. This excessive tension can snap the string, pull the bridge off the soundboard, or warp the neck of the ukulele. Always use a reliable chromatic tuner and wind slowly.
Another frequent error is failing to protect the soundboard from scratches during the process. The sharp, clipped ends of nylon or fluorocarbon strings can easily scratch the soft wood of the ukulele face if they are allowed to whip around. Always keep one hand controlling the loose ends of the strings while cutting or winding, and keep your tools resting on your work mat rather than on the instrument itself.
Finally, ensure that each string sits perfectly in its designated slot on the nut at the top of the fretboard. If a string is too thick for the slot or is wound at an incorrect angle, it can bind in the nut, making tuning difficult and causing the string to wear out prematurely. A poorly seated string can also cause a persistent buzzing sound when played open, ruining the tone of your instrument.
Frequently Asked Questions (FAQ)
How Often Should You Change Ukulele Strings?
There is no strict calendar schedule for changing ukulele strings, as lifespan depends heavily on how often you play and your local climate. However, you should look for physical and auditory signs of wear to decide when it is time for a change. If your ukulele begins to sound dull, loses its bright resonance, or struggles to stay in tune even after being stretched, the strings are likely worn out.
Physical cues are also highly reliable indicators. Run your finger along the underside of the strings; if you feel flat spots, notches, or fraying where the strings meet the frets, they need to be replaced. For a casual player, changing strings every six to twelve months is usually sufficient, while frequent players or those living in humid climates may prefer to change them every three to four months to maintain optimal tone.
Can You Use Guitar Strings on a Ukulele?
You should never use steel guitar strings on a standard ukulele. Ukuleles are lightweight instruments designed to withstand the relatively low tension of nylon or synthetic strings. The immense tension exerted by steel guitar strings will quickly warp the neck, lift the bridge off the soundboard, or crack the body of the ukulele, causing irreparable structural damage.
While nylon classical guitar strings are physically made of a similar material, they are still not suitable substitutes. Classical guitar strings have different gauges, lengths, and tension profiles designed for a much larger instrument. Using them on a ukulele will result in a muddy tone, poor intonation, and improper tension that can make the instrument difficult to play and tune correctly. Always purchase dedicated ukulele strings matched to your instrument’s specific size.
Community discussion
Share your experience or ask a question. Comments are reviewed before publication.