
Changing your ukulele strings is one of the most effective ways to restore the bright, resonant tone of your instrument. Over time, strings stretch, lose their elasticity, and accumulate dirt and oils from your fingers, resulting in a dull sound and poor intonation. By learning to replace them yourself, you can keep your instrument sounding its best while avoiding unnecessary trips to a music shop.
The process requires patience and a few basic tools, but it is highly manageable for players of all levels. Whether you play a soprano, concert, tenor, or baritone ukulele, the fundamental steps remain the same: preparing your workspace, safely removing the old strings, securing the new ones at the bridge, winding them at the headstock, and stretching them to stabilize the tuning. Taking your time during each step ensures you do not scratch the wood or put uneven stress on the neck.
Preparing Your Tools and Choosing the Right Ukulele Strings
Before you begin, you must select the correct replacement strings for your specific instrument. Ukuleles come in four primary sizes—soprano, concert, tenor, and baritone—and each size requires a corresponding string set designed for its scale length and tension requirements. Installing baritone strings on a soprano ukulele, or vice versa, can cause structural damage or render the instrument unplayable due to incorrect tension.
Products mentioned in this guide

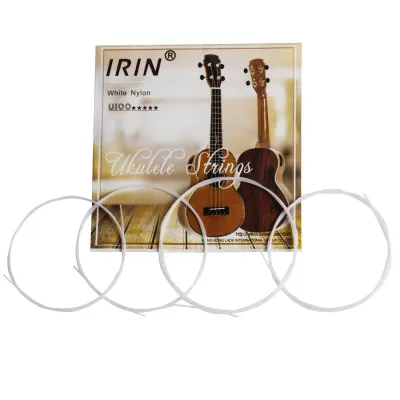

Prices are valid at publication and may change. Please refer to the product page for the latest price.
You should also consider the string material based on your tonal preferences and the manufacturer’s recommendations. Nylon strings offer a warm, traditional, and mellow tone, while fluorocarbon strings tend to be brighter, thinner, and more resistant to temperature and humidity changes. If you live in a highly humid tropical environment, fluorocarbon strings are often favored for their stability, but you should always verify compatibility with your ukulele manufacturer’s specifications.
Gathering the necessary tools beforehand will make the process smooth and prevent accidental damage to your instrument. You will need a new set of high-quality ukulele strings, a pair of wire cutters or string cutters, and a soft microfiber cloth. A peg winder or string winder is highly recommended to speed up the winding process, though it is not strictly mandatory.
Finally, prepare a clean, flat, and well-lit workspace. Laying a soft towel or a dedicated instrument work mat on a table will protect the back of your ukulele from scratches while you work. Ensure you have a small container nearby to hold any discarded string clippings or small parts, keeping your workspace organized and safe.
Safely Removing the Old Strings
The first active step in restringing is removing the old strings safely. It is crucial to avoid cutting strings while they are under full tension, as the sudden release of force can warp the neck, damage the bridge, or cause the snapped string to scratch the instrument’s finish.

Begin by turning the tuning pegs to loosen the tension on each string gradually. Pluck the string as you turn the peg to ensure you are rotating it in the correct direction to lower the pitch. Continue detuning until the strings are completely slack and floppy.
Once the tension is fully released, you can safely unwind the strings from the tuning posts. Carefully unthread the string from the hole in the tuning peg. If your ukulele has a tie-bar bridge, untie the knots at the bridge end. For instruments with bridge pins or slot bridges, gently slide or pull the string out of its slot. If the strings are very long, you can use your wire cutters to cut the slack sections to make removal easier, but only after the tension is completely gone.
With the strings removed, you have an excellent opportunity to clean the fretboard and body. Use a dry, soft microfiber cloth to wipe away accumulated dust, sweat, and finger oils from the frets and the soundboard. Avoid using harsh household chemical cleaners, polish, or excessive moisture, as these can damage the wood’s natural finish or lift the glue holding the frets in place. If the fretboard is exceptionally dry, check the manufacturer’s care instructions to see if a tiny drop of specialized fretboard conditioner is recommended.
Tying and Securing the New Strings at the Bridge
Securing the new strings at the bridge is often considered the most challenging part of the process, but it is straightforward once you understand the knotting technique. Most traditional ukuleles feature a tie-bar bridge, which requires you to tie a specific locking knot to keep the string from slipping.
Start with the fourth string (the G string on a standard soprano, concert, or tenor setup). Thread one end of the string through the hole in the bridge, passing it from the soundhole side toward the bottom of the ukulele. Pull about five to ten centimeters of the string through the hole.
Take the short tail end of the string and loop it up and behind the long part of the string. Then, tuck the tail end under itself inside the loop you just created behind the bridge. For slicker materials like fluorocarbon or thin nylon strings, you should wrap the tail under the loop two or three times to prevent slippage. Ensure the final wrap of the knot rests over the back edge of the bridge block, pressing down on the tail to lock it in place.
Gently pull the long end of the string toward the headstock while holding the knot flat against the bridge plate. The tension should tighten the knot securely against the bridge. Make sure the tail end points downward, away from the soundhole, and is tucked neatly so it does not vibrate against the soundboard, which can cause an annoying buzzing sound when playing.
Before moving to the headstock, double-check that the string is seated perfectly in the center of its corresponding groove on the bridge saddle. Repeat this knotting process for the remaining three strings, ensuring each knot is tight, flat, and secure.
Attaching and Winding the Strings at the Headstock
Once all four strings are anchored at the bridge, you can begin attaching them to the tuning pegs at the headstock. Proper winding technique is essential for maintaining tuning stability and ensuring the correct break angle over the nut.
Pull the first string up to the headstock and thread it through the hole in its corresponding tuning post. Leave a generous amount of slack—typically about two to three fingers of space between the string and the fretboard at the twelfth fret. This slack is necessary because you need enough string length to wrap around the tuning post multiple times to prevent slipping.
Begin winding the tuning peg to tighten the string. As you turn the peg, guide the string so that each successive wind wraps neatly downward on the post, underneath the previous loop. This downward winding forces the string closer to the headstock face, creating a sharper break angle over the nut, which improves sustain and prevents the string from buzzing in its slot.
Ensure the wraps do not overlap or cross over one another, as overlapping wraps can pinch the string and cause tuning instability. Keep light tension on the string with your free hand as you wind to keep the wraps tight and orderly. You can use a peg winder to speed up this step, but turn slowly as the string approaches its target pitch.
Once the string is securely tensioned and holding a basic pitch, use your wire cutters to trim the excess string tail at the headstock. Leave about half a centimeter of slack beyond the tuning post to prevent the string from slipping back through the hole. Do not trim the excess string until you are certain the string is wound correctly and holding tension.
Stretching and Tuning Your Newly Strung Ukulele
New ukulele strings are highly elastic and will stretch significantly when first installed. If you do not stretch them manually, your ukulele will go out of tune almost immediately after you tune it.
To accelerate the settling process, you must gently stretch each string along its entire length. Place your fingers under a string near the soundhole and pull it gently upward, away from the fretboard, by about one to two centimeters. Slide your hand up and down the neck, applying light, even tugs along the string. Avoid pulling too hard, as excessive force can snap a new string or damage the bridge.
After stretching a string, you will notice that its pitch has dropped significantly. Use a digital tuner to bring the string back up to standard pitch. For a standard soprano, concert, or tenor ukulele, the traditional tuning is G-C-E-A from the top string to the bottom string.
Repeat this stretching and tuning cycle three to five times for each string. Even with manual stretching, new nylon or fluorocarbon strings will continue to settle and stretch over the first few days of playing. You should expect to retune your instrument frequently during your initial playing sessions.
Keep a close eye on the bridge knots and tuning posts during these first few days. Check for any signs of the knots slipping or the wraps on the tuning posts unraveling. If a knot begins to slip, loosen the string immediately and re-tie it securely before it slips completely and scratches the soundboard.
Frequently Asked Questions (FAQ)
How often should I change my ukulele strings?
You should generally change your ukulele strings every six to twelve months, depending on how often you play and the environmental conditions. If you play daily, you may need to replace them more frequently to maintain optimal tone. Observable signs that indicate it is time for a change include physical wear such as fraying, discoloration, or deep grooves worn into the underside of the strings from the frets. You may also notice a loss of intonation, where the instrument struggles to stay in tune or sounds out of tune with itself as you play higher up the neck. Additionally, if your ukulele begins to sound noticeably dull, muddy, or lacks its usual sustain, a fresh set of strings will often restore its bright, lively voice.
Can I mix different string brands or materials on one ukulele?
It is highly recommended to avoid mixing different string brands, gauges, or materials on a single ukulele. String manufacturers design their sets with carefully balanced tension profiles to ensure consistent playability, feel, and volume across all four strings. Mixing a high-tension fluorocarbon string with a low-tension nylon string can create an uneven feel across the fretboard, making it difficult to play smoothly. Furthermore, mismatched tensions can exert uneven stress on the ukulele’s neck and bridge, potentially leading to structural warping over time. To maintain consistent intonation and protect your instrument, always install a complete, matching set of strings from a single manufacturer, and consult the manufacturer’s guidelines if you wish to experiment with alternative materials.
Community discussion
Share your experience or ask a question. Comments are reviewed before publication.