
Changing your ukulele strings does not have to be a stressful chore. By releasing tension gradually, protecting the delicate wooden soundboard, and tying secure knots, you can complete the process safely at home. Taking a methodical approach prevents sudden string snaps and protects the bridge from structural damage.
Whether you play a soprano, concert, tenor, or baritone instrument, installing a fresh set of strings restores the bright, resonant tone of your ukulele. This guide walks you through the entire process, from selecting the right materials to stretching the new strings for optimal tuning stability.
Preparation: Choosing the Right Strings and Tools
Before you begin, you must select a compatible ukulele strings set that matches your instrument’s specific size and scale length. Ukuleles come in several standard sizes, and using strings designed for a different scale length can create incorrect tension. Excessive tension can warp the neck or pull the bridge off the soundboard, while insufficient tension results in loose, buzzing strings.
Products mentioned in this guide

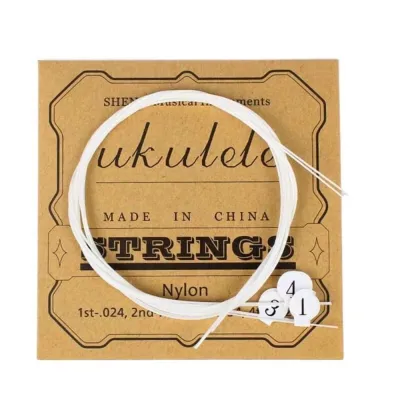

Prices are valid at publication and may change. Please refer to the product page for the latest price.
Most modern ukulele strings are made from synthetic materials like nylon, fluorocarbon, or titanium. Nylon strings offer a warm, traditional tone and are highly flexible, making them gentle on fingers. Fluorocarbon strings are denser, producing a brighter sound and offering excellent durability, especially in warm, humid environments like Singapore where humidity levels can affect tuning stability and wood expansion.
To complete the restringing process safely, gather the necessary tools beforehand. You will need a dedicated string winder to speed up the process, a pair of sharp wire cutters, a soft microfiber cloth for cleaning, and a bridge protector. A simple piece of thick cardboard or heavy paper can serve as an effective bridge protector to shield the wooden body from accidental tool slips.
Prepare a clean, flat, and stable workspace, such as a dining table or desk. Lay down a soft towel or yoga mat to protect the back and sides of your ukulele from scratches. Use a neck cradle or a rolled-up towel to support the neck of the instrument, keeping it stable and elevated while you work.
Step 1: Removing Old Strings Safely
Removing old strings requires patience to avoid shocking the wood of your ukulele. Never cut strings while they are under full tension. The sudden release of force can cause the neck to snap back rapidly, potentially cracking the soundboard or lifting the bridge from its glued joint.

Begin by detuning each string slowly. Turn the tuning pegs to loosen the tension gradually, working across the strings rather than detuning one completely while others remain tight. Loosen each string until it is entirely slack and can be easily pulled away from the fretboard.
Once the strings are completely slack, place your bridge protector or a soft cloth over the soundboard directly behind the bridge. This barrier protects the delicate wood finish from being scratched by the sharp, stiff ends of the old strings as you untie them.
With the soundboard protected, you can safely cut the slack strings near the soundhole using your wire cutters. Cutting the slack strings makes them much easier to unthread from the tuning pegs and untie from the bridge. If the strings are heavily corroded or dirty, cutting them prevents you from dragging grime through the narrow bridge holes or tuning peg slots.
Step 2: Cleaning and Inspecting the Fretboard and Bridge
With the old strings removed, you have a rare opportunity to perform essential maintenance on the exposed fretboard and bridge. Use a dry or slightly damp microfiber cloth to wipe away accumulated sweat, skin oils, and dust from the frets. In humid climates, moisture can trap grime along the fret wires, which can degrade both the wood and your new strings over time.
Gently run your finger along the edges of the fretboard to check for sharp fret ends. Changes in humidity can cause the wooden fretboard to shrink slightly, leaving the metal fret wires protruding. If you feel sharp edges, they can slice into your new strings during play, causing premature breakage.
Next, inspect the bridge and saddle closely. Look for deep grooves worn into the saddle, cracks in the wooden bridge block, or any separation between the bridge and the soundboard. The saddle should sit firmly in its slot without leaning forward or wobbling.
If you notice a visible gap between the bridge and the body of the ukulele, or if there are structural cracks in the wood, stop the restringing process immediately. Do not install new strings, as the tension will worsen the damage and could tear the bridge off entirely. Under these conditions, consult a qualified instrument technician or luthier to repair the structural issues before proceeding.
Step 3: Installing the New Ukulele Strings Set
Installing a new ukulele strings set requires careful handling to ensure even tension distribution across the neck. It is best to install the strings one by one or work from the outside strings inward to keep the neck balanced. Avoid pulling the strings too tightly before they are secured, as this can crease the material and create weak points.
Securing the Strings at the Bridge
The method you use to secure the strings depends on whether your ukulele has a tie-bar bridge, a slotted bridge, or a pin bridge. Tie-bar bridges are the most common and require a specific knot to prevent the string from slipping under tension.
To tie a secure knot on a tie-bar bridge, pass the end of the string through the hole from the soundhole side, leaving about three inches of excess string extending behind the bridge. Loop the short end behind the long part of the string, then tuck it under itself inside the loop. For nylon or fluorocarbon strings, tuck the end under a second time to create a double wrap, which prevents the slick synthetic material from slipping.
Pull the long end of the string gently to tighten the knot, ensuring the wraps sit flat against the back of the bridge block. The knot must be snug and positioned so that the tail points downward, away from the soundboard. This even distribution of pressure prevents the knot from slipping out and striking the top of the instrument.
Avoid pulling the string at sharp, harsh angles against the edge of the bridge hole while tightening. Sharp bends can weaken the synthetic fibers, creating a stress point where the string is highly likely to snap once tuned to pitch.
Winding the Strings at the Tuning Pegs
Once the bridge end is secure, thread the other end of the string through the hole in the corresponding tuning peg. Pull the string relatively taut, then pull back slightly to leave about one to two inches of slack above the fretboard. This slack is necessary to allow the string to wrap around the tuning post multiple times, which prevents slipping.
Begin winding the tuning peg, ensuring the string wraps toward the inside of the headstock. As you turn the peg, use your other hand to guide the string so that each successive wind sits neatly below the previous one. This downward winding pattern increases the break angle over the nut, which keeps the string seated firmly in its slot and prevents unwanted buzzing.
Never allow the winds to overlap or cross over one another on the tuning post. Overlapping winds create friction points and uneven pressure, which can cause the string to bind, slip out of tune, or snap prematurely under tension. Aim for three to four neat, parallel wraps around the post for optimal stability.
Step 4: Stretching and Tuning to Prevent Breakage
New synthetic strings are highly elastic and must be stretched gradually to hold their pitch. Trying to tune a brand-new string directly to standard pitch in one continuous motion puts immense sudden stress on the material, often causing it to snap at the bridge or nut.
To prevent breakage, tune all four strings up to a pitch slightly below standard tuning first. Once they are close, perform a gentle manual stretch. Place your fingers under the string near the soundhole and lift it gently a few centimeters away from the fretboard, sliding your hand slowly from the bridge up to the nut. Repeat this motion two or three times for each string.
After stretching, you will notice the pitch has dropped significantly. Tune the strings back up, gradually bringing them closer to standard pitch (G-C-E-A) over several passes. This incremental approach allows the knots at the bridge to tighten slowly and the wraps at the tuning pegs to settle without sudden shocks.
Once the strings are fully stretched and holding their pitch relatively well, use your wire cutters to trim the excess string ends. At the headstock, trim the ends leaving about five millimeters of clearance. At the bridge, trim the tails neatly so they do not touch the soundboard, which can cause annoying vibrations and buzzing noises while playing.
Troubleshooting: Why Strings Break and How to Avoid It
If you experience recurring string breakage, the issue is often caused by friction or sharp edges rather than a defective ukulele strings set. Inspect the contact points where the strings touch the instrument, specifically the nut slots, the saddle, and the edges of the tuning peg holes.
Over time, the plastic or bone saddle can develop sharp burrs or deep, narrow grooves that pinch the string. Similarly, the nut slots can become clogged with debris or worn unevenly. If a string always snaps at the exact same spot near the nut or saddle, a sharp edge is likely cutting into the material as you tune.
Different string materials also have unique physical properties that affect their durability. Fluorocarbon strings are thinner and under higher tension than nylon, making them more sensitive to sharp contact points. Nylon strings are more forgiving of minor imperfections but require more initial stretching to stabilize.
If you identify sharp edges or deep grooves on your saddle or nut, do not attempt to file them down yourself unless you have specialized tools and experience. Filing too deeply can ruin the instrument’s action and cause permanent buzzing. Instead, stop and take your ukulele to a professional luthier who can safely adjust the setup and smooth out any problematic contact points.
Frequently Asked Questions (FAQ)
How long does it take for new ukulele strings to stay in tune?
New synthetic ukulele strings typically take between three to seven days of regular playing and tuning to fully stabilize. Because materials like nylon and fluorocarbon are highly elastic, they continue to stretch and settle under tension for several days after installation.
You can accelerate this settling process safely by performing gentle manual stretches during your first few practice sessions. Tune the ukulele, stretch each string gently along its length, and then tune it back to pitch. Repeating this cycle a few times will help the knots tighten and the wraps on the tuning pegs seat securely.
If a string continues to drop in pitch drastically after a week of daily playing, inspect the bridge knot and the tuning peg wraps. A continuous drop in pitch usually indicates that the knot at the bridge is slowly slipping loose, or that the wraps around the tuning peg are overlapping and sliding.
Community discussion
Share your experience or ask a question. Comments are reviewed before publication.