
To change a violin string safely without damaging the bridge or soundpost, you must replace the strings one by one, maintain constant downward pressure on the top plate, and actively monitor the bridge’s alignment. Removing all strings at once is the most common mistake, as it removes the tension holding these critical components in place. By following a systematic, sequential replacement process, you can protect your instrument’s structural integrity and avoid costly repairs.
Understanding the delicate balance of tension that holds your violin together is key to performing this basic maintenance. With the right tools and a patient approach, you can confidently replace your strings at home while keeping your bridge and soundpost perfectly secure.
Why the Bridge and Soundpost Are Vulnerable During String Changes
The violin is an acoustic marvel held together almost entirely by friction and tension rather than glue. The soundpost, a small spruce cylinder positioned inside the violin body just behind the treble foot of the bridge, is not glued or fastened to the wood. Instead, it relies completely on the downward pressure of the strings transmitted through the bridge to remain wedged upright between the top plate and the back plate.
Products mentioned in this guide

![[SG 🚚] King Lion Violin String Copper-Nickel White Copper Violin String Set Violin Accessories V134 Universal Steel Core](https://img.lazcdn.com/g/p/b2ab032ebafdd1f562a774c73cc2e0e8.jpg_400x400q80.jpg_.webp)

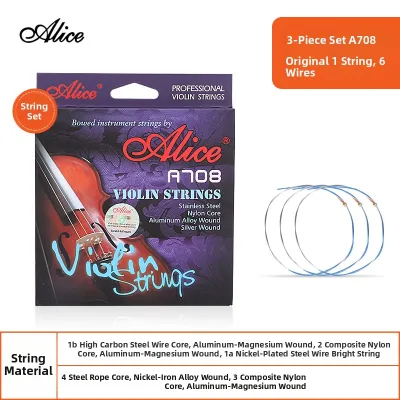

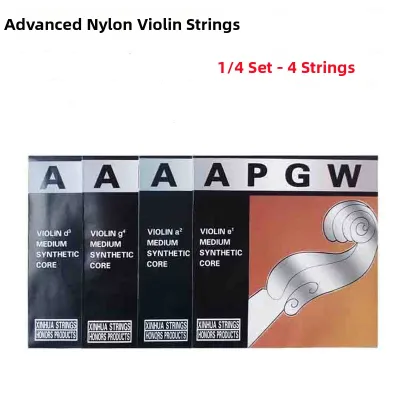
Prices are valid at publication and may change. Please refer to the product page for the latest price.
Similarly, the bridge is not glued to the varnished top plate. It is held in its precise position solely by the downward force of the strings and the resulting friction. The total tension of four violin strings tuned to standard pitch can exceed 20 kilograms, creating immense downward pressure on the thin spruce top.
If you remove all four strings simultaneously, this downward pressure drops to zero. Without this stabilizing force, the soundpost can easily fall over inside the instrument. Resetting a fallen soundpost requires specialized luthier tools and expertise, and a loose soundpost rolling around inside can scratch the delicate interior wood or crack the top plate. Furthermore, uneven tension during string changes can cause the bridge to warp, lean forward, or snap entirely under the sudden shift in forces.
Tools and Materials Needed for a Safe String Change
Before beginning, gather all necessary tools and materials to ensure a smooth, scratch-free replacement process. Having everything within reach minimizes the risk of leaving the instrument unattended or making sudden, clumsy movements.

- New Violin Strings: Verify the correct size (such as 4/4 full size, 3/4, or 1/2) and core material (synthetic, steel, or gut) before opening the packaging. Mixing sizes or tension ratings can warp the bridge or damage the pegbox.
- Soft Microfiber Cloth or Towel: Use this to drape over the violin's top plate to protect the delicate varnish from dropped pegs, sharp string ends, or a slipping bridge.
- Soft Graphite Pencil: A standard 2B or 4B pencil is ideal. The graphite acts as a dry lubricant in the bridge and nut grooves, allowing the string to glide smoothly during tuning without binding.
- Peg Compound or Chalk: Singapore's high relative humidity can cause wooden pegs to swell and stick, or conversely, slip during dry spells in air-conditioned rooms. Peg compound (also known as peg dope) or a tiny amount of chalk helps regulate friction.
- String Winder: This optional tool is designed specifically for violin pegs to reduce hand fatigue and speed up the winding process.
Step-by-Step Guide to Replacing Violin Strings
Preparing the Instrument and Workspace
Find a flat, clean, stable, and well-lit surface, such as a sturdy table. Avoid working on your lap if you are a beginner, and never balance the instrument on the edge of a chair or couch where it could easily slide off. Lay down a soft towel or foam pad to protect the back of the violin from scratches.
Drape a clean microfiber cloth over the top plate, specifically covering the area between the fingerboard, bridge, and tailpiece. This simple step protects the delicate varnish from the sharp, metal ends of the strings or a slipping bridge. Keep your new strings organized by pitch so you do not accidentally install a string in the wrong position.
Removing the Old Strings One at a Time
The absolute golden rule of violin maintenance is to never remove all four strings at the same time. Always replace the strings one by one, completing the entire process for one string before moving to the next. This keeps constant downward pressure on the bridge and soundpost, preventing them from shifting or falling.
Begin with a systematic order to balance the tension across the bridge. A common, safe sequence is to start with the lowest string (G string), followed by the highest (E string), then the D string, and finally the A string. This alternating pattern keeps the lateral forces on the bridge feet relatively balanced.
Slowly turn the tuning peg toward you to loosen the tension on the chosen string. Unwind the string completely until you can gently pull the upper end out of the pegbox hole. Carefully unhook the ball or loop end from the tailpiece or fine tuner, ensuring the metal end does not scratch the wooden tailpiece or the top plate of the violin.
Installing and Winding the New Strings Correctly
Before threading the new violin string, take your soft graphite pencil and draw inside the corresponding grooves of both the nut (at the top of the fingerboard) and the bridge. The graphite coating reduces friction, preventing the string from binding, chewing into the wood, or snapping during tuning.
Identify the pegbox end of the new string (usually wrapped in colored silk) and thread it through the hole in the tuning peg. Allow about 5 to 10 millimeters of the string to protrude through the other side of the hole. Begin winding the peg away from you, guiding the first turn so it crosses over the short protruding tail of the string to lock it in place.
As you continue winding, guide the string so it wraps neatly and progressively toward the wooden wall of the pegbox. This creates a slight lateral wedge effect that helps push the peg into its peg hole, preventing it from slipping out under tension. Ensure the string does not overlap itself haphazardly on the peg, as this can cause uneven tension, jamming, or wood damage. Guide the string over the nut groove and the bridge groove, making sure it sits perfectly centered.
Tuning, Stretching, and Checking Bridge Alignment
Slowly turn the peg to bring the new string up to pitch. Because new strings are highly elastic, they will stretch and drop in pitch rapidly at first. As you increase the tension, the string will naturally drag the top of the bridge forward toward the fingerboard.
You must actively check the bridge’s posture during this process. To correct any leaning, use the “pinch and push” technique. Place the violin on your lap with the scroll pointing away from you. Support the bridge with both hands, placing your thumbs on the tailpiece side of the bridge and your index fingers on the fingerboard side. Gently pinch the top of the bridge and nudge it back toward the tailpiece until the back of the bridge (the side facing the tailpiece) is perfectly perpendicular (90 degrees) to the top plate of the violin.
Repeat this alignment check and adjustment after tuning each individual string. Once all strings are installed, fine-tune the entire instrument to standard pitch. Keep in mind that new synthetic or gut strings may take several days to stretch and stabilize completely.
How to Actively Protect the Bridge and Soundpost During Tuning
The “one string at a time” rule is your primary defense. If a string breaks during tuning or playing, do not panic and strip the other strings off. Keep the remaining strings under tension to secure the soundpost until you have a replacement violin string ready.
Regularly inspect the physical condition of your bridge. A healthy bridge should sit with its feet completely flush against the curved top plate of the violin. There should be no gaps under the feet, no visible warping or bending in the middle of the wood, and the string grooves should not be cut too deep (ideally, the strings should sit only halfway into the groove depth).
In Singapore’s humid climate, wood can warp more rapidly under uneven tension. If you notice that the bridge is warped, has deep grooves that pinch the strings, or if the feet do not sit flush even when the bridge is perpendicular, do not attempt to force it or sand it down yourself. Stop the process immediately and bring your instrument to a professional luthier or specialized violin repair shop in Singapore to have the bridge professionally adjusted, planed, or replaced.
Never use excessive force when executing the “pinch and push” technique. Applying too much downward or lateral force can snap the fragile maple bridge or, worse, crack the spruce top plate of your violin. If the bridge does not budge easily, loosen the string tension slightly before attempting to adjust it.
Troubleshooting Common Issues Without Damaging the Instrument
- Peg Slippage: If a peg refuses to hold tension and slips back, do not force it inward with extreme pressure, as this can split the pegbox. Instead, remove the peg and apply a small amount of peg compound (peg dope) or a light swipe of chalk to the contact points on the peg shaft. Never use liquid adhesives, rosin, or household oils, which can permanently ruin the wood and peg fit.
- Strings Slipping from Fine Tuners: If a loop-end or ball-end string slips out of the tailpiece fine tuner, check that the hook or slot is clean and not bent. Ensure the fine tuner screw is not wound all the way down, as an over-extended tuner can dig into the violin's top plate or snap the string's loop. Back the screw out almost completely before installing the new string.
- Creaking or Pinging Sounds: A sharp "ping" or creaking sound during tuning indicates that the violin string is getting caught in either the nut or bridge groove. This friction can cause the string to snap prematurely. Immediately stop tuning, loosen the string, and apply more soft graphite pencil lubricant to the groove.
- The Fallen Soundpost: If you hear a loose rattle inside your violin and notice that the soundpost has fallen over, do not attempt to shake it out or upright it yourself with wire or tweezers. Immediately loosen all remaining strings to a low tension to relieve pressure on the top plate, and take the instrument directly to a professional luthier. Setting a soundpost requires specialized setter tools, precise acoustic positioning, and professional expertise to avoid cracking the soundpost patch or top wood.
Frequently Asked Questions (FAQ)
How often should I change my violin strings?
The ideal replacement frequency depends on your playing hours, the type of strings used, and your sweat acidity. For daily players or students practicing several hours a day, replacing strings every 3 to 6 months is recommended to maintain optimal tonal brilliance and responsiveness. Casual players can typically wait 9 to 12 months.
In Singapore’s high-humidity environment, the metal windings on synthetic or steel-core strings can corrode and tarnish faster. Look out for clear signs of degradation: a dull or muddy tone, visible fraying or unraveling of the metal winding (especially near the nut or bridge), rust spots, or an inability of the instrument to hold tune or play true fifths across adjacent strings.
Can I reuse old violin strings in an emergency?
While it is physically possible to reinstall a previously used string if it is not broken, it is not recommended for regular use. Once a violin string has been tensioned to pitch for an extended period, it loses its elasticity, core stability, and structural integrity.
Reused strings will sound noticeably dull, lack projection, and struggle to hold pitch. Furthermore, the crimped sections near the peg and tailpiece are structurally weakened and highly prone to snapping upon re-tensioning. Keep old, unbroken strings in your case strictly as a temporary, single-day emergency backup until you can purchase a fresh, high-quality replacement set.
Community discussion
Share your experience or ask a question. Comments are reviewed before publication.