
Selecting an electronic drum kit for electronic music production requires a shift in perspective compared to choosing one for traditional acoustic practice. While acoustic drummers prioritize natural cymbal swing and realistic shell resonance, a music producer focuses on MIDI data accuracy, trigger latency, and sound design flexibility. NUX electronic drums offer a range of options, but finding the right model depends on how seamlessly the kit integrates with your digital audio workstation (DAW) and how precisely its pads translate your physical performance into digital notes.
To make the right choice, you must evaluate the drum module’s internal processing capabilities, the physical response of the pads, and the available connectivity options. Whether you plan to use the module’s internal synthesizer sounds or trigger high-end virtual instrument (VST) libraries on your computer, understanding these technical specifications ensures your workflow remains uninterrupted. By focusing on hardware compatibility and MIDI performance, you can select a kit that serves as a powerful controller and creative tool in your studio.
Key Module Features for Electronic Music Production
The drum module, often referred to as the brain, is the core of any electronic drum kit. For electronic music producers, the internal sound library needs to extend far beyond standard acoustic drum kit emulations. While realistic snare wires and maple bass drums are excellent for rock or jazz, electronic genres like techno, house, drum and bass, and hip-hop demand synthetic transients, deep sub-bass drops, and crisp drum machine samples. When evaluating a NUX module, check the specifications to see if the pre-loaded library includes dedicated electronic kits, 808-style voices, and synthetic percussion elements.
Products mentioned in this guide
![NUX DM-210 Electronic Drum Kit [All Mesh Drum Pad] with [Bluetooth Audio/MIDI]](https://img.lazcdn.com/g/p/d5e0c23076a125810eaf8e8bf13b82db.jpg_400x400q80.jpg_.webp)
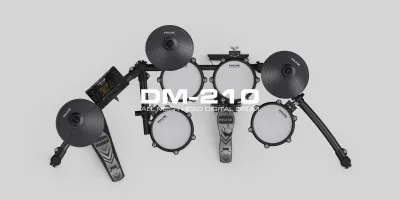
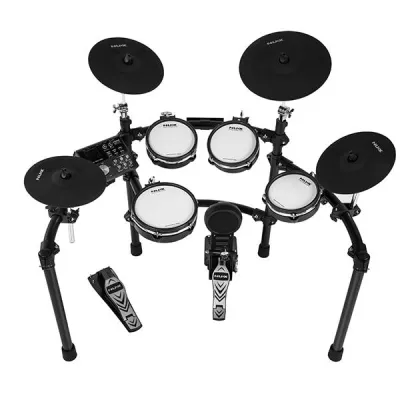
Prices are valid at publication and may change. Please refer to the product page for the latest price.
Beyond the raw samples, the ability to manipulate those sounds directly within the module is a major asset for sound design. Look for modules that support sound layering, which allows you to stack an acoustic snare sample with a synthetic clap or white noise burst on a single pad trigger. Additionally, verify if the module offers adjustable envelope parameters such as attack, decay, and release. Being able to shorten the decay of a kick drum to make it punchier, or lengthening the release of a cymbal to create an ambient wash, allows you to tailor the kit’s output to match the tempo and vibe of your track. Internal effects processing, including compression, saturation, and spatial effects like delay or reverb, should also be checked on the official spec sheet to ensure you can shape your sounds before they even reach your recording software.
Another critical technical specification is polyphony, which refers to the maximum number of individual notes or voices the module can play simultaneously. In electronic music, drum patterns can become incredibly dense, featuring rapid double-kick patterns, rolling hi-hats, sustained cymbal crashes, and layered percussion loops. If a module has a low polyphony limit, triggering a new sound can cause an active, decaying sound to be abruptly cut off, resulting in an unnatural and choppy audio output. Ensure the module you choose has a high enough polyphony count to handle complex, multi-layered performances without dropping notes, especially if you plan to play along with backing tracks or trigger internal loops.
Assessing Pad Sensitivity and Dynamic Response
The physical pads are your direct interface with your music production software, making their sensitivity and dynamic response paramount. In a studio environment, the choice between mesh heads and rubber pads significantly impacts your playing experience and the quality of the MIDI data you capture. Mesh heads are generally preferred for their realistic rebound and tension adjustability, which closely mimic the feel of acoustic drumheads. This physical response allows for greater control over dynamic variations, making it easier to execute subtle ghost notes and expressive rolls that translate into natural-looking velocity curves in your DAW. Rubber pads, while often more compact and durable, tend to have a stiffer rebound that can fatigue your wrists during long tracking sessions and may offer a more limited dynamic range.

To capture a highly expressive performance, you must also consider the zoning capabilities of the pads. A multi-zone pad can send different MIDI note numbers depending on where you strike it. For example, a dual-zone snare pad allows you to map a standard snare hit to the center head and a rimshot or cross-stick sound to the outer rim. For electronic music production, having multi-zone tom and cymbal pads opens up creative possibilities for mapping non-traditional sounds, such as triggering a vocal sample on a cymbal bell or an effects sweep on a tom rim. Check the product specifications of the NUX kit to confirm which pads support multi-zone triggering and ensure they align with your performance style.
The underlying triggering algorithms and threshold settings within the module play a vital role in preventing unwanted double-triggering or missed hits. When playing fast, repetitive patterns common in electronic genres—such as rapid trap hi-hat rolls or intense drum and bass breakbeats—the module must process these rapid signals accurately. Look for modules that allow you to customize trigger settings, including sensitivity, threshold, and crosstalk rejection. Crosstalk occurs when the vibration from striking one pad accidentally triggers an adjacent pad; having robust crosstalk settings ensures that your MIDI recordings remain clean and free of stray notes that require tedious manual editing in your DAW.
MIDI Connectivity and DAW Integration Requirements
For modern electronic music production, seamless integration with your computer and software is non-negotiable. The primary method of connection for most home studios is USB-MIDI. A class-compliant USB-MIDI port on the NUX drum module allows you to connect the kit directly to your computer, Mac, or mobile production device without needing to install specialized drivers. This plug-and-play functionality enables the drum kit to act as a universal MIDI controller, allowing you to trigger any software sampler, synthesizer, or drum machine plug-in within your DAW instantly.
While USB-MIDI is standard for computer-based setups, producers who work with hardware synthesizers, samplers, or standalone drum machines should look for traditional 5-pin MIDI ports. Having a physical MIDI Out port on the drum module allows you to bypass the computer entirely, routing your performance data directly into external hardware gear. This is particularly useful for live performances or dawless production setups where reliability and tactile hardware control are prioritized. If your studio relies on a hybrid setup of hardware and software, verifying the presence of these traditional ports on the NUX module is an essential step before purchasing.
Wireless connectivity is another feature to evaluate, with many modern modules offering MIDI over Bluetooth. While Bluetooth MIDI provides a convenient, cable-free connection to tablets or smartphones for casual practice and quick beat sketching, it is important to understand its limitations regarding latency. Latency is the delay between the physical strike of the pad and the moment you hear the sound. For real-time recording and precise tracking, even a few milliseconds of wireless latency can disrupt your timing and feel. Therefore, while Bluetooth is excellent for practice and wireless editing of module settings via mobile apps, a wired USB or 5-pin MIDI connection remains the gold standard for serious studio recording and production.
Building Your Shortlist: Pre-Purchase Verification Steps
Before finalizing your purchase of a NUX electronic drum kit, it is crucial to perform a thorough pre-purchase verification using official manufacturer documentation. Start by downloading the user manual or specification sheet for the specific model you are considering. Verify the exact input and output (I/O) ports available on the module. Ensure it has the correct headphone jack size, auxiliary inputs for play-along tracks, and dedicated audio outputs if you plan to route individual drum channels to an external mixer or audio interface. Additionally, check if the manufacturer regularly releases firmware updates for the module, as these updates can improve trigger algorithms, fix software bugs, and sometimes introduce new sound samples or features.
Next, assess the physical footprint and structural design of the kit to ensure it fits comfortably within your studio space. Electronic drum racks vary in size, adjustability, and stability. If you have limited space in your home studio, look for a kit with a compact, foldable rack design that can be easily tucked away when not in use. However, keep in mind that a sturdier, heavy-duty rack provides better stability during energetic playing, which in turn reduces pad movement and potential trigger crosstalk. If you live in an apartment or shared housing, consider the acoustic noise generated by physical pad strikes; while mesh heads are relatively quiet, the physical thud of the kick pedal can transfer through the floor, requiring a noise-isolating mat or platform.
Finally, identify any potential third-party upgrades or accessories you will need to purchase separately to complete your production setup. Many electronic drum kits do not include a bass drum pedal, a drum throne, or headphones in the standard package, so you must budget for these essentials. Furthermore, as your production needs evolve, you might want to upgrade to a more advanced, stand-mounted hi-hat controller or add extra cymbal pads to your setup. Check the module’s expansion capabilities to see how many extra trigger inputs are available, ensuring the kit can grow alongside your creative ambitions.
Frequently Asked Questions (FAQ)
Can I use third-party VST instruments with a NUX drum module?
Yes, you can use third-party virtual studio technology (VST) instruments with a NUX drum module. By connecting the module to your computer via a USB-MIDI cable, the drum kit acts as a MIDI controller. Within your digital audio workstation (DAW), you can route the incoming MIDI data from the drum kit to trigger any drum sampler or synthesizer plug-in you own. When using this setup, the internal sounds of the NUX module are bypassed entirely, meaning the audio quality is determined by your VST library, while the module’s primary role is to transmit accurate velocity and trigger data.
Do I need an audio interface to record NUX electronic drums?
Whether you need an audio interface depends on what you want to record. If you only want to record MIDI data to trigger software instruments on your computer, a simple USB cable connected directly from the drum module to your computer is sufficient; no audio interface is required. However, if you want to record the actual internal sounds generated by the NUX drum module, you will need an audio interface. You must connect the module’s audio outputs to the inputs of your audio interface using standard instrument cables, ensuring proper gain staging to capture a clean, distortion-free stereo recording.
Community discussion
Share your experience or ask a question. Comments are reviewed before publication.