
Choosing the right capo for an acoustic guitar is one of the most impactful decisions a beginner can make to expand their playing range. A capo acts as a movable nut, raising the pitch of the instrument so you can play in different keys using familiar open-chord shapes. However, selecting the wrong capo can lead to persistent tuning issues, fret buzzing, or even physical damage to your guitar’s neck and finish.
To find the ideal capo, you must evaluate how its clamping mechanism aligns with your playing habits, verify that its physical shape matches your guitar’s neck profile, and ensure it provides the correct amount of tension. Balancing these factors helps you achieve a clean, buzz-free tone without constantly retuning your instrument.
Understanding Capo Mechanisms and Operation Styles
The mechanism of a capo determines how you attach, adjust, and remove it during practice or performance. Different styles offer distinct balances between speed of use, tension precision, and physical weight.
Products mentioned in this guide
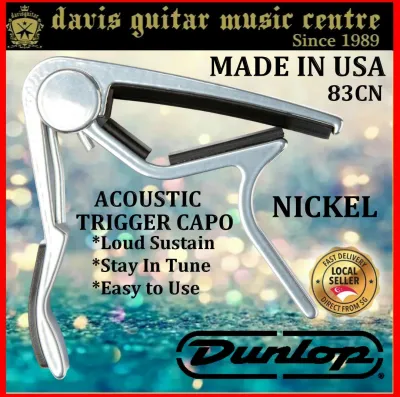

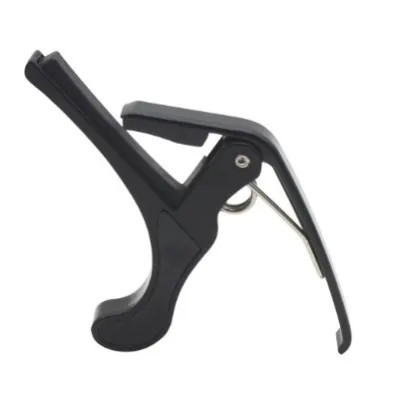
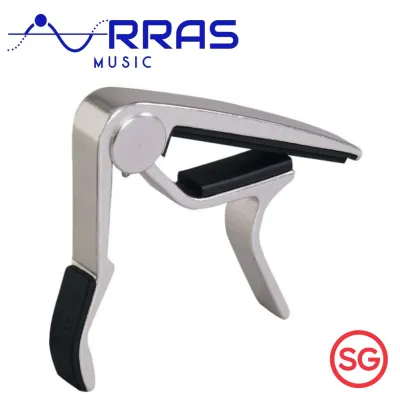
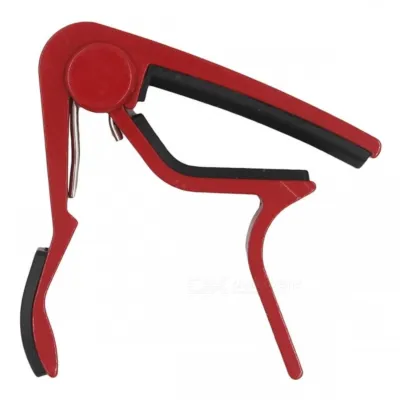
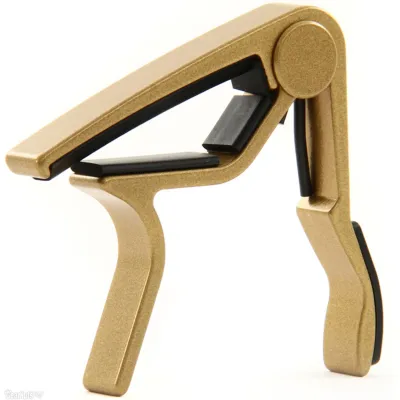

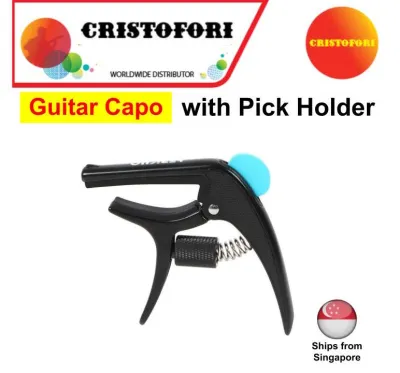
Prices are valid at publication and may change. Please refer to the product page for the latest price.
Trigger or spring-loaded capos are highly popular among beginners due to their simplicity. These devices use a spring-loaded clamp that you open by squeezing a lever, allowing you to position or move the capo with one hand. This speed makes them excellent for quick transitions during practice sessions. However, the primary trade-off is that spring-loaded capos apply a fixed amount of tension. If the spring is exceptionally stiff, it can apply excessive force, pulling your strings sharp. Over time, the spring can also lose its tension, leading to fret buzz.
Screw-adjustable capos prioritize precision over speed. These models feature a knob or screw that allows you to manually tighten the clamp until it applies just enough pressure to fret the strings cleanly. Because you control the exact tension, you can minimize the risk of pulling your strings out of tune. Additionally, these capos tend to be lightweight and low-profile, meaning they do not add noticeable weight to your guitar’s neck. The trade-off is that they require two hands to install and adjust, making them slower to move.
Toggle and elastic capos represent a more traditional, budget-friendly category. Elastic capos use a fabric or rubber strap that wraps around the neck and hooks into slots on the opposite side. These options are incredibly lightweight and highly portable, making them easy to slip into an accessory pouch. However, they are generally more difficult to align evenly across the fretboard. The elastic material also stretches and degrades over time, which can result in uneven pressure and frequent string buzzing. They are well suited as temporary or occasional backups.
When weighing these options, consider your primary playing environment. If you value rapid changes and convenience, a spring-loaded trigger capo is highly practical. If you prioritize precise intonation and want to avoid retuning your guitar every time you use a capo, a screw-adjustable model is a highly precise choice.
Matching the Capo to Your Acoustic Guitar Neck
A common mistake is assuming that any capo will fit any guitar. Acoustic guitars feature diverse neck profiles, fretboard widths, and fingerboard curvatures, all of which directly affect how a capo performs. Ensuring physical compatibility before purchasing prevents uneven string pressure and potential fretboard wear.

The most critical factor to check is the fretboard radius, which refers to the slight curvature of the fingerboard from side to side. Most steel-string acoustic guitars have a curved fretboard, typically ranging from a 12-inch to a 16-inch radius. In contrast, classical guitars feature completely flat fretboards. If you place a flat capo on a curved steel-string fretboard, the capo will press down too hard on the outer strings while failing to make adequate contact with the middle strings, causing them to buzz. Conversely, using a curved capo on a flat classical fretboard will pinch the middle strings excessively, pulling them sharp. Always verify whether a capo is designed for curved steel-string guitars or flat classical guitars.
Nut width and neck thickness also vary significantly across acoustic models. Traditional acoustic guitars often have wider nuts and thicker neck profiles than electric guitars. A capo must have a throat deep enough and an opening wide enough to clamp securely around the neck, especially as you move up the fretboard where the neck naturally thickens. If a capo is too narrow, it may clamp unevenly or fail to clear the neck entirely, leading to instability and slipping.
String spacing is another dimension to keep in mind. The capo’s padded bar must be long enough to cover all six strings with some clearance on either side. If the bar is too short, the outer strings can easily slip off the edge of the padding. When shopping, read the manufacturer’s product specifications carefully. Look for clear labels indicating the maximum neck width, compatible fretboard radii, and whether the model is optimized for steel-string or nylon-string instruments.
Evaluating Tension Control and Padding Materials
Achieving a clear, resonant acoustic tone requires a delicate balance of pressure. Too little tension results in muted notes and annoying string buzz, while too much tension stretches the strings downward toward the wood, pulling the notes sharp and putting unnecessary stress on your frets.
Even pressure distribution across all six strings is essential for maintaining proper intonation. Because acoustic guitar strings vary in thickness—with heavy, wound bass strings requiring more force to fret than thin, plain treble strings—the capo must distribute its clamping force intelligently. Adjustable tension mechanisms excel here because they allow you to customize the pressure to match your specific string gauge. If you use light-gauge strings, you can back off the tension to prevent pitch distortion. If you switch to medium or heavy-gauge strings, you can tighten the mechanism to ensure every note rings out clearly.
The quality of the padding material on the capo is just as important as the clamping mechanism. The pad is the only part of the capo that makes direct contact with your strings and fretboard, while a secondary pad cushions the back of the guitar neck. Well-constructed capos utilize dense, durable silicone or specialized rubber that mimics the natural feel of a human finger. This material must be firm enough to press the strings down cleanly without absorbing too much string vibration, which would deaden your guitar’s natural sustain. It must also be soft enough to protect the delicate wood and finish of your guitar neck.
In humid climates, such as Singapore, wood can expand slightly, and certain finishes can become more sensitive to pressure and friction. Ensuring your capo has high-grade, non-reactive silicone padding prevents chemical reactions that can mar or cloud the guitar’s finish. When testing a capo, observe how the padding behaves. If the rubber feels overly soft, sticky, or brittle, it is likely to degrade quickly and fail to provide even pressure. Look for firm, resilient padding that springs back to its original shape immediately after use.
Step-by-Step Guide to Applying and Adjusting the Capo
Using a capo correctly is a skill that directly preserves your guitar’s tuning and protects its frets. Even the most reliable capo will cause intonation issues if it is applied carelessly. Following a systematic approach ensures consistent performance every time you play.
First, identify the target fret and prepare to position the capo. You should always place the capo just behind the fret wire—approximately one to two millimeters away from the metal fret itself. Avoid placing the capo directly in the middle of the fret space. Placing it too far back requires significantly more clamping pressure to eliminate buzzing, which inevitably pulls the strings sharp. Positioning it directly on top of the fret wire can mute the strings and damp your tone.
Second, align the capo so that it runs completely straight and parallel to the fret wire. If the capo is angled, it will pull the strings laterally across the fretboard. This lateral bending stretches the strings unevenly, causing immediate tuning issues. Ensure the padded bar covers all six strings completely, with equal clearance on the bass and treble sides of the neck.
Third, apply the clamping pressure gradually. If you are using a spring-loaded capo, release the lever slowly to let the pad settle naturally onto the strings. If you are using an adjustable screw capo, tighten the dial incrementally. Pluck each string individually as you tighten. Stop turning the screw the exact moment every string rings out clearly without any buzzing. This technique ensures you apply the absolute minimum pressure required, preserving both your tuning and your fret life.
Finally, always re-check your tuning after the capo is in place. Even with proper technique, clamping a capo can cause minor pitch shifts. Use a clip-on tuner to verify that all strings are in tune relative to the new capoed key. If several strings are sharp, try releasing the capo, realigning it, and reapplying it with slightly less tension rather than immediately turning your tuning pegs, which can create uneven tension across the nut.
Common Beginner Mistakes and Troubleshooting
It is common for beginners to encounter minor hurdles when first integrating a capo into their practice. Recognizing these issues early allows you to make quick adjustments and avoid developing habits that could damage your instrument.
If your strings consistently sound sharp when the capo is applied, the most likely culprit is excessive clamping pressure. For spring-loaded capos, try shifting the capo slightly further back from the fret wire to see if a minor placement change resolves the issue, or consider switching to an adjustable-tension model. If you are using an adjustable capo, back off the screw until you hear buzzing, then tighten it just enough to clear the sound. Sharpness can also occur if you pull or push the strings sideways while clamping the capo down; always ensure your hands are steady and the capo descends straight onto the strings.
Muted or buzzing strings are usually caused by insufficient tension, misaligned padding, or an incorrect fretboard radius match. If tightening the capo does not resolve the buzz, check if the capo’s pad is sitting flat against all strings. If the middle strings are buzzing while the outer strings are quiet, your capo is likely too flat for your guitar’s curved fretboard. In this case, continuing to tighten the capo will only damage your frets and strings; you must replace the capo with one that matches your neck’s specific radius.
Another critical mistake is leaving the capo clamped onto the guitar neck or headstock when the instrument is not in use. Leaving a capo clamped for extended periods exerts continuous pressure on the frets and neck wood, which can lead to premature fret wear or deep indentations in the wood. Additionally, leaving a capo clamped on the headstock can damage the finish, particularly on guitars with sensitive lacquer finishes. Always remove the capo completely and store it in your gig bag or accessory drawer when you finish playing.
If you find that a specific capo consistently fails to provide a clean tone despite careful positioning and tension adjustment, stop using it. Forcing an incompatible capo to work by over-tightening it can warp your strings, wear down your frets prematurely, and strain your hand. Re-evaluate your guitar’s specifications and select a model that aligns more precisely with your instrument’s physical profile.
Frequently Asked Questions (FAQ)
Can I use an electric guitar capo on my acoustic guitar?
While it is physically possible to clamp an electric guitar capo onto an acoustic guitar, it is generally not recommended. Electric guitars typically have narrower necks, tighter fretboard radii, and much lighter string gauges than acoustic guitars. Consequently, an electric capo may be too short to cover all six acoustic strings, and its curved profile may apply uneven pressure on a flatter acoustic fretboard. This mismatch often results in severe string buzzing on the outer strings or excessive sharpness in the middle. However, some high-quality adjustable or universal capos are engineered with flexible padding or adjustable tension that can safely accommodate both neck profiles. Always check the manufacturer’s compatibility guidelines before using one capo for both instruments.
How do I clean the rubber padding on my capo?
Over time, the rubber or silicone padding on your capo will accumulate natural finger oils, dust, sweat, and microscopic metal residue from your guitar strings. This buildup can make the padding slippery, reducing its grip and potentially transferring grime onto your guitar’s fretboard and neck finish. To clean the padding safely, wipe it down with a soft, lint-free microfiber cloth slightly dampened with warm water and a single drop of mild dish soap. Gently scrub the padded surfaces to lift the oils, then wipe away any soap residue with a clean, damp cloth. Always dry the capo completely with a dry towel before using it again. Never use harsh household chemicals, rubbing alcohol, or solvents, as these substances can dry out and crack the rubber padding or dissolve the adhesives holding the pads in place.

Community discussion
Share your experience or ask a question. Comments are reviewed before publication.