
Selecting the right Boya microphone requires matching the specific demands of your recording environment with the technical capabilities of your hardware. Whether you are capturing spoken word for a podcast, filming dynamic outdoor vlogs, or recording the subtle nuances of an acoustic guitar, the brand’s extensive catalog offers distinct solutions tailored to different workflows. To make an informed purchase, you must evaluate key factors such as connection compatibility, power requirements, polar patterns, and physical form factors. By focusing on these technical specifications rather than relying on generic recommendations, you can ensure your chosen microphone integrates seamlessly into your existing setup and delivers the audio quality your project demands.
Understanding Boya Microphone Types and Connections
Before diving into specific recording scenarios, it is essential to understand the primary form factors and connection standards that define the Boya microphone lineup. The brand categorizes its products into several distinct designs, each engineered for specific use cases. Lavalier microphones are ultra-compact, clip-on options ideal for hands-free speech. On-camera shotgun microphones are directional, tube-shaped units designed to mount directly onto a camera’s hot shoe to capture audio from the direction the lens is pointing. Wireless systems utilize a transmitter and receiver pair to offer greater mobility, while desktop USB and XLR condenser microphones are larger, stationary units built for high-fidelity studio recording.
Understanding connection standards is critical because buying a microphone with the wrong connector can lead to compatibility issues or require additional adapters that may degrade signal quality. Boya microphones typically utilize one of several connection types. Analog connections include 3.5mm TRS (Tip-Ring-Sleeve) connectors, which are standard for cameras and audio recorders, and 3.5mm TRRS (Tip-Ring-Ring-Sleeve) connectors, designed for smartphones and laptops with integrated headphone/microphone jacks. Digital connections include USB-C and Lightning connectors, which plug directly into modern mobile devices and computers, bypassing the device’s internal analog-to-digital converter. Finally, professional-grade models use three-pin XLR connections, which require an external audio interface, mixer, or recorder to function.
Products mentioned in this guide
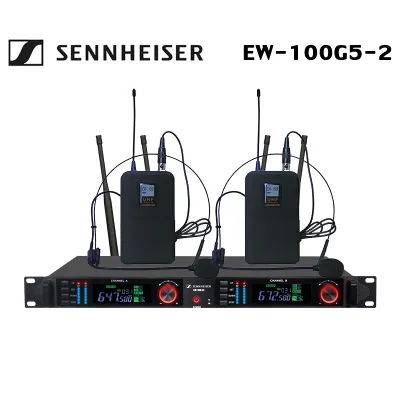
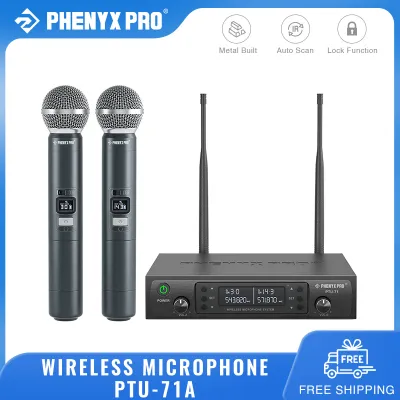
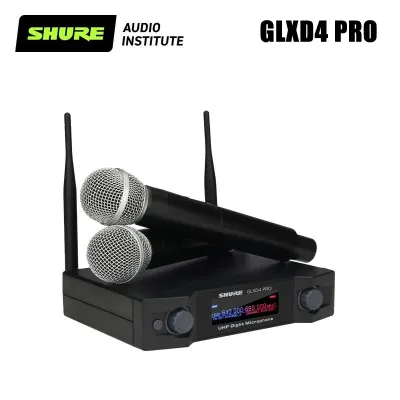
Prices are valid at publication and may change. Please refer to the product page for the latest price.
To avoid purchasing a microphone that requires unsupported adapters, always inspect your primary recording device’s input ports before making a decision. If you primarily record on a modern smartphone that lacks a headphone jack, a digital USB-C or Lightning microphone is often the most straightforward choice. For dedicated mirrorless or DSLR cameras, a microphone with a 3.5mm TRS output is standard. If you plan to scale up your setup in the future with a dedicated audio interface, investing in an XLR-compatible microphone provides the greatest long-term flexibility and signal integrity.
Choosing a Boya Mic for Podcasting and Voiceovers
For stationary, high-quality vocal recording at a desk, such as podcasting, voiceovers, or live streaming, desktop USB condenser or XLR microphones are generally preferred over small lavaliers or shotgun mics. These larger-diaphragm microphones are designed to capture the full richness and depth of the human voice, providing a warm, professional sound. USB condenser models are highly convenient for solo creators, as they plug directly into a computer and function as their own audio interface. XLR models, while requiring an external interface or mixer, offer versatile signal routing, physical gain control, and the ability to record multiple microphones simultaneously on separate tracks.

When evaluating a Boya microphone for vocal work, look for a model that features a cardioid polar pattern. This directional pattern is highly sensitive to sound coming from directly in front of the capsule while rejecting noise from the sides and rear, which is crucial for minimizing the pickup of keyboard clicks, computer fans, or room reflections. Additionally, prioritize models that offer physical gain control directly on the microphone body, allowing you to adjust input levels on the fly without diving into software menus. Another indispensable feature is zero-latency headphone monitoring, which lets you plug headphones directly into the microphone or interface to hear your voice in real time without distracting digital delays.
Beyond the internal specifications, you must verify the physical mounting options and included accessories of your chosen model. Desktop recording requires a stable mount to prevent structural vibrations from traveling up the desk and into the microphone capsule. Check whether the microphone uses standard 3/8-inch or 5/8-inch threads, which ensures compatibility with aftermarket boom arms and desk stands. Furthermore, review the product specifications to see if essential accessories like a custom-fit shock mount (to isolate the mic from physical bumps) and a pop filter (to disperse plosive air blasts from words starting with “P” or “B”) are included in the box, as purchasing these separately can quickly increase your overall investment.
Selecting a Boya Mic for Vlogging and Mobile Video
Mobile content creators and vloggers require audio gear that balances portability, ease of setup, and reliable performance in unpredictable environments. When choosing a Boya microphone for run-and-gun shooting, you will primarily decide between wireless lavalier systems and on-camera shotgun microphones. Wireless systems offer significant freedom of movement, allowing the speaker to walk far from the camera while maintaining a consistent audio level. On-camera shotgun microphones, conversely, require no batteries or pairing processes; they mount directly to the camera, draw plug-in power through the audio cable, and are ready to record instantly, making them highly practical for spontaneous, point-and-shoot scenarios.
If you opt for a wireless system, there are several crucial field-recording specifications you must verify before purchasing. Battery life is paramount; look for systems that offer sufficient operating hours on a single charge, and check if the system includes a portable charging case that can replenish the transmitters and receivers in the field. Some advanced wireless models also feature internal recording backup, which saves a copy of the audio directly to the transmitter’s onboard memory. This serves as a reliable backup in case of wireless interference or signal dropouts. For both wireless and shotgun microphones, ensure the package includes a high-quality wind noise reduction accessory, such as a synthetic fur windscreen (often called a “deadcat”), which is essential for preserving audio clarity when filming outdoors.
Physical dimensions and mounting compatibility are also critical considerations for mobile setups. An excessively heavy or bulky microphone can throw off the balance of a handheld gimbal or strain a lightweight smartphone clamp. Check the physical weight and dimensions of the microphone and receiver units to ensure they match your rig’s payload capacity. For camera-mounted setups, verify that the microphone’s cold shoe mount fits securely onto your camera or cage, and look for models that feature integrated shock-absorbing mounts to isolate the microphone capsule from the physical handling noise of the camera body.
Boya Microphones for Musical Instruments and Acoustic Recording
Recording acoustic musical instruments, such as acoustic guitars, violins, pianos, or drum overheads, presents a unique set of acoustic challenges that differ significantly from spoken-word recording. Instruments produce a wide range of frequencies and rapid transient peaks that require highly responsive microphone capsules. For these applications, small-diaphragm condenser microphones or matched stereo pairs are highly recommended. Small-diaphragm condensers feature lightweight diaphragms that react quickly to high-frequency transients, capturing the bright “pluck” of a guitar string or the delicate resonance of a piano with high detail and accuracy.
When selecting a microphone for instrument recording, pay close attention to the frequency response curve and the maximum Sound Pressure Level (SPL) handling. A flat, wide frequency response ensures that the microphone captures the instrument’s natural tone without artificially boosting or cutting specific frequencies. High SPL handling is equally critical, especially if you plan to position the microphone close to loud sound sources like brass instruments, guitar amplifiers, or snare drums; a microphone with insufficient SPL handling will distort and clip when exposed to high volumes.
Additionally, you must verify the power delivery system required by your chosen instrument microphone. Most professional-grade small-diaphragm condensers utilize an XLR connection and require 48V phantom power to charge the internal capsule and power the active electronics. Before purchasing, ensure that your audio interface, mixing console, or portable field recorder is capable of supplying a stable 48V phantom power signal. If your recording device only provides low-voltage plug-in power (typically found on 3.5mm mic inputs), you will need to select a self-powered microphone model that accepts internal batteries or utilize an external phantom power supply unit.
Essential Specifications and Pre-Purchase Checks
Before finalizing your purchase of a Boya microphone, conducting a systematic pre-purchase check will help prevent compatibility issues and ensure the equipment aligns with your recording environment. First, evaluate the polar pattern of the microphone in relation to your room’s acoustics. If you are recording in an untreated room with hard surfaces, an omnidirectional microphone will pick up excessive room echo and ambient noise from all directions. In such environments, a highly directional cardioid or supercardioid pattern is necessary to isolate your sound source. Conversely, if you are recording a multi-person interview around a single table, an omnidirectional or bidirectional pattern may be more practical, provided the room is acoustically treated.
Second, double-check the power requirements of the specific model you are considering. Microphones run on various power sources: some require no external power (dynamic mics), some draw low-voltage plug-in power from a camera or phone, some rely on internal rechargeable or AA batteries, and others demand 48V phantom power from an audio interface. Mismatched power requirements can result in a completely silent signal or weak, noisy audio. Always cross-reference the microphone’s power specifications with the output capabilities of your recording device.
Finally, carefully review the unboxing contents listed by the manufacturer or authorized retailer. Many microphone models are sold in multiple configurations or packages that include different assortments of cables, adapters, mounting clips, and storage pouches. Confirming exactly what is included in the box helps you avoid unexpected extra costs in S$ for essential accessories like TRS-to-TRRS patch cables, USB adapters, or specialized shock mounts. Taking the time to verify these details ensures that your new microphone is fully operational the moment it arrives, allowing you to focus entirely on your creative work.
Frequently Asked Questions (FAQ)
Do I need an adapter to use a Boya mic with my smartphone?
Whether you need an adapter depends on the output connector of the microphone and the input port of your smartphone. Traditional analog microphones with a 3.5mm TRS connector (designed for cameras) require a TRS-to-TRRS adapter cable to work with smartphones that have a headphone jack. For modern smartphones that lack a 3.5mm headphone jack entirely, you must use a digital adapter, such as a certified USB-C to 3.5mm or Lightning to 3.5mm dongle. To ensure the microphone is recognized by your phone’s operating system, it is highly recommended to use official adapters from your phone’s manufacturer or certified digital interfaces.
How do I reduce background noise when using a Boya lavalier mic?
To minimize background noise with a lavalier microphone, start by optimizing its physical placement. Clip the microphone to your clothing at chest level, approximately a hand’s span below your chin, ensuring it is pointing upward toward your mouth and is free from rubbing against fabric. Always use the included foam windscreen, even indoors, to reduce air currents and vocal plosives. Finally, adjust the input gain on your recording device or camera downward so the microphone is not overly sensitive to distant ambient sounds, and speak at a consistent, natural volume to maintain a strong signal-to-noise ratio.
Community discussion
Share your experience or ask a question. Comments are reviewed before publication.