
A guitar capo is an indispensable tool for players of all levels, allowing you to instantly change the key of a song while keeping your familiar open-chord fingerings. However, selecting the wrong capo can lead to persistent tuning issues, string buzzing, or even physical damage to your instrument’s neck. Finding the right match requires balancing your performance needs with the specific physical dimensions of your guitar.
To make an informed decision, you must evaluate how different clamping mechanisms apply pressure, how the capo’s shape matches your fretboard’s curvature, and how your playing environment dictates your need for speed versus precision. By understanding these core factors, you can select an accessory that keeps your instrument sounding sweet and in tune.
Compare Spring, Screw, and Elastic Capo Mechanisms
The mechanism of a capo determines how it clamps onto the neck and how much control you have over the tension applied to the strings. The three primary designs—spring-loaded, screw-adjustable, and elastic—each offer distinct trade-offs in terms of speed, precision, and portability.
Products mentioned in this guide
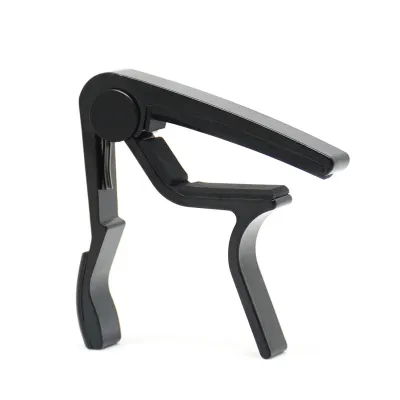
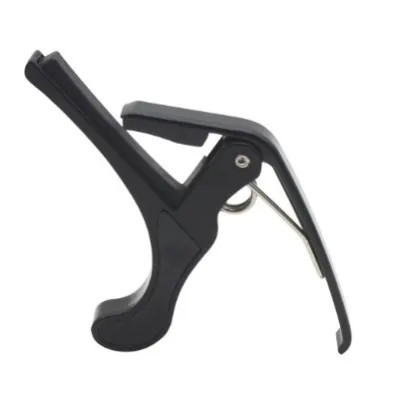

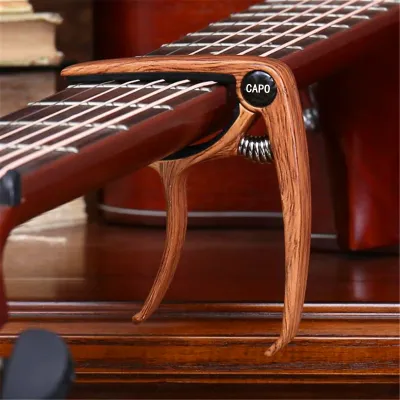
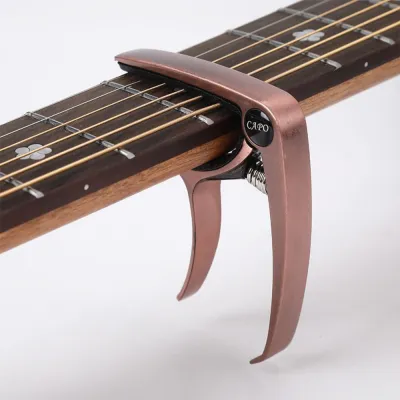
![[SG FREE ] Guitar Capo Tune Clamp Violin Ukulele Single-handed Acoustic](https://img.lazcdn.com/g/p/33e08b91a35a0f022db65ab15c505bdc.jpg_400x400q80.jpg_.webp)

Prices are valid at publication and may change. Please refer to the product page for the latest price.
Spring-Loaded (Trigger) Capos Spring-loaded capos, often referred to as trigger capos, utilize a heavy-duty internal spring to clamp down on the strings. Their primary advantage is speed; you can easily squeeze the trigger and reposition the capo with one hand in a matter of seconds. This makes them incredibly popular for casual practice and fast-paced live performances where you need to transition between songs without delay.
However, this convenience comes with a notable limitation. Because the spring tension is fixed, you cannot adjust the clamping force. If the spring is exceptionally strong, it may apply excessive pressure, pulling your strings sharp and forcing you to retune. Conversely, on guitars with high action or thicker strings, a worn spring might not apply enough pressure, resulting in unwanted string buzz.
Screw (Clamp) Capos Screw-adjustable capos, sometimes called micrometer or dial capos, use a threaded screw mechanism to manually tighten the clamp against the back of the neck. This design provides unparalleled control over tension. You can tighten the screw just enough to fret the strings cleanly without applying any unnecessary downward force, which preserves your guitar’s intonation and minimizes tuning adjustments.
The trade-off for this precision is speed and ease of use. Adjusting a screw capo requires two hands and takes significantly longer than squeezing a trigger. If you frequently change keys mid-set or prefer a seamless workflow, the manual adjustment process can feel slow and disruptive.
Elastic (Toggle or Strap) Capos Elastic capos consist of a flexible, heavy-duty fabric or elastic strap that wraps around the neck and secures via a series of eyelets, snaps, or a metal toggle. These are the most lightweight and compact capos available, making them highly portable and easy to slip into a pocket or gig bag accessory compartment. They are also generally the most budget-friendly option, often priced under S$10.
Despite their low cost and portability, elastic capos present long-term durability concerns. The elastic material naturally stretches and degrades over time when subjected to constant tension, leading to uneven pressure across the fretboard. Additionally, securing the strap tightly enough to prevent buzzing can be physically awkward and may pull the outer strings out of alignment.
Match the Capo to Your Guitar Neck Profile and Radius
A common mistake is assuming that any capo will work on any guitar. In reality, the physical geometry of your guitar’s neck and fretboard dictates which capos will fit properly and maintain clean, buzz-free notes.

Fretboard Radius The fretboard radius refers to the subtle curvature of the wood surface where your fingers press the strings. Classical guitars almost always feature a completely flat fretboard, which requires a capo with a perfectly straight clamping bar. If you use a curved capo on a flat classical neck, the middle strings will receive too much pressure while the outer strings will buzz or fail to ring out.
Conversely, electric guitars and steel-string acoustic guitars feature curved fretboards, with radiuses typically ranging from a vintage 7.25 inches to a modern 16 inches. To ensure clean fretting, you must choose a capo with a matching curved profile. Using a flat classical capo on a curved fretboard will pinch the outer strings down too hard, pulling them out of tune, while leaving the middle strings loose and prone to buzzing.
Neck Width and Thickness Guitar necks vary dramatically in width and thickness across different styles. Classical guitars have exceptionally wide necks to accommodate fingerstyle playing, requiring a capo with a longer clamping bar to cover all six strings. Twelve-string guitars also feature wider necks and require specialized capos with firmer, wider padding to handle the doubled string pairs.
Electric guitars, on the other hand, tend to have much narrower and thinner neck profiles. A bulky capo designed for an acoustic guitar may feel cumbersome on a sleek electric neck, potentially interfering with your fretting hand or applying excessive pressure to the lighter-gauge strings.
Verification Steps Before purchasing a capo from an online marketplace or local music shop, take a moment to verify your instrument’s specifications. Check the manufacturer’s website to find your guitar model’s exact fretboard radius and neck width. Compare these measurements against the capo’s product specifications, ensuring the packaging explicitly states compatibility with your specific instrument type, whether it is a classical, steel-string acoustic, or electric guitar.
Align Your Capo Choice with Your Playing Style
Your choice of capo should also reflect where and how you play. Different musical environments and playing techniques place unique demands on your gear, making certain capo features more valuable than others.
Live Performance If you regularly perform on stage, play in a worship band, or participate in local open mic nights, your primary priority should be efficiency. A quick-release trigger capo or a rolling capo allows you to make seamless key changes between songs without breaking the flow of your performance. Look for designs that can be easily clamped onto your guitar’s headstock when not in use, ensuring you never misplace the accessory mid-set.
Studio and Recording In a recording environment, minor tuning imperfections that go unnoticed live become glaringly obvious. For studio work, prioritize precise tension adjustment over speed. A high-quality screw-adjustable capo is the standard choice for recording sessions, as it allows you to dial in the exact pressure needed to eliminate buzz while maintaining perfect intonation across all tracks, saving you valuable time during editing and mixing.
Creative and Alternative Tunings For adventurous players looking to expand their sonic palette, specialty capos offer exciting creative possibilities. Partial capos are designed to clamp only a select number of strings—such as covering the top five strings while leaving the low E open, or clamping only the A, D, and G strings to mimic a drop tuning. These tools allow you to explore unique open-string voicings and drone notes while continuing to play standard chord shapes.
Apply and Adjust the Capo for Perfect Intonation
Even the most expensive capo will perform poorly if it is applied incorrectly. Developing proper placement habits is essential for maintaining tuning stability and protecting your guitar’s neck and frets from unnecessary wear.
Positioning To achieve the cleanest tone, place the capo parallel to and just behind the fret wire—ideally about one to two millimeters away. Placing it directly on top of the metal fret wire will mute the strings and deaden your sustain. Conversely, placing it too far back in the middle of the fret space requires significantly more clamping pressure to eliminate buzzing, which inevitably pulls the strings sharp.
Tension Application When using an adjustable capo, always start with the tension completely loose. Clamp the capo onto the neck, then slowly tighten the adjustment screw while plucking each string individually. Stop tightening the moment every string rings out clearly without buzzing. This minimal-pressure approach prevents the strings from being stretched down to the wood of the fretboard, preserving your instrument’s natural intonation.
Verification Once the capo is securely in place, always verify your tuning. Strum a full chord and use a reliable clip-on or pedal tuner to check each string. Even with perfect placement, the physical act of clamping can cause minor pitch shifts. Making quick micro-adjustments to your tuning pegs after applying the capo ensures your performance remains perfectly in tune.
Stop Conditions If you experience persistent string buzzing, deadened notes, or severe pitch bending that cannot be corrected with minor tuning adjustments, release the capo immediately. Do not attempt to solve the issue by over-tightening the clamp, as this can damage your frets or warp the rubber padding. Instead, remove the capo, inspect the rubber strip for deep grooves or wear, and try repositioning it with careful alignment.
Frequently Asked Questions (FAQ)
Can I use the same capo for both acoustic and electric guitars?
While it is physically possible to use some capos on both instruments, it is generally not ideal due to differences in neck geometry. Electric guitars typically feature narrower necks, lighter string gauges, and more pronounced fretboard curvatures compared to steel-string acoustics. A heavy-duty acoustic capo may apply too much pressure to an electric guitar, pulling the light strings sharp and causing fret wear. If you plan to use one capo for both, select an adjustable screw-type model that allows you to customize the tension, and verify that the rubber padding is wide enough to cover the acoustic neck while remaining flexible enough to conform to the electric’s curved radius.
Why does my guitar go out of tune when I put the capo on?
Tuning instability is almost always caused by uneven or excessive clamping pressure. When a capo clamps down too hard, it stretches the strings downward toward the fretboard wood, pulling the pitch sharp. This issue is exacerbated if the capo is placed too far behind the fret wire or clamped at an angle, which pulls the strings sideways. To resolve this, ensure your capo is positioned straight and close to the fret wire, and use an adjustable model to apply only the minimum tension required to produce clear notes. Additionally, always check your tuning after applying the capo to settle the strings into their new tension.
Community discussion
Share your experience or ask a question. Comments are reviewed before publication.