
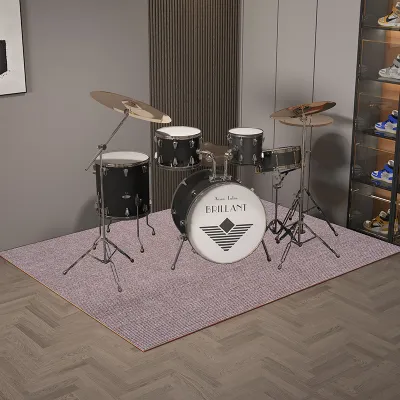
To determine the correct drum carpet size, you must measure the physical footprint of your fully assembled drum kit and add a safety margin of 10 to 15 cm on all sides. For a compact electronic kit or a small jazz setup, a carpet measuring 120 cm x 160 cm is typically sufficient. A standard five-piece acoustic drum kit with a normal cymbal spread generally requires a carpet of at least 160 cm x 200 cm or 160 cm x 230 cm. Larger configurations, such as double-bass setups or kits with extensive multi-cymbal arrays, will need a wide-format rug of 200 cm x 200 cm or even 200 cm x 250 cm to ensure all hardware legs remain securely anchored on the carpet surface.
Selecting the correct dimensions is not just about aesthetics; it directly impacts your playing stability, floor preservation, and acoustic control. In Singapore’s typical high-density residential layouts, where space is at a premium and hard flooring is common, choosing the right size ensures your kit fits comfortably in your bedroom or studio without encroaching on living space or creating a safety hazard.
Why Correct Drum Carpet Dimensions Matter for Your Setup
A high-quality drum carpet serves as the foundation of your entire percussion setup, playing a vital role in hardware stability. During energetic playing, the physical force exerted on kick pedals and hi-hat stands naturally pushes them forward. This phenomenon, known as “hardware creep,” can disrupt your playing posture and force you to interrupt your session to pull your gear back into place. A properly sized drum carpet provides a high-friction surface that keeps these heavy pedals and stands firmly anchored.
Products mentioned in this guide
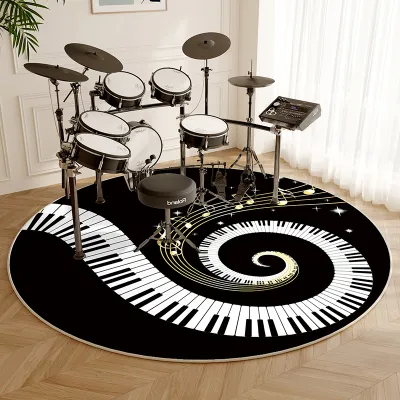

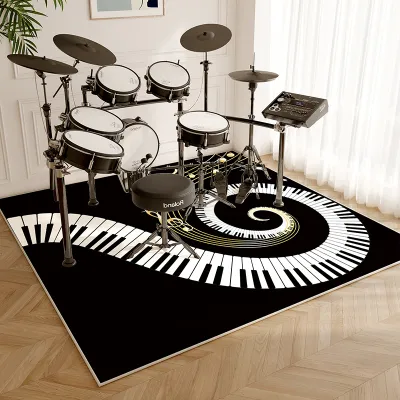
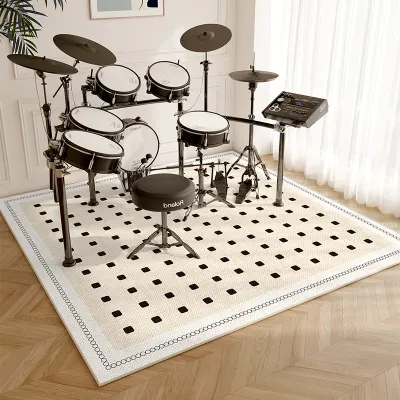
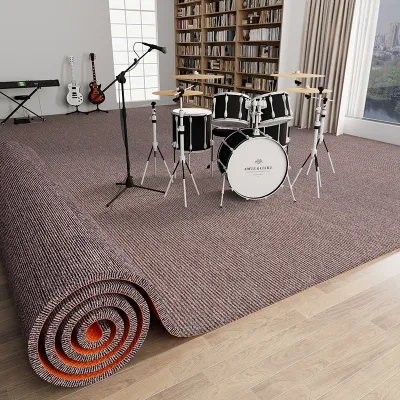
Prices are valid at publication and may change. Please refer to the product page for the latest price.
Protecting your flooring is another critical function of this accessory. Acoustic drum kits feature sharp metal spurs on the bass drum legs and heavy double-braced tripods for cymbal stands. On popular Singaporean flooring materials like homogeneous tiles, luxury vinyl tiles (LVT), engineered wood, or parquet, these metal components can easily cause deep scratches, gouges, or cracks. A carpet acts as a protective barrier, absorbing the heavy downward pressure and preventing costly floor repairs.
Acoustic management is particularly important when playing drums in residential apartments. Striking a bass drum creates low-frequency structural vibrations that travel directly through the floorboards into the concrete slab, disturbing neighbors below. A dense drum carpet helps decouple the kit from the floor, dampening these low-frequency transfers. Additionally, it absorbs high-frequency room reflections, reducing the harsh flutter echoes that can make drums sound overly bright or muddy in small, uncarpeted rooms.
Choosing an incorrect size carries distinct practical risks. If the carpet is too small, some hardware legs or the drum throne will inevitably sit on the slippery bare floor, causing uneven height distribution and letting stands drift during play. Conversely, an oversized carpet can easily swallow up an entire bedroom, curling up against walls or furniture to create dangerous tripping hazards. Finding the precise balance ensures a safe, efficient, and professional-looking rehearsal environment.
How to Measure Your Drum Kit Footprint Accurately
Before purchasing a drum carpet, you must measure your physical setup rather than relying on generic estimates. Start by assembling your kit exactly how you prefer to play it, adjusting all stands, pedals, and the throne to your optimal ergonomic positions. Grab a standard tape measure and prepare to record both the maximum depth and maximum width of your playing area.

To measure the depth of your setup, locate the point that extends furthest forward. This is usually the front edge of your bass drum hoop, the tips of the bass drum spurs, or the front of a secondary kick pedal. Extend your tape measure from this forwardmost point straight back to the rear edge of your drum throne. It is a common mistake to omit the drum throne from these measurements, but your body weight on the throne is actually what anchors the carpet to the floor, preventing the entire setup from sliding forward.
To determine the width, identify the outermost hardware points on the left and right sides of your kit. Typically, this is the outer leg of your hi-hat stand or a left-side crash cymbal stand on one end, and the outer leg of your ride cymbal or floor tom stand on the other. Measure the distance between these two outer tripod feet. If you use boom arms that extend your cymbals far beyond the base of their stands, measure to the edge of the tripod base itself, as this is the part that must rest on the carpet.
Electronic drum kits require a slightly different measurement approach. While electronic kits are generally more compact than acoustic ones, they are often built around a rigid metal or carbon-fiber rack system. Measure the outermost points of this rack’s rubber feet, and pay close attention to the kick pedal tower and trigger pedal placements, which may extend beyond the main frame. Ensure your measurement captures the full span of these rigid components alongside your drum throne.
Do not forget to account for any specialized hardware spreads. If you use double-braced boom stands, their legs must be spread wide for stability, which significantly increases the kit’s physical footprint. Similarly, auxiliary percussion mounts, side tables, or external monitor wedges must be factored into your final width and depth calculations to avoid leaving expensive gear balanced precariously on the carpet edge. Always verify your drum kit’s manufacturer specifications for exact footprint recommendations if you are using a specialized rack system.
Calculating the Ideal Drum Carpet Size with Safety Margins
Once you have recorded the exact physical footprint of your drum kit, you must apply the “margin rule” to find the ideal carpet size. Never buy a rug that matches your exact measurements, as this leaves zero room for error or natural movement. Instead, add a safety buffer of at least 10 to 15 cm (approximately 4 to 6 inches) to all four sides of your measured footprint. This extra space accommodates small adjustments to your setup, prevents tripod feet from slipping off the edge during aggressive playing, and allows you to position your drum throne comfortably.
To help visualize how these calculations translate to real-world products, consider these three standard drum kit configurations:
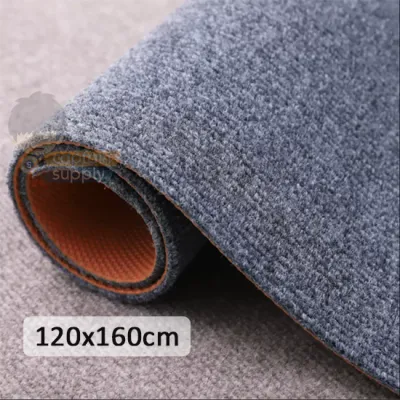
- Compact 4-Piece or Electronic Kits: A basic four-piece acoustic kit (comprising a snare, bass drum, rack tom, and floor tom) or a standard electronic kit typically has a footprint of around 100 cm in depth and 130 cm in width. Applying the margin rule brings the ideal carpet size to approximately 120 cm x 160 cm. This compact size fits neatly into small study rooms or bedroom corners.
- Standard 5-Piece Acoustic Kits: A classic five-piece setup with a hi-hat, two crash cymbals, and a ride cymbal generally occupies a footprint of 130 cm in depth and 160 cm in width. Adding the safety margins suggests a carpet size of 160 cm x 200 cm or 160 cm x 230 cm. This is the most common size category and offers excellent versatility for growing setups.
- Large Double-Bass or Fusion Kits: Advanced setups featuring dual bass drums (or a double pedal with multiple auxiliary snares and side toms) and extensive cymbal trees can easily stretch to 160 cm in depth and over 200 cm in width. These configuration styles require a massive carpet, typically measuring 200 cm x 200 cm or 200 cm x 250 cm, to ensure all heavy hardware remains fully supported.
When shopping, you will need to choose between standard area rugs and custom-cut options. Standard pre-cut rugs (such as 160 cm x 230 cm) are widely available, highly cost-effective, and come in a vast range of designs. They are generally the best choice for most drummers. Custom-cut carpets are only necessary if you have an unusually shaped rehearsal space, such as a narrow balcony or an asymmetrical room corner, where every centimeter of floor space must be meticulously managed.
Choosing the Right Material, Pile, and Thickness
Choosing the right carpet material and construction is just as important as getting the correct dimensions. The pile height of the carpet—the thickness and density of its fibers—directly affects how your hardware behaves. Low-pile carpets, such as flatweaves, tight loops, or commercial-grade needle-punch styles, are highly recommended for drummers. They provide a firm, unyielding surface that allows your bass drum pedal and hi-hat stand to sit perfectly flat, preserving the direct pedal rebound and preventing a spongy, unstable feel underfoot. High-pile or plush shag rugs should be avoided, as hardware legs will sink into the fibers, causing stands to wobble and pedals to lose their level alignment.
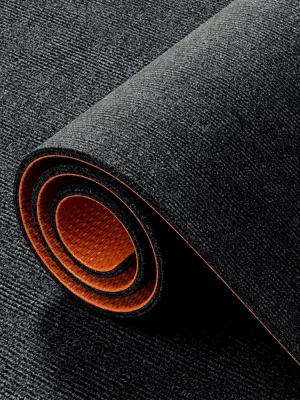
The backing material of your drum carpet is a critical safety feature. Since drums are subjected to constant forward impact, a carpet with a plain fabric backing will easily slide across polished tiles or wooden floors. Look for carpets with a heavy-duty, non-slip backing made of rubber, PVC, or latex. This backing grips the subfloor securely, ensuring the carpet remains stationary even during intense double-bass drumming. In Singapore’s humid climate, high-quality synthetic rubber or treated PVC backing is preferred, as low-grade latex can degrade, dry out, and stick to your flooring over time.
Carpet thickness also plays a dual role in acoustic decoupling and physical stability. While a thicker, padded carpet can absorb more low-frequency impact noise—a major benefit for apartment-dwelling drummers—excessive thickness can compromise the stability of your stands. A moderate thickness of 5 mm to 8 mm strikes the ideal balance, offering sufficient vibration dampening without making your cymbal stands feel top-heavy or prone to tipping.
When deciding between dedicated drum rugs and standard household area rugs, consider your specific needs. Purpose-built drum rugs are designed specifically for musicians, often featuring reinforced, weighted corners to prevent curling, built-in blocks to stop the bass drum from sliding, and pre-marked alignment grids to speed up setup times at gigs. However, a standard household utility rug or low-pile office carpet can perform just as effectively at a lower price point, provided it features a robust non-slip backing and a durable, tightly woven surface.
How to Lay Out and Secure Your Drum Kit on the Carpet
Once you have selected your ideal drum carpet, proper installation is key to maximizing its benefits. Begin by preparing your space. Unroll the carpet in your designated drum room and let it sit flat for at least 24 hours before placing any gear on it. In Singapore’s warm climate, the fibers and backing material will relax quickly, allowing any curls or creases from shipping to flatten out. This step is essential to prevent raised edges from becoming tripping hazards or catching on your hardware.
When you are ready to assemble your kit, follow a structured positioning sequence. Place your drum throne and the bass drum on the carpet first. These two components establish the central axis and depth of your setup. By sitting on the throne and positioning the bass drum directly in front of you, you anchor the core weight of the system. Once these are set, position your hi-hat stand and snare drum, and then build the rest of your rack toms, floor toms, and cymbal stands outward from the center. This sequence ensures your entire kit remains balanced and centered on the carpet.
To secure your hardware further, take advantage of specialized anchoring techniques. If your bass drum pedals or hi-hat stands feature built-in metal spurs, gently extend them so they dig slightly into the carpet fibers without penetrating through to the floor below. Please check your drum manufacturer’s instructions first to ensure the spurs are compatible with your carpet and will not cause damage to the underlying floor if extended too far. For electronic kits or lightweight hardware, you can apply industrial-strength hook-and-loop (Velcro) strips to the underside of your pedal boards. The hook side of the Velcro will grip the low-pile carpet fibers tightly, creating an incredibly secure bond that completely eliminates pedal drift. If your carpet’s backing lacks sufficient grip on highly polished tiles, place dedicated non-slip rubber caster cups or pads under your heaviest tripod legs.
Before declaring your setup complete, perform a quick verification check. Sit on your drum throne and play an aggressive, heavy groove for a few minutes, focusing on heavy kick drum strokes and energetic hi-hat foot transitions. Stop and physically inspect the front of your bass drum and the base of your stands for any signs of forward or lateral shifting. If you notice even a few millimeters of movement, adjust the angle of your bass drum spurs, reposition your hardware legs to distribute weight more evenly, or add additional hook-and-loop fasteners to secure the drifting components.
Frequently Asked Questions (FAQ)
Can I use a regular household rug instead of a dedicated drum carpet?
Yes, you can certainly use a regular household rug as a drum carpet, provided it meets specific structural criteria. The rug must have a very low, dense pile—such as an entryway mat, a flatwoven outdoor rug, or a commercial office carpet—to ensure your hardware stands and pedals remain stable. The primary drawback of standard household rugs is their lack of a non-slip backing. If you choose a household rug, you must place a high-quality, non-slip rubber rug underlay beneath it, or apply heavy-duty double-sided anti-slip tape to the corners and edges. This prevents the rug from sliding across your tiles or wooden floors when you play.
How do I clean and maintain my drum carpet?
Maintaining your drum carpet is straightforward but essential for hygiene and longevity. First, review the carpet manufacturer’s care instructions for specific material constraints. Vacuum the carpet at least once a week to remove wood shavings from drumsticks, dust, and general debris that can settle into the fibers. If you spill liquids, blot the spill immediately with a clean cloth and spot-clean using a mild detergent and warm water. Avoid using harsh chemical solvents, which can degrade the non-slip rubber or latex backing. Periodically inspect the underside of the carpet for signs of drying, cracking, or crumbling, particularly in humid environments, and store the carpet rolled up with the pile facing outward to prevent permanent creasing.
Community discussion
Share your experience or ask a question. Comments are reviewed before publication.