
Choosing your first drum set is an exciting milestone, but for aspiring drummers in Singapore, the decision involves balancing musical ambition with practical living realities. Yamaha has long been a staple in music schools and home studios across the island, offering a range of starter kits designed for durability and progressive learning. To find the right match, you must evaluate your home’s physical space, noise tolerance, and long-term practice goals.
The primary decision lies between an acoustic kit, which offers the authentic feel of vibrating wooden shells, and an electronic kit, which provides volume control and a compact footprint. Both paths have distinct advantages, but your choice will ultimately dictate how often you can practice without disruption. By understanding the specific demands of Singaporean housing and the technical features of entry-level instruments, you can select a setup that supports your musical growth for years to come.
Acoustic vs. Electronic: Navigating Space and Noise Constraints
Living in high-density housing like Housing & Development Board (HDB) flats or condominiums requires careful consideration of acoustics and spatial footprints. An acoustic drum set is inherently loud, often producing sound levels exceeding 100 decibels. In a typical concrete-walled apartment, these sound waves bounce off hard surfaces and easily penetrate shared walls, floors, and ceilings, which can lead to noise complaints from neighbors.
Products mentioned in this guide
![Yamaha DTX6KX Electronic Drums DTX6K-X DTX 6K X Digital Drum DTX 6KX DTX6 The Music Works Store [LIMITED STOCK]](https://img.lazcdn.com/g/p/b6a8ffb94630b560f5e937d7664610bc.jpg_400x400q80.jpg_.webp)
![Yamaha DTX10K-M 9 Pieces Premium Mesh & Real Wood Electronic Drums DTX PRO X Series [LIMITED STOCK]](https://img.lazcdn.com/g/p/2fb77b223479d4822751a66570309559.png_400x400q80.png_.webp)
![Yamaha DTX6K2X Electronic Drums DTX6K2-X DTX 6K2 X Digital Drum DTX 6K2X DTX6 The Music Works [PREORDER]](https://img.lazcdn.com/g/p/dbb03d29e0c686e3e39376ae0c45e5e3.jpg_400x400q80.jpg_.webp)
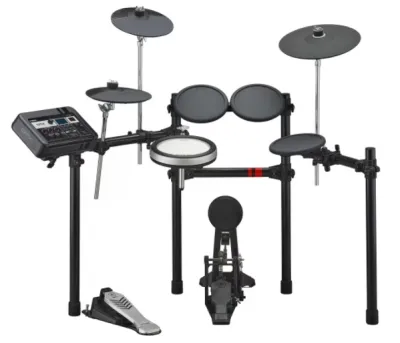
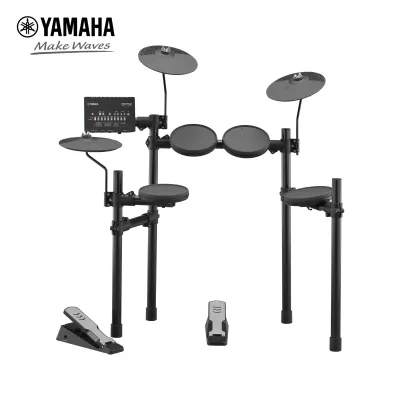
![Yamaha DTX402K Electronic Drums DTX-402K DTX 402 K Digital Drum Set [LIMITED STOCK]](https://img.lazcdn.com/g/p/70cd82f589c9b929f2e99afd4e639545.jpg_400x400q80.jpg_.webp)
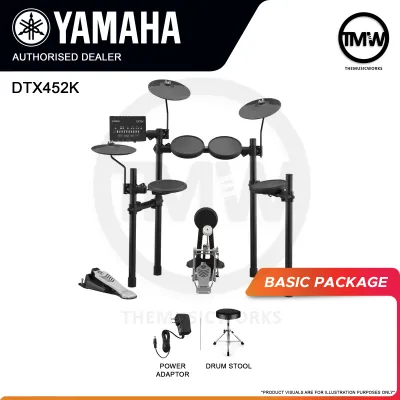
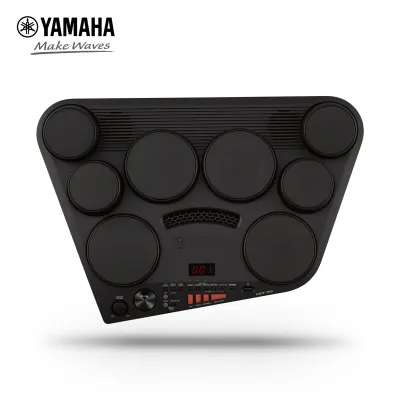
Prices are valid at publication and may change. Please refer to the product page for the latest price.
If you opt for an acoustic kit in an apartment, you must implement comprehensive noise management strategies. This includes installing heavy drapes, laying down thick acoustic foam on walls, and using specialized rubber mute pads on the drumheads and cymbals. However, these dampening measures significantly alter the natural tone and rebound of the drums, which partially defeats the purpose of choosing an acoustic instrument. Consequently, acoustic kits are generally more viable in landed properties or dedicated, soundproofed studio rooms.
Electronic drum sets offer a highly practical alternative for apartment dwellers. These kits allow you to route the sound directly to headphones, keeping the ambient noise to a minimum. However, electronic kits are not completely silent. The physical impact of wooden drumsticks hitting rubber or silicone pads, along with the downward force of the bass drum pedal, creates low-frequency structural vibrations. These vibrations travel through the floorboards and can be heard as a dull thudding sound in the room below.
To mitigate this structure-borne noise, many local drummers construct a vibration-isolating platform, often referred to as a “tennis ball riser,” or use high-density acoustic foam mats beneath the drum rack. This isolation is crucial for maintaining peace with your neighbors, especially during late-night practice sessions.
Beyond noise, the physical footprint of the instrument is a major factor. A standard five-piece acoustic drum set requires a dedicated area of at least 1.5 meters by 1.5 meters, plus additional clearance for the player to move comfortably. Electronic kits are significantly more compact, with many models featuring foldable racks that can be tucked into a bedroom corner when not in use.
Finally, consider the tactile differences between the two formats. Acoustic drums feature wooden shells and tensioned drumheads that provide organic rebound, dynamic sensitivity, and a wide range of tonal expression. Electronic kits utilize rubber, mesh, or textured cellular silicone pads. While Yamaha’s textured silicone pads are engineered to mimic the natural playability of an acoustic drum, transitioning from electronic pads to a real acoustic kit during lessons or performances still requires a brief adjustment period to master control over stick rebound and dynamics.
Essential Features to Check in Entry-Level Yamaha Kits
When evaluating entry-level Yamaha drum sets, hardware stability should be your first priority. Drumming is a highly physical activity, and a starter kit must withstand repetitive, high-impact force without shifting or loosening. Examine the construction of the drum throne, the bass drum pedal, and the rack system. Look for double-braced legs on stands, as they provide a much sturdier foundation than single-braced alternatives, preventing the hardware from wobbling during intense play.

For electronic configurations, the drum module—often called the “brain”—is the most critical component. A beginner-friendly module should feature an intuitive interface with easily accessible practice tools. Look for built-in metronomes, tempo-check functions, and interactive coaching programs that analyze your timing accuracy. These features act as a virtual instructor, helping you build a steady internal clock.
Connectivity is another essential aspect of the electronic module. Ensure the unit includes a standard headphone output, an auxiliary input for connecting external media players, and a USB port. The USB connection is particularly valuable, as it allows you to connect the drum set to a computer or tablet to trigger external software, record your practice sessions, or interface with interactive learning applications.
The quality of the included drumheads and cymbals also warrants close inspection. On entry-level acoustic kits, the factory-installed drumheads are typically basic, single-ply models. While these are perfectly adequate for your first year of learning, they will eventually stretch and lose their tone, requiring an upgrade to more durable, double-ply heads. Similarly, starter acoustic packages often include basic brass cymbals, which produce a bright, sharp sound but lack the complex overtones of professional bronze cymbals.
For electronic kits, pay attention to the pad zones. Basic models may feature single-zone pads, which produce the same sound regardless of where you strike them. Upgrading to multi-zone snare and cymbal pads allows you to execute rimshots, cymbal chokes, and bell strikes, providing a much more realistic playing experience that aligns with classical drum grading curricula.
Understanding Budget Tiers and Value for Money
Navigating the financial aspect of purchasing a drum set in Singapore requires a clear understanding of what is included in the retail price. Drum sets are sold in various configurations, and failing to read the fine print can lead to unexpected secondary expenses. For instance, acoustic drum sets are frequently sold as “shell packs,” which consist solely of the wooden drum shells and mounting hardware.
If you purchase a shell pack, you must budget separately for the snare stand, hi-hat stand, cymbal stands, bass drum pedal, drum throne, and the cymbals themselves. Conversely, “complete” acoustic packages usually include basic hardware and cymbals, making them a more straightforward option for beginners. Always verify the exact contents of the package with the retailer before finalizing your purchase.
Electronic drum sets are generally sold as complete packages containing the rack, pads, and module. However, many mid-to-high-entry models do not include a bass drum pedal or a drum throne in the standard box. Because these components are highly personal and depend on player preference, manufacturers often leave them out so players can choose their own. Beginners should factor in an additional S$100 to S$250 to cover these essential accessories, along with a pair of quality drumsticks and comfortable monitoring headphones.
When comparing budget tiers, consider the long-term value and potential resale market in Singapore. A well-maintained acoustic kit from a reputable brand like Yamaha holds its value reasonably well, as wooden shells do not become technologically obsolete. Electronic kits, while highly convenient, are subject to the depreciation typical of consumer electronics, as newer modules with advanced processing power are introduced over time.
To maximize your investment, look for bundled deals offered by local music retailers. These packages often combine the drum kit with necessary accessories like a drum mat, headphones, sticks, and a throne at a discounted bundle rate. Sourcing these items together is almost always more cost-effective than purchasing each component individually.
Purchasing Channels and Pre-Delivery Verification
Acquiring your drum set through the right channel ensures you receive an authentic product backed by reliable after-sales support. In Singapore, you can choose between authorized brand showrooms, established local music retailers, and general e-commerce platforms. Visiting a physical showroom or dedicated music store is highly recommended, as it allows you to sit at the kit, test the pad rebound, and hear the acoustic or electronic tones in person before making a decision.
While online marketplaces can offer competitive pricing, you must exercise caution. Ensure the seller is an authorized dealer rather than an unauthorized parallel importer. Parallel imports may feature lower upfront prices, but they often lack local warranty coverage, leaving you without recourse if the electronic module malfunctions or hardware components arrive damaged.
Once your drum set is delivered, perform a thorough pre-delivery verification before assembling the kit. Begin by inspecting the shipping boxes for any signs of rough handling, such as deep punctures, crushed corners, or water damage. Unpack the components systematically and cross-reference them with the parts list in the owner’s manual to ensure no tension rods, memory locks, or cables are missing.
For acoustic kits, inspect the wooden shells for any hairline cracks in the lacquer or ply separation along the bearing edges. The bearing edge is the top rim of the shell where the drumhead makes contact; it must be perfectly smooth to ensure proper tuning. Check that the metal hoops are perfectly round and not warped.
For electronic kits, assemble the rack and mount the pads securely before connecting the cable harness to the module. Power on the unit and test every pad and cymbal trigger systematically. Strike the pads at varying velocities to ensure the module registers soft taps as well as hard hits. Test the hi-hat controller pedal to verify that it smoothly transitions between open, half-open, and closed sounds. Finally, plug in your headphones to check that both the left and right audio channels are clear and free of static or intermittent dropouts.
Keep your physical purchase receipt in a safe place and register your product online with the local distributor immediately. Having a registered local warranty is your best protection against manufacturing defects, ensuring you can access authorized servicing and replacement parts without hassle.
Frequently Asked Questions (FAQ)
Do I need to buy an amplifier for an electronic Yamaha drum set?
You do not need to buy an amplifier for everyday home practice. The primary advantage of an electronic drum set is the ability to practice quietly using a pair of headphones, which plugs directly into the drum module’s headphone jack. This setup keeps your practice sessions private and prevents disturbance to your household and neighbors.
An amplifier or a dedicated drum monitor is only necessary if you plan to play along with other musicians in a shared space, perform live, or practice without headphones when noise is not a concern. If you do decide to purchase an amplifier, ensure it is a dedicated drum monitor or keyboard amplifier, as standard guitar amplifiers are not designed to handle the deep low-end frequencies of a bass drum and can easily blow out.
How much space do I need to set up an acoustic Yamaha kit in an HDB?
A standard five-piece acoustic drum set typically requires a dedicated floor space of approximately 1.5 meters in width by 1.5 meters in depth. This footprint accommodates the bass drum, snare, three toms, hi-hat stand, cymbal stands, and the drum throne. You should also allow for an additional 30 to 50 centimeters of clearance around the perimeter so you can easily access the kit and adjust stands.
When setting up in an HDB flat, it is highly recommended to place the entire setup on a thick, non-slip drum mat or a heavy rug. This mat serves two purposes: it prevents the bass drum and pedals from sliding forward as you play, and it helps absorb some of the physical vibrations before they can transfer directly into the concrete floor structure.
Community discussion
Share your experience or ask a question. Comments are reviewed before publication.