
Selecting the best Yamaha electronic drum kit for electronic music production requires shifting your focus away from traditional acoustic realism and toward digital utility. While acoustic drummers prioritize the natural sway of physical cymbals and the deep resonance of a wooden shell, an electronic music producer needs precise MIDI translation, low-latency connectivity, and highly customizable pad sensitivity. The right kit acts as an expressive controller for your Digital Audio Workstation (DAW), allowing you to play in intricate drum-and-bass breaks, house grooves, or trap rolls with organic human feel, which is then mapped to your favorite software samplers and synthesizers.
To find the ideal setup, you must evaluate how a kit’s hardware components and sound module integrate with your production workflow. Yamaha offers a diverse range of electronic drums, utilizing different pad materials, trigger technologies, and module capabilities across various price points. By understanding how these technical specifications translate to MIDI sequencing and sample triggering, you can select a kit that enhances your creative output without overpaying for features you do not need.
Key Features to Evaluate for Electronic Music Production
When producing electronic music, the physical feel of the pads directly influences the MIDI data you record. Yamaha kits primarily feature two types of pad materials: traditional rubber and Textured Cellular Silicone (TCS). Rubber pads are highly durable and offer a sharp, immediate rebound, which some finger-drummers and electronic producers prefer for fast, precise inputs. However, rubber can be fatiguing during long studio sessions and tends to produce more acoustic room noise. TCS pads, which feature tiny air bubbles suspended within a silicone matrix, behave much more like a coated acoustic drumhead. They absorb stick impact naturally, reducing wrist strain and offering highly accurate MIDI velocity translation. This precise velocity tracking is crucial when triggering dynamic software instruments, such as multi-layered velocity-sensitive synth patches or acoustic-electric hybrid drum kits.
Products mentioned in this guide
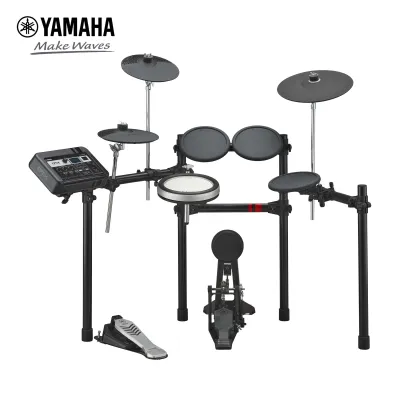
![Yamaha DTX452K Electronic Drums Digital Drum Set DTX-452K DTX 452 K DTX 452K DTX452 [PREORDER]](https://img.lazcdn.com/g/p/af5553ead0032cf1aa86c61dfabcbc22.jpg_400x400q80.jpg_.webp)
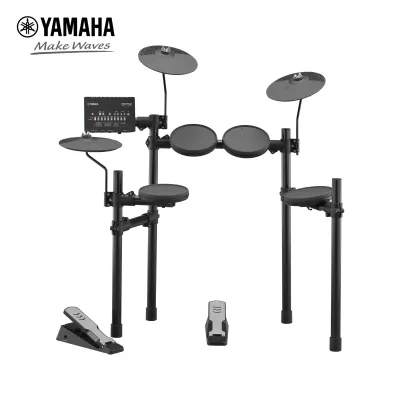
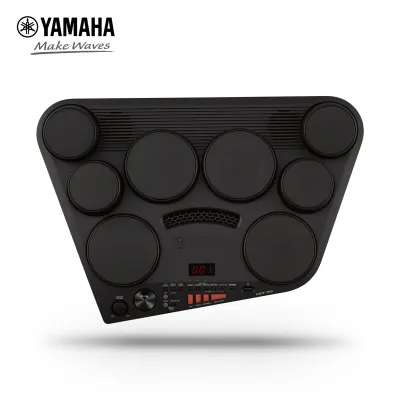
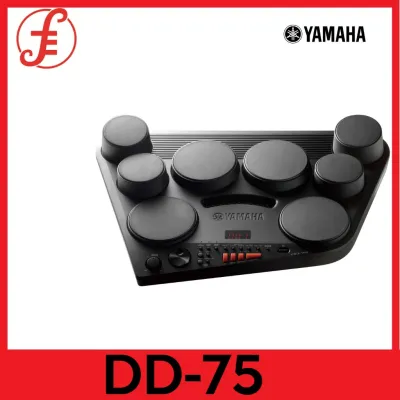
![Yamaha DD75 Digital Percussion Set DD-75 Portable Musical Electronic Instrument DD 75 [PREORDER]](https://img.lazcdn.com/g/p/c2c5758c27b7e76ef28a58fa17673cb1.jpg_400x400q80.jpg_.webp)
Prices are valid at publication and may change. Please refer to the product page for the latest price.
Module connectivity is the bridge between your physical performance and your DAW. Modern music production relies heavily on USB-MIDI connectivity, which allows you to send MIDI data directly to your computer via a single USB cable. This is standard across almost all contemporary Yamaha modules. However, if you work with hardware samplers, vintage drum machines, or external synthesizer modules in a “DAWless” studio setup, you should verify if the drum module includes traditional 5-pin DIN MIDI ports. Without these physical ports, routing MIDI data directly to external hardware requires an intermediary computer or a dedicated USB-MIDI host box, adding complexity to your creative workspace.
Expressive hi-hat and cymbal articulation can make or break an electronic rhythm track. Simple electronic kits often use single-zone cymbal pads, which trigger the exact same MIDI note regardless of where you strike the pad. For complex electronic genres like future bass, UK garage, or IDM, multi-zone triggers are essential. A three-zone cymbal pad allows you to assign different samples to the bell, bow, and edge of the cymbal, or map them to distinct parameters in your software synthesizer. Furthermore, advanced hi-hat controllers that transmit continuous controller (MIDI CC) data allow for smooth transitions between fully open, half-open, and closed states, giving you the granular control needed for realistic, shifting hi-hat patterns.
Navigating Yamaha Electronic Drum Tiers for Studio Use
Yamaha’s electronic drum lineup is structured into distinct tiers, each catering to different production needs, studio spaces, and budgets. Understanding what each tier offers helps you allocate your budget effectively, ensuring you invest in the features that match your specific beat-making workflow.

Entry-Level Tier (S$600 to S$1,200)
Kits in this price range are designed with compact footprints and streamlined functionality, making them highly suitable for small home studios or apartments in Singapore where space is at a premium. These kits typically feature rubber pads and simplified modules. While the internal sound libraries are basic, these kits excel as dedicated MIDI controllers. If your production workflow involves routing the drum kit directly into a computer to trigger external Virtual Studio Technology (VST) instruments like Native Instruments Battery, Ableton Drum Racks, or FXpansion Geist, an entry-level kit provides all the essential MIDI triggering capabilities you need without the added cost of advanced onboard sound engines.
Mid-Range Tier (S$1,200 to S$2,500)
Moving into the mid-range tier introduces Yamaha’s proprietary TCS pads, usually starting with a TCS snare pad combined with rubber tom pads. The modules in this tier offer significantly improved processing power, lower latency, and expanded connectivity options. Many mid-range modules function as class-compliant USB audio interfaces, allowing you to send both MIDI and multi-channel digital audio directly to your computer over a single USB cable. This tier is ideal for hybrid producers who want to blend the module’s internal electronic drum sounds with software instruments, or those who require more expressive physical pads for recording complex, velocity-sensitive performances.
Professional Tier (S$2,500 and Above)
Yamaha’s flagship kits feature full TCS or high-grade mesh pad configurations, heavy-duty rack systems, and highly advanced sound modules. These professional modules offer extensive internal sampling capabilities, onboard effects processing, and individual analog audio outputs. Individual outputs are incredibly valuable in a professional studio environment, as they allow you to route separate drum channels (such as the kick, snare, and hi-hats) into individual inputs on an external audio interface or mixing console. This enables real-time analog processing, EQing, and compression during tracking, providing the ultimate level of control for high-end electronic music production and live hybrid performances.
Integrating Your Kit with a DAW and DJ Software
To turn your Yamaha electronic drum kit into a powerful production tool, you must properly integrate it with your software environment. The first step is ensuring stable communication between the drum module and your operating system. While many modern Yamaha modules are class-compliant—meaning they work immediately when plugged in—installing the official Yamaha Steinberg USB Driver is highly recommended. This dedicated driver optimizes data transfer, ensures stable MIDI communication, and allows the module to handle multi-channel audio routing with minimal jitter and dropouts.
Once the hardware is connected, you need to map the drum pads to your software instruments. By default, Yamaha modules output MIDI notes following the standard General MIDI (GM) map. While most software samplers automatically align with this map, electronic music production often requires custom layouts. In DAWs like Ableton Live or Logic Pro, you can use MIDI mapping utilities or drum rack editors to assign specific pads to custom samples, loops, or synthesizer parameters. For example, you can map a rimshot trigger on your snare pad to activate a vocal chop, or configure a cymbal choke to mute a running bassline. This level of customization transforms the drum kit from a simple rhythm instrument into an interactive performance controller.
Managing audio latency is critical when recording live drum takes. Latency is the short delay between the physical strike of a pad and the sound emerging from your studio monitors or headphones. To keep latency to an imperceptible minimum, configure your DAW’s audio buffer size to 64 or 128 samples. While lower buffer sizes demand more processing power from your computer, they ensure a tight, responsive feel during tracking. If your computer struggles with low buffer sizes, you can utilize the direct monitoring feature found on many Yamaha modules. This routes the module’s internal sounds directly to your headphones with zero latency, allowing you to play naturally while your DAW silently records the incoming MIDI data for later editing and sample replacement.
Pre-Purchase Checklist for Home Studio Setups
Before purchasing a Yamaha electronic drum kit, it is essential to plan for the physical and environmental realities of your home studio space. Taking the time to verify these factors beforehand prevents setup headaches and ensures a comfortable, productive creative environment.
- Space and Footprint: Measure your available studio area carefully. A standard mid-range electronic drum kit typically requires a footprint of approximately 1.2 meters by 1.1 meters, though larger professional racks may require more space. Ensure you have enough clearance for a comfortable drum throne, headphone cable routing, and easy access to your computer or audio interface.
- Acoustic Decoupling and Vibration Control: While electronic drums are significantly quieter than acoustic kits, physical impacts still generate structural noise. The downward force of a kick drum pedal and hi-hat controller creates low-frequency vibrations that travel easily through concrete floors, which can disturb neighbors in high-density housing areas like Singapore. Consider placing your kit on a heavy-duty, high-density rubber drum mat. For maximum isolation, you can construct a DIY sound isolation platform (often called a tennis ball riser) to decouple the drum rack and pedals from the floor entirely.
- Hardware and Accessory Completeness: Do not assume that every kit comes as a complete, ready-to-play package. Many mid-range and professional Yamaha kits do not include a kick drum pedal, a physical hi-hat stand, or a drum throne, as experienced players often prefer to choose these accessories separately. Carefully read the product specifications to verify what is included in the box, and budget accordingly for high-quality hardware, a comfortable throne, and a durable pair of studio headphones.
- Cable Management and Routing: Electronic drum kits involve a significant number of trigger cables running from the pads to the module, alongside USB, power, and audio cables. Plan your cable routing to prevent tangles and tripping hazards. Using cable ties or hook-and-loop straps to secure cables along the drum rack frame keeps your studio looking clean and organized, while also protecting the delicate trigger inputs from accidental tension or damage.
Frequently Asked Questions (FAQ)
Can I use a Yamaha electronic drum to trigger samples in DJ software?
Yes, you can use a Yamaha electronic drum kit to trigger samples in DJ software, provided the software supports external MIDI mapping. Because modern Yamaha drum modules send standard MIDI data over USB, they are recognized by major DJ applications as MIDI controllers. You can manually map specific drum pads to trigger sample decks, cue points, or performance effects within your DJ software. To ensure a seamless performance, verify that your computer’s audio buffer settings are optimized for low latency, as any noticeable delay between striking a pad and hearing the sample can disrupt your mixing and timing during a live set.
Do I need the built-in module sounds if I only use external VST instruments?
If you plan to use external VST instruments exclusively, you do not need to rely on the built-in sounds of the Yamaha module. In this workflow, the module serves primarily as a trigger-to-MIDI interface, translating the physical impacts on the pads into digital MIDI notes sent to your computer. However, having a module with high-quality internal sounds remains highly beneficial. It allows you to practice or sketch out rhythm ideas quickly without turning on your computer, and it provides a zero-latency audio reference that you can monitor directly while recording MIDI data into your DAW, ensuring a highly responsive playing experience.
Community discussion
Share your experience or ask a question. Comments are reviewed before publication.