
Finding your first distortion pedal is a major milestone in your journey as a guitarist, transforming your clean tone into the gritty, powerful sound that defines rock, metal, and alternative music. However, walking into a music shop or browsing online marketplaces can quickly become overwhelming due to the sheer volume of options, technical jargon, and conflicting opinions. Instead of chasing subjective “best-of” lists or expensive boutique trends, the most effective way to choose your first pedal is to understand how these devices interact with your specific guitar, amplifier, and playing environment.
In Singapore, unique factors like compact HDB living spaces and high tropical humidity play a practical role in your gear choices. You need a pedal that sounds excellent at lower bedroom volumes, fits neatly into a modest practice setup, and features robust hardware that can withstand local environmental conditions. By focusing on usability, reliable power integration, and tone-shaping fundamentals, you can confidently select an entry-level pedal that serves as a versatile foundation for your musical growth.
Decoding Pedal Controls for Better Tone Shaping
To make an informed decision when testing pedals, you must first understand the standard control knobs found on almost every distortion unit. While manufacturers use various creative names, the core parameters almost always boil down to three essential controls: Level, Tone, and Gain. Level, sometimes labeled as Volume or Output, controls the overall loudness of the effect when engaged. It is crucial to balance this so that turning the pedal on does not cause an accidental, massive spike in volume that disrupts your practice or disturbs your neighbors.
Products mentioned in this guide
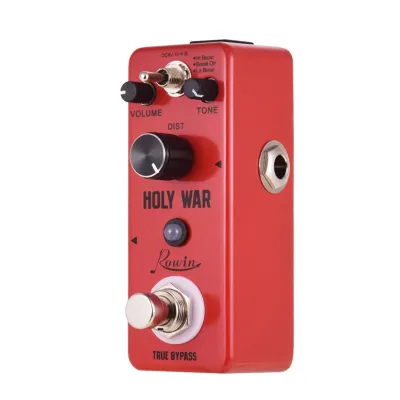
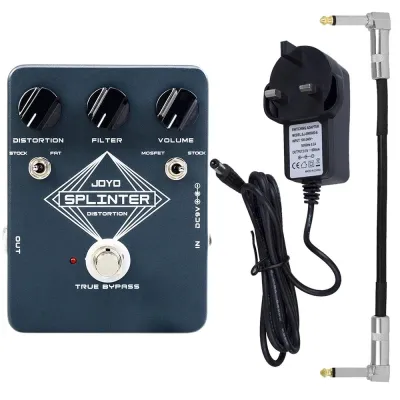
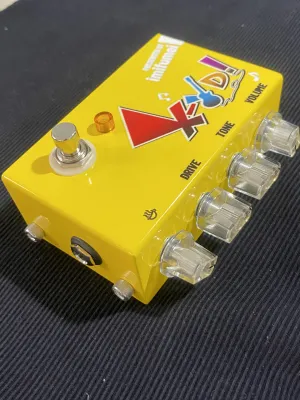
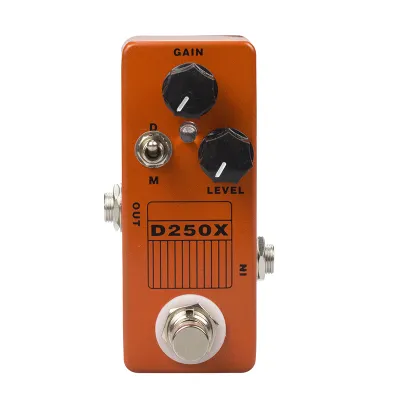
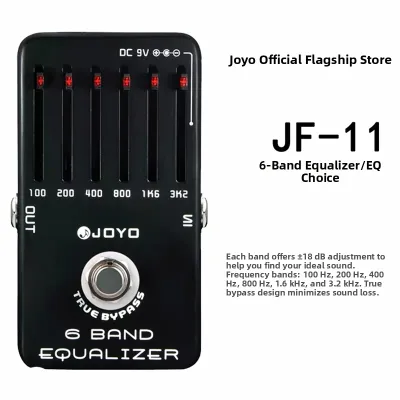
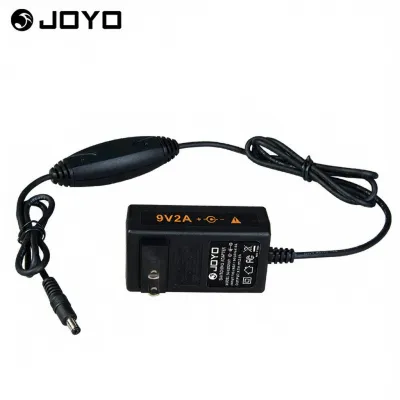
Prices are valid at publication and may change. Please refer to the product page for the latest price.
The Gain control, often labeled as Distortion or Drive, dictates the amount of saturation and sustain injected into your signal. Lower gain settings yield a crunchy, bluesy grit, while higher settings push the signal into thick, sustaining distortion suitable for heavy riffs and solos. The Tone control, which may be a single knob or a multi-band equalizer (EQ), shapes the frequency response of the distorted signal. Turning it up boosts the treble frequencies for a sharper, cutting sound, while turning it down rolls off the highs for a warmer, darker texture.
Understanding how these controls interact is key to shaping your sound. For instance, increasing the Gain naturally compresses the signal and can make it sound louder and denser, which might require you to back off the Level knob slightly to maintain a consistent volume. Similarly, high gain settings can introduce harsh high-end frequencies, which you can tame by subtly rolling back the Tone control.
These controls are directly influenced by the pedal’s internal clipping circuit, which is the mechanism that cuts off the peaks of your guitar’s audio waveform to create distortion. Generally, pedals utilize either soft clipping or hard clipping. Soft clipping gently rounds off the waveform peaks, producing a smoother, overdrive-like saturation that responds dynamically to how hard you pluck the strings. Hard clipping shears off the waveform peaks abruptly, resulting in a sharper, more aggressive, and highly compressed distortion characteristic of heavy rock and metal.
When you visit a local music store in Singapore to test these units, approach the process systematically. Ask to use a guitar and amplifier similar to your home setup to get an accurate representation of the sound. Start with all the knobs set to the “noon” position (straight up at 12 o’clock) to hear the pedal’s baseline character. Slowly sweep each knob from its minimum to its maximum setting while playing simple chords or riffs, paying close attention to how the tone changes and whether the controls offer a smooth, usable range of adjustment.
Checking Power, Bypass, and Hardware Compatibility
Before purchasing any pedal, you must ensure it integrates seamlessly with your existing hardware, power infrastructure, and physical space. Most compact effects pedals operate on a standard 9-volt DC power supply, but how they receive this power can vary. Many entry-level pedals allow for 9V battery operation, which offers maximum portability and eliminates cable clutter for quick practice sessions. However, batteries drain over time, lose voltage, and can cause the pedal’s tone to degrade or become muddy before failing completely.

For a more reliable and environmentally friendly setup, a dedicated DC power adapter is highly recommended. When selecting an adapter, you must verify two critical specifications: polarity and current draw. The vast majority of guitar pedals use a center-negative barrel connector, indicated by a small diagram on the chassis showing a negative sign pointing to the center dot. Connecting a center-positive adapter to a center-negative pedal can permanently damage the internal circuitry. Additionally, ensure the adapter can supply at least the minimum current (measured in milliamperes, or mA) required by the pedal, though distortion pedals are typically analog and have low power demands compared to digital delay or reverb units.
Another technical aspect to consider is the bypass style of the pedal, which determines how your signal flows when the effect is turned off. True bypass pedals use a mechanical switch that routes your guitar signal directly from the input jack to the output jack, completely bypassing the pedal’s internal circuitry when disengaged. This ensures your clean tone remains entirely unaltered. However, if you run multiple true bypass pedals together with long cables, the cumulative capacitance can cause a loss of high-frequency clarity, making your tone sound dull.
In contrast, buffered bypass pedals feature an active electronic buffer circuit that remains active even when the effect is off. This buffer strengthens your guitar signal, allowing it to travel through long cables and complex setups without losing high-end sparkle. For a beginner with only one or two pedals and short cable runs, the difference between true bypass and buffered bypass is negligible. However, understanding these concepts early helps you plan a cleaner, more reliable signal path as your collection grows.
Finally, evaluate the physical footprint and hardware durability of the pedal. Standard compact enclosures are highly practical because they fit easily on small pedalboards and are easy to transport. Look for robust metal enclosures rather than cheap plastic housings, as they offer superior shielding against electromagnetic interference and can withstand years of being stepped on. Pay attention to the foot switch itself; latching switches click firmly into place to turn the effect on or off, which is standard for distortion, while momentary switches only engage the effect while your foot is actively pressing down.
Matching Distortion to Your Pickups and Amplifier
A distortion pedal does not operate in a vacuum; its final sound is heavily dependent on the guitar and amplifier you plug it into. The pickups on your guitar serve as the primary source of your signal, and their output level dictates how hard they push the pedal’s input stage. Single-coil pickups, common on classic double-cutaway guitars, produce a bright, clear, and articulate tone with lower output. When paired with a distortion pedal, they retain excellent note definition but can sometimes sound thin or introduce a noticeable background hum due to their susceptibility to electromagnetic interference.
Humbucker pickups, found on many solid-body and single-cutaway guitars, feature two coils wound in opposition to cancel out hum. They produce a much higher output level and a warmer, mid-range-focused tone. This higher output pushes the distortion pedal into saturation much faster, resulting in a thicker, heavier, and more sustaining sound. If you play a guitar with humbuckers, you may find you need less gain on the pedal to achieve a heavy sound compared to a single-coil guitar.
Your amplifier also plays a massive role in how the pedal behaves. Solid-state amplifiers, which use transistors to amplify the signal, generally offer a highly clean, predictable, and consistent platform for pedals. They do not distort easily on their own, meaning the distortion you hear comes entirely from the pedal itself. This makes it easy to dial in a consistent tone at any volume level, which is ideal for quiet practice in Singapore’s residential estates.
Tube amplifiers, on the other hand, use vacuum tubes that naturally compress and distort when pushed by a strong input signal. If you plug a distortion pedal into a tube amp that is already on the verge of breaking up, the pedal will push the tubes into rich, organic saturation. However, if you run too much gain from both the pedal and the amplifier simultaneously, the sound can quickly become muddy, compressed, and lose all definition. The key strategy is to use the pedal to complement the amp’s natural character rather than fighting against it.
To establish a clean foundation before engaging your pedal, always set your amplifier’s EQ to a neutral baseline. Start with the bass, middle, and treble controls at their middle positions (often 5 or 12 o’clock depending on the amp). Play your guitar clean to ensure the tone is balanced—neither too boomy nor too piercing. Once you have a clear, natural clean tone, engage your distortion pedal and use its onboard controls to fine-tune the frequency response to your liking.
Setting Up Your Signal Chain and Dialing In Tone
Once you have chosen your distortion pedal, integrating it correctly into your signal chain is essential for achieving a clean, noise-free tone. The order in which you connect your pedals determines how they interact with one another. As a general rule of thumb, utility pedals like tuners, noise gates, and pitch shifters should come first in the chain, directly after your guitar. This ensures they receive the cleanest, most accurate signal possible to track your notes correctly.
Distortion, overdrive, and fuzz pedals should follow immediately after these utility effects. Placing distortion early in the chain allows it to shape the raw guitar signal before it is modified by other effects. Modulation pedals, such as chorus, flanger, and phaser units, should be placed after your distortion. If you place a chorus pedal before your distortion, the pedal will distort the modulated signal, which often results in a harsh, chaotic, and muddy sound. Finally, time-based effects like delay and reverb should go at the very end of the chain, allowing them to create clean, spacious echoes of your fully shaped tone.
Cable management is another critical factor in maintaining a quiet, reliable setup. Use high-quality, shielded patch cables to connect your pedals together, keeping the cable runs as short as possible to minimize signal degradation. Avoid routing your audio cables directly parallel to power cables, as this can induce unwanted hum and buzz into your signal. If they must cross, try to have them cross at a 90-degree angle to minimize electromagnetic coupling.
When you are ready to dial in your tone for the first time, resist the temptation to immediately crank the gain to maximum. Instead, adopt a systematic dialing strategy. Start with all the knobs on your distortion pedal set to the 12 o’clock position. Play a few chords to hear the baseline character of the pedal. From there, adjust one parameter at a time. For example, slowly turn the Gain knob up until you reach the desired level of saturation, then adjust the Tone knob to balance the brightness, and finally use the Level knob to match the volume of the pedal to your clean bypass volume. This methodical approach ensures you understand exactly how each control affects your sound.
Frequently Asked Questions (FAQ)
Can I use a distortion pedal with an acoustic guitar?
While you can physically plug an acoustic guitar into a distortion pedal, doing so presents significant technical and tonal challenges. Acoustic guitars are designed to resonate, and when paired with high-gain distortion, they are highly prone to loud, uncontrollable acoustic feedback. Additionally, the piezo pickups commonly found on acoustic-electric guitars can sound harsh, brittle, and unnatural when distorted. If you want to add warmth or grit to an acoustic guitar, look into dedicated acoustic preamps with built-in saturation controls or subtle overdrive pedals designed to preserve acoustic dynamics.
Do I need a separate power supply for just one pedal?
If you only own a single distortion pedal, you do not necessarily need a complex, expensive power supply system. A standard 9V battery or a simple, high-quality wall adapter is perfectly sufficient to get started. Batteries are highly portable but generate waste and can drain quickly if you leave your guitar cable plugged into the pedal’s input jack when not in use. As you expand your setup to include three or more pedals, upgrading to a dedicated, isolated power supply becomes essential to eliminate ground loop hum and provide clean, consistent power to each unit.
Why does my distortion sound muddy or fizzy?
A muddy or fizzy tone is usually the result of improper gain staging or EQ conflicts. If your sound is muddy, you may have too much bass dialed in on your amplifier or pedal, or you might be running high gain into an already distorting amplifier channel. Try backing off the gain and rolling off some bass. If your tone is too fizzy or harsh, your pedal’s Tone control or your amplifier’s treble control may be set too high. Additionally, ensure your cables are fully inserted and that your pedal is receiving stable, clean power, as low voltage can cause a pedal to sputter and sound thin.

Community discussion
Share your experience or ask a question. Comments are reviewed before publication.