
Starting your journey into the world of guitar effects can feel overwhelming due to the sheer volume of options available on the market. To choose your first guitar pedal brand, you should focus on manufacturers that prioritize rugged physical construction, intuitive control layouts, and industry-standard power specifications. By selecting a brand that emphasizes straightforward analog or digital designs rather than complex programming menus, you can master the fundamentals of tone shaping before investing in highly specialized boutique gear.
Evaluating a brand requires looking past marketing hype and focusing on practical, observable features. A reliable first pedal should serve as a durable tool that helps you understand how different effects interact with your guitar and amplifier. By establishing a clear framework for what makes a pedal brand beginner-friendly, you can make an informed purchase that fits your budget and supports your long-term musical growth.
What Makes a Guitar Pedal Brand Beginner-Friendly?
When you are learning how to shape your guitar tone, the physical durability of a pedal is paramount. Guitar pedals are designed to be stepped on, meaning they must withstand significant mechanical stress over their lifespan. Beginner-friendly brands typically use die-cast aluminum or heavy-duty steel enclosures rather than thin plastic casings. In Singapore’s highly humid climate, metal enclosures with high-quality powder coating or anodized finishes are particularly valuable, as they resist corrosion and protect the internal circuitry from moisture-related damage. Additionally, look for brands that use robust, chassis-mounted metal jacks and heavy-duty footswitches that can handle thousands of stomps without failing.
Products mentioned in this guide
![Donner Embark 02 DIS Distortion Pedal for Electric Guitar Classic High-Gain Tone [LIMITED STOCK]](https://img.lazcdn.com/g/p/49bad01cfe1439eb02869d278784145b.jpg_400x400q80.jpg_.webp)
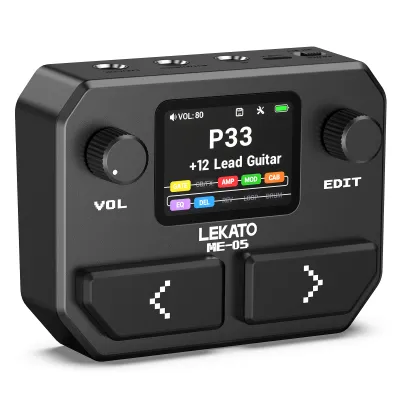
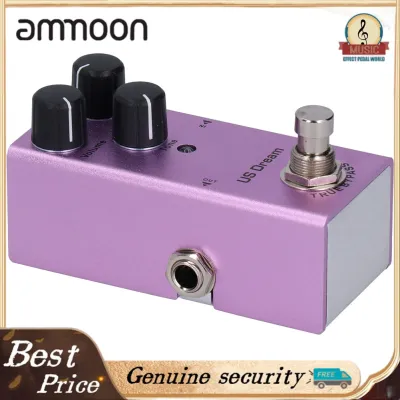
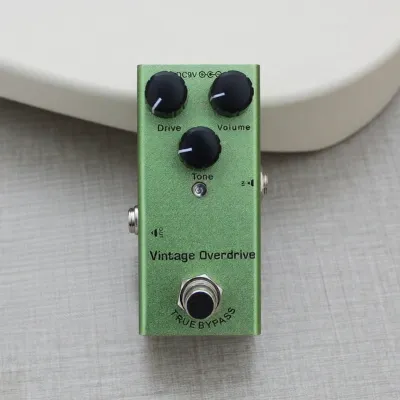
Prices are valid at publication and may change. Please refer to the product page for the latest price.
Intuitive control layouts are another essential trait of a beginner-friendly brand. When you are first experimenting with effects, you need to see exactly how adjusting a knob alters your sound. Brands that feature clear, high-contrast labeling and a “one knob, one function” design philosophy are ideal for beginners. This straightforward approach allows you to make quick adjustments on the fly without having to navigate complex digital sub-menus or multi-function encoders. Highly visible status LEDs are also crucial, as they provide immediate visual feedback on whether the pedal is active, which is especially helpful in dimly lit practice spaces.
Standardized power requirements and bypass switching configurations simplify the integration of a new pedal into your setup. Most beginner-friendly manufacturers adhere to the industry-standard 9V DC center-negative power specification. This standardization allows you to power your pedal using common, readily available power adapters or multi-pedal power supplies without risking electrical damage. Furthermore, understanding the brand’s approach to bypass switching is important. True bypass pedals completely isolate the pedal’s circuitry when turned off, preserving your guitar’s natural tone, while high-quality buffered bypass pedals help maintain signal strength over long cable runs.
Finally, consider the availability of local warranty support, clear documentation, and customer service. Purchasing a brand represented by authorized local dealers in Singapore ensures that you have access to reliable support if a component ever requires repair or replacement. Beginner-friendly brands often provide comprehensive user manuals, online video tutorials, and suggested setting templates that help you dial in classic tones quickly. Having access to these resources reduces the learning curve and helps you get the most out of your investment from day one.
Which Pedal Types Should You Buy First?
Before diving into complex modulation or ambient effects, it is highly practical to establish a foundation with essential utility and gain-shaping pedals. A dedicated tuner pedal is widely considered the most important first purchase for any guitarist. While clip-on tuners are convenient for casual bedroom practice, a pedal tuner offers superior accuracy, mutes your signal path for silent tuning between songs, and acts as a master mute switch at the very beginning of your signal chain. This utility is indispensable for both structured practice sessions and live performances.

Once your tuning is secured, gain-stage pedals are the logical next step for shaping your core amplifier tone. Overdrive pedals are designed to mimic the natural, warm breakup of a tube amplifier, responding dynamically to your playing volume and picking attack. Distortion pedals, on the other hand, provide a more aggressive, hard-clipped saturation that remains consistent regardless of how hard you strike the strings. Starting with a versatile overdrive or a classic distortion pedal allows you to explore different levels of grit and sustain, helping you find the right tonal balance for your preferred musical genres.
After mastering gain stages, you can introduce time-based effects to add depth and dimension to your sound. Delay pedals record your input signal and play it back after a set period, creating echoes that can range from quick slapbacks to spacious, rhythmic repeats. Reverb pedals simulate the acoustic characteristics of different physical spaces, such as a small room, a large hall, or a spring tank. Adding a basic delay or reverb pedal provides a sense of space that makes your playing sound more polished and professional, especially if your practice amplifier lacks built-in ambient effects.
While multi-effects processors are often marketed as all-in-one solutions, starting with individual single-effect pedals is generally more beneficial for beginners. Single pedals force you to interact with physical controls and learn the fundamental characteristics of each effect type. This hands-on experience makes it much easier to understand how different effects interact with one another. Once you have a firm grasp of these individual building blocks, you will be much better equipped to navigate and program complex multi-effects units later in your musical journey.
How to Evaluate and Compare Pedal Brands
To compare different guitar pedal manufacturers objectively, you must look closely at their technical specifications rather than relying on brand reputation alone. Start by checking the input and output impedance of the pedals. Standard guitar pedals typically feature an input impedance of 1 Megohm, which prevents high-frequency signal loss from your guitar pickups, and a low output impedance (usually under 10 Kilohms) to ensure clean signal transfer to the next pedal or amplifier. Additionally, verify the current draw, measured in milliamperes (mA). Analog overdrive pedals often draw very little current (under 20mA), whereas digital delay and reverb pedals can draw 100mA to 300mA or more, requiring a power source that can deliver sufficient current.
Physical dimensions and layout are critical factors when planning your physical setup. Standard compact pedals generally measure approximately 120mm by 65mm, making them highly compatible with standard pedalboard layouts. Some brands offer mini-format pedals, which save valuable space but may lack the option to run on an internal 9V battery. You should also observe the placement of the input, output, and power jacks. Pedals with top-mounted jacks can be placed closer together on a pedalboard, saving horizontal space, whereas side-mounted jacks require more clearance between individual units.
Evaluating the physical components used by a brand can give you a clear indication of its long-term reliability. Look for manufacturers that use standardized, easily replaceable parts, such as standard 1/4-inch jacks and heavy-duty footswitches. Brands that solder their jacks and switches directly to the main circuit board without chassis reinforcement can be more susceptible to damage from physical impacts. Checking whether a brand uses silent, soft-touch momentary switches or traditional latching switches with a physical click can also help you choose a pedal that matches your physical playing preferences.
Finally, compare the value of any bundled accessories or unique design features included with the pedal. Some manufacturers package their pedals with pre-cut hook-and-loop tape for easy pedalboard mounting, adhesive rubber feet for non-slip floor use, or even a dedicated power adapter. Other brands may offer unique battery compartment designs that allow you to swap out a 9V battery quickly without needing a screwdriver. Comparing these small but practical details can help you determine which brand offers the most convenient and complete package for your needs.
Strategies for Building Your First Setup
Building your first pedal setup does not require a massive upfront financial investment if you approach the process strategically. One of the most effective ways to stretch your budget is to compare the benefits of buying new versus used gear. Purchasing a new pedal from an authorized local retailer gives you the peace of mind of a manufacturer’s warranty and ensures the pedal is in pristine condition. However, the used market in Singapore is highly active, and you can often find reliable, name-brand pedals at a significant discount. When inspecting a second-hand pedal, always test the physical jacks for loose connections, turn all the knobs to check for scratchy static sounds, and verify that the footswitch engages consistently.
If you are on a highly restricted budget, a basic multi-effects processor can serve as an educational sandbox. While individual pedals are superior for learning tactile control, a budget-friendly multi-effects unit allows you to experiment with a wide variety of modulation, delay, and filter effects that you might not want to purchase individually. This exposure can help you identify which specific effects are essential to your playing style, allowing you to make more targeted investments in high-quality single pedals in the future.
When planning your purchases, establish a realistic budget in S$ and prioritize your core tone over niche effects. A sensible starting budget for a single, high-quality beginner pedal ranges from S$60 to S$150. It is far better to invest in one highly reliable overdrive or tuner pedal from an established brand than to buy three or four ultra-cheap, unbranded pedals that may introduce excessive electrical noise, degrade your tone, or fail after a few months of use. Prioritize the effects that will have the greatest impact on your daily practice and musical style.
Remember to factor the cost of essential accessories into your overall budget. A guitar pedal cannot function in isolation; you will need high-quality patch cables to connect multiple pedals, which typically cost between S$10 and S$25 each. You must also budget for a reliable power source, as running multiple digital pedals on cheap, unregulated adapters can introduce unwanted hum and noise into your amplifier. Allocating a portion of your budget to these supporting components ensures that your pedal setup remains quiet, reliable, and enjoyable to play.
Pre-Purchase Checklist for Your First Pedal
Before finalizing your purchase, it is essential to verify that your new pedal will integrate seamlessly with your existing equipment. Use the following checklist to ensure a smooth setup process:
- Amplifier Compatibility: Confirm how you plan to connect the pedal to your amplifier. If your amplifier has an effects loop (Send and Return jacks), time-based effects like delay and reverb will generally sound cleaner when placed there. If your amp only has a standard front input, ensure your gain and utility pedals are arranged to feed into the clean channel of the amplifier.
- Power Supply Specifications: Double-check the power requirements printed on the pedal or in its manual. Verify that your power adapter matches the required voltage (typically 9V DC), polarity (usually center-negative, indicated by a diagram with a minus sign inside a C-shape pointing to a center dot), and that the adapter's current output (mA) meets or exceeds the pedal's current draw.
- Authorized Dealer Verification: Purchase your pedal from an authorized local dealer to guarantee product authenticity and secure a valid local warranty. This protects you from counterfeit products and ensures you have access to professional support if technical issues arise.
- Cable Requirements: Ensure you have the correct cables for immediate testing. To connect a single pedal, you will need two standard 1/4-inch instrument cables: one running from your guitar to the pedal's input, and another running from the pedal's output to your amplifier's input. If you are adding a second pedal, you will also need a short patch cable to link them together.
Frequently Asked Questions (FAQ)
Do I need a specific power supply for my first pedal?
Yes, using an incorrect power supply can permanently damage your pedal’s internal circuitry. Most standard guitar pedals require a 9V DC power supply with a center-negative polarity. You must verify that the voltage matches exactly and that the power supply can deliver at least the minimum current draw (measured in mA) required by the pedal. While a simple daisy-chain cable can power multiple low-draw analog pedals, digital pedals often require an isolated power supply to prevent unwanted electrical hum and noise from entering your signal chain.
Should I buy a multi-effects unit or single pedals?
The choice depends on your personal learning style and goals. A multi-effects unit offers excellent value, allowing you to explore hundreds of different sounds, modulations, and delays for a single upfront cost. However, their complex digital menus can be distracting for beginners. Single pedals are highly recommended because they offer a tactile, one-knob-per-function interface. This simplicity makes it much easier to understand how adjusting a specific parameter directly alters your tone, helping you build a stronger foundation in sound design.
Does the order of pedals matter for a beginner?
Yes, the sequence of your pedals significantly influences your final sound. The standard industry convention is to place utility pedals like tuners first, followed by dynamic and gain pedals (such as overdrives and distortions), then modulation effects (like choruses or phasers), and finally time-based effects (delays and reverbs) at the end of the chain. Placing the tuner first ensures it receives a clean, unaltered signal directly from your guitar for accurate pitch detection, while putting delay and reverb last ensures your distorted tones are echoed cleanly rather than distorting the echoes themselves.

Community discussion
Share your experience or ask a question. Comments are reviewed before publication.