
Starting your journey into guitar effects is an exciting milestone, but managing multiple pedals quickly becomes chaotic without a proper foundation. Choosing your first pedalboard requires balancing your current collection with your future musical ambitions, ensuring your setup remains organized, quiet, and easy to transport. To make the right choice, you must focus on physical dimensions, power distribution compatibility, and structural durability. By planning ahead, you can avoid the common pitfall of buying a board that you outgrow within a few months or one that introduces unwanted electrical noise into your signal chain.
Sizing and Capacity: How to Plan Your Pedal Layout
Before looking at specific board models, you need to audit your current gear and estimate your growth. A common mistake is choosing a board that fits your existing pedals exactly, leaving no room for expansion. If you currently own three pedals, planning for a board that accommodates five or six is a sensible approach. This buffer allows you to add new effects without needing to replace the entire board. You must also account for the physical space required by patch cables, especially the connectors, which can add significant width between pedals depending on whether you use pancake-style or standard right-angle plugs.
Pedalboards generally fall into three size categories: compact, medium, and large. Compact boards typically hold three to five standard-sized pedals and are excellent for minimalist setups or players who only need essential effects like a tuner, overdrive, and delay. Medium boards accommodate six to ten pedals, making them a versatile choice for advancing guitarists who want to experiment with modulation, reverb, and utility pedals. Large boards hold ten or more pedals, but they are heavy, difficult to transport, and generally unnecessary for beginners.
Products mentioned in this guide
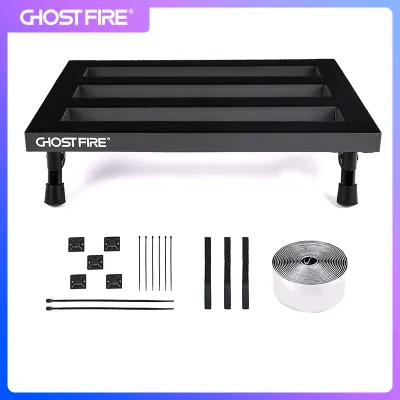
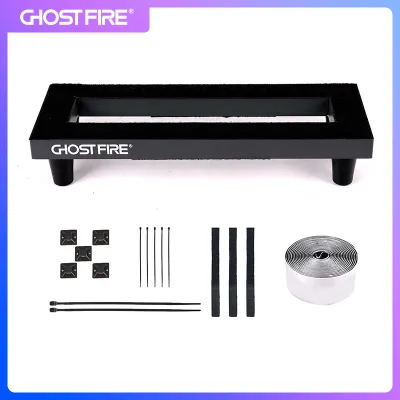
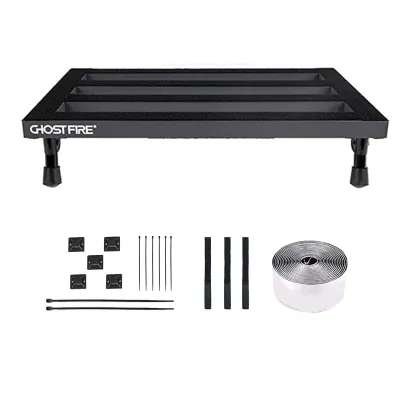
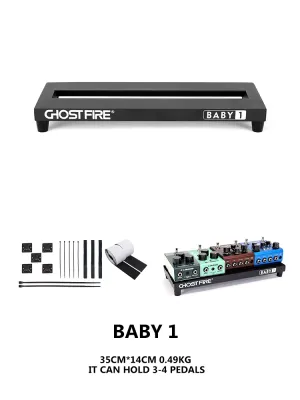
Prices are valid at publication and may change. Please refer to the product page for the latest price.
The physical profile of the board also affects how easily you can access your effects during a performance. Flat boards are simple and cost-effective, but reaching the back row of pedals on a multi-row setup can be challenging without accidentally stepping on the knobs of the front row. Angled or tiered designs elevate the back row, providing better visibility and easier access. Some modern designs even feature modular tiers that you can adjust as your collection changes, which helps maintain a clean line of sight to your footswitches.
To determine the exact size you need, lay your pedals out on a flat surface or use an online layout planner. Arrange them in your preferred signal chain order, leaving at least two to three centimeters of space between each enclosure. Measure the total width and depth of this arrangement, including the protruding jacks and power cables. This measurement represents the minimum footprint you require, allowing you to select a board size that comfortably accommodates your layout without crowding.
Power Solutions: Choosing Between Daisy Chains and Isolated Supplies
Powering your pedals correctly is crucial for maintaining a clean, noise-free guitar signal. Many beginners start with a simple daisy chain cable, which connects a single power adapter to multiple pedals in a series. While daisy chains are inexpensive and highly portable, they share a common ground across all connected devices. This shared ground often introduces significant electrical hum and interference, particularly when you mix different types of pedal technologies on the same chain.

Isolated power supplies solve this issue by providing dedicated, electrically isolated outputs for each pedal. This isolation prevents ground loops and keeps digital high-frequency noise from bleeding into sensitive analog overdrive or fuzz circuits. If your setup includes a mix of analog dirt pedals and digital delay or reverb units, an isolated power supply is highly recommended to keep your signal quiet. Digital pedals also tend to have much higher current demands, which can easily overload a basic daisy chain.
Before purchasing any power unit, you must verify the electrical requirements of each pedal in your chain. Check the labels on the back of your pedals or consult the manufacturer manuals for three key specifications: voltage, polarity, and current draw. Most standard pedals operate on 9V direct current (DC) with a center-negative polarity, but some require 12V or 18V. Additionally, ensure the power supply output can deliver at least the minimum current (measured in milliamperes, or mA) that your pedal demands; supplying insufficient current can cause digital pedals to malfunction or fail to power on entirely.
When selecting a pedalboard, consider where the power supply will sit. Mounting the power supply underneath the board is an excellent way to save valuable surface space for more pedals. Many angled and tiered boards feature dedicated mounting brackets or spacious under-board cavities designed specifically to house common power bricks. Ensure the board you choose has enough vertical clearance underneath to accommodate your chosen power supply model without resting on the floor or putting tension on the power cables.
Build and Portability: Evaluating Materials and Cable Management
The materials used to construct your pedalboard directly impact its durability and how easy it is to carry. Aluminum is the industry standard for a reason; it offers an excellent strength-to-weight ratio, resisting bending and impact while remaining relatively lightweight. Plywood and plastic boards are also available, but they may not withstand the rigors of regular transport as effectively. In humid climates like Singapore, metal or treated materials are particularly beneficial, as untreated wood can warp or degrade over time when exposed to moisture.
Effective cable management is what separates a professional, reliable setup from a messy and unreliable one. Look for boards that feature integrated routing slots, open rails, or built-in zip tie anchors. These design elements allow you to route your patch cables and power lines underneath the board, keeping the top surface clean and preventing cables from getting snagged or unplugged during transport. High-quality hook-and-loop tape or dual-lock fastening surfaces are also essential for keeping your pedals firmly anchored to the board.
Portability is a major consideration if you plan to take your gear to rehearsals, lessons, or local gigs. Evaluate the board’s weight limits and check whether it comes with a fitted gig bag or a hard flight case. A padded gig bag is usually sufficient for local travel, but ensure it has comfortable shoulder straps and robust zippers. If you anticipate heavy travel or stacking your gear in a vehicle trunk with heavy amplifiers, a hard case offers robust protection, though it adds significant weight to your overall carrying load.
Finally, do not overlook the small details that keep your board stable during use. Verify that the board is equipped with sturdy, non-slip rubber feet. These feet prevent the board from sliding across slick stages or studio floors when you step on your pedals. They also elevate the frame slightly, protecting the underside of the board and your power connections from dust, dirt, or minor spills on the floor.
Building Your Shortlist: A Condition-Based Selection Checklist
To narrow down your options and find the right pedalboard for your specific needs, use this structured, step-by-step checklist.
First, match the board size to your primary use case. If your setup is destined to remain stationary in a compact bedroom or home studio, a simple, flat board costing around S$40 to S$80 is highly practical. However, if you plan to transport your gear frequently to rehearsals or local venues, prioritize a compact or medium angled board that fits easily into a gig bag and can be set up quickly with a single power cable.
Second, verify power supply compatibility. Before committing to a board, check its underside clearance and mounting options. Ensure that your chosen isolated power supply can be mounted securely underneath using brackets or heavy-duty adhesive. If the board is too low to the ground, you will be forced to place the power supply on top, which reduces the space available for your pedals.
Third, cross-check your transport limits. Consider how you will transport the board to your destinations. Measure the dimensions of the board’s carrying bag or case to ensure it fits comfortably in your car trunk, on public transport, or in your storage space at home. Keep the total weight of the board, pedals, and power supply within a range that you can comfortably carry alongside your guitar.
Fourth, review the board’s surface material and mounting system. Some boards come pre-covered in loop fabric, while others require you to apply adhesive strips yourself. Ensure the mounting surface is compatible with your pedals’ bottom plates. If your pedals have rubber feet or battery compartments that prevent them from sitting flat, you may need to remove the feet or use specialized mounting brackets to achieve a secure bond.
Frequently Asked Questions (FAQ)
Do I need a pedalboard if I only have three pedals?
While you do not strictly need a dedicated board for three pedals, having one offers significant practical benefits. A small board keeps your pedals connected, powered, and aligned, allowing you to set up or pack away your gear in seconds with just a single input and output cable. If you prefer to test different layouts before investing in a commercial board, you can arrange your pedals on a clean towel or a piece of cardboard at home to see how you like the workflow before making a purchase.
How do I secure my pedals to the board without damaging them?
The most common method is using high-quality hook-and-loop tape. Before applying the adhesive, thoroughly clean the bottom of your pedals with isopropyl alcohol to remove any dust or oils, ensuring a strong, long-lasting bond. For pedals with rubber feet or uneven bottom plates, you can carefully unscrew the feet and store them safely, or use specialized mounting brackets that attach directly to the pedal’s existing screws, preserving the original condition of the enclosure.
Can I use a generic household power strip instead of a dedicated pedal power supply?
Using a standard household power strip to plug in multiple individual wall-adapter power supplies is technically possible, but it often introduces significant ground loop hum and electrical noise into your audio path. Household strips lack the specialized voltage regulation and isolated filtering circuits required to keep sensitive guitar signals quiet. Investing in a dedicated, isolated pedal power supply is a highly effective way to ensure clean, quiet, and reliable power for your effects.
Community discussion
Share your experience or ask a question. Comments are reviewed before publication.