
As a beginner guitarist, your most reliable starting point is a clip-on headstock tuner or a basic pedal tuner. These options offer the best balance of visual clarity, ease of use, and affordability, ensuring you spend more time practicing and less time struggling to get in tune. While smartphone apps are highly accessible, dedicated hardware provides the physical isolation and reliability needed to train your ears and keep your instrument sounding sweet in any environment.
Choosing your first tuner is not just about finding the cheapest device; it is about selecting a tool that matches your instrument, your practice space, and your learning style. A good tuner helps you build pitch confidence, making your practice sessions much more productive. By understanding the different types of tuners available and the key features to look for, you can make an informed purchase that will serve you well throughout your musical journey.
Main Types of Guitar Tuners and Who They Suit
Selecting the right tuner form factor depends heavily on where you plan to practice and what type of guitar you play. Different designs excel in different environments, and choosing the wrong style can lead to frustration during your practice sessions.
Products mentioned in this guide
![[SG 🚚] Electronic Tuner for Guitar Violin Ukulele & Bass | Stringed Instrument Accessory with Accurate](https://img.lazcdn.com/g/p/b3c88a9afe4c63c1057dda7e61f5d1ed.jpg_400x400q80.jpg_.webp)
Prices are valid at publication and may change. Please refer to the product page for the latest price.
Clip-On Headstock Tuners
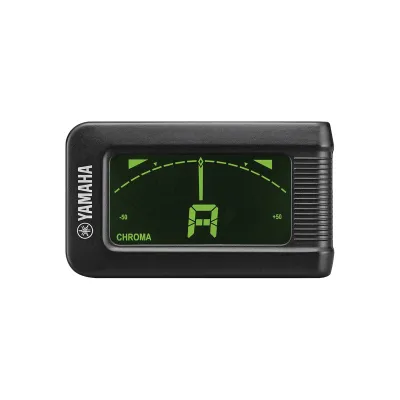
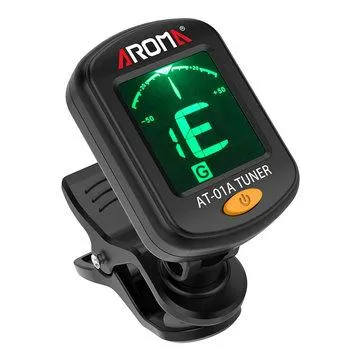
Clip-on tuners attach directly to the headstock of your guitar. They operate using a piezoelectric sensor, which detects the physical vibrations of the wood rather than the sound waves traveling through the air. This vibration-based tracking makes them highly effective at isolating your instrument’s pitch, even in a room with moderate background noise.
For acoustic guitarists and casual electric players practicing at home, clip-on tuners are generally the default recommendation. They are compact, highly portable, and incredibly easy to use. However, they do have minor drawbacks; some clamp designs can potentially mar delicate vintage finishes if left on the headstock permanently, and their small screens can sometimes be difficult to position at the perfect viewing angle.
Pedal Tuners
Pedal tuners are designed to sit on the floor as part of an effects pedalboard setup. They require a standard instrument cable to receive an audio signal directly from an electric, bass, or acoustic-electric guitar. Because they rely on a direct cable connection, they are completely immune to external room noise, making them the gold standard for live performances and noisy band rehearsals.
In addition to their superior accuracy, pedal tuners feature a foot-activated switch that mutes your guitar signal when turned on. This allows you to tune silently between songs without broadcasting your adjustments to your audience or bandmates. The primary trade-offs are portability and cost; they require an external power supply or a 9V battery, are heavier than clip-ons, and generally carry a higher price tag.
Smartphone Apps and Software
Smartphone tuning apps are highly convenient because almost everyone already carries a compatible device. Many of these apps are free or low-cost, making them an attractive option for absolute beginners who want to try out the guitar before investing in dedicated hardware.
Despite their convenience, apps rely on your phone’s built-in microphone, which presents significant limitations. They struggle to track pitch accurately in noisy environments, as they pick up background chatter, television audio, or air conditioning hum. Furthermore, using your phone to tune can introduce unwanted distractions from notifications during your dedicated practice time.
Soundhole and Rack Tuners
Soundhole tuners are specialized devices that mount inside the soundhole of an acoustic guitar, keeping them hidden from view while providing a discrete display for the player. While they are excellent for maintaining the clean aesthetic of an acoustic instrument, they can be awkward to install and are completely incompatible with electric guitars.
Rack tuners are large, high-precision units designed to be mounted in professional studio or touring gear racks. They offer exceptional accuracy and advanced routing options, but their bulk, high cost, and complexity make them entirely unnecessary for first-time buyers. Beginners should almost always bypass these niche options in favor of more versatile designs.
Essential Features to Evaluate for Accuracy and Ease of Use
When evaluating different tuners, it is easy to get overwhelmed by technical specifications. Focusing on a few essential features will help you find a device that is both accurate and user-friendly.

Chromatic vs. Non-Chromatic Modes
Non-chromatic tuners are programmed to recognize only the specific notes of standard guitar tuning (E, A, D, G, B, E). If your string is wildly out of tune, a non-chromatic tuner may fail to register the note at all, leaving you confused about whether to tighten or loosen the string.
In contrast, a chromatic tuner detects all twelve semitones in the Western musical scale. This is highly recommended for beginners because it allows you to explore alternate tunings, such as Drop D or half-step down, as you progress. A chromatic display also helps you learn the actual names of the notes you are playing, reinforcing your basic music theory knowledge.
Display Readability and Interface
A tuner is only useful if you can easily read its display while holding your instrument in a comfortable playing position. Look for screens with high contrast, bright LEDs, or backlighting that remain visible in both dim bedrooms and bright outdoor settings.
Many modern tuners use color-changing displays to provide instant visual feedback, turning red when a note is flat or sharp and green when it is perfectly in tune. This intuitive color coding is incredibly helpful for beginners, allowing you to make quick, confident adjustments without squinting at tiny needle indicators.
Calibration Settings
Standard concert pitch is calibrated to A4 = 440Hz, which is the universal reference point for modern music. Most dedicated tuners feature calibration buttons that allow you to adjust this reference pitch slightly, typically between 430Hz and 450Hz.
For a beginner, the most important aspect of calibration is ensuring it stays locked at 440Hz. Accidental adjustments to this setting can cause you to tune your guitar sharp or flat relative to instructional videos, backing tracks, and other musicians. When choosing a tuner, look for one with a simple interface where the calibration settings cannot be easily changed by accident.
Power Sources and Battery Life
Clip-on tuners typically run on small CR2032 coin cell batteries, which are lightweight but require regular replacement if you practice daily. Some modern clip-ons feature built-in lithium-ion batteries that can be recharged via a standard USB cable, offering excellent long-term value and eliminating the need to buy disposable batteries.
Pedal tuners are usually powered by a standard 9V DC power adapter or a 9V battery. If you plan to build a pedalboard, a pedal tuner that can run on an external power supply is highly convenient, as it can often daisy-chain power to your other effects pedals, simplifying your setup.
Building Your Conditional Tuner Shortlist
To find the perfect tuner, you should match your specific practice environment and instrument type to a realistic budget. This structured approach ensures you do not overspend on features you do not need.
Scenario Matching for Beginners
If you primarily play an acoustic guitar in a quiet bedroom, a high-quality clip-on tuner is your best option. It is simple, unobtrusive, and highly responsive to the natural vibrations of an acoustic instrument. It also easily slips into your gig bag pocket for travel.
If you play an electric guitar and plan to practice with an amplifier, jam with friends, or eventually perform live, a pedal tuner is a much wiser investment. The direct cable connection ensures perfect tracking regardless of how loud the room gets, and the mute function is an essential tool for maintaining a professional presentation.
Budget Tiers and What to Expect
Understanding what each price point offers helps you set realistic expectations for build quality and performance. In the local market, tuner prices generally fall into three distinct tiers:
- Entry-Level (Under S$20): This tier consists primarily of basic clip-on tuners. They offer simple LCD screens and plastic construction. While they are perfectly adequate for basic home practice, they may have slower tracking speeds and less durable hinges.
- Mid-Range (S$20 to S$60): Here you will find advanced clip-on tuners with bright color displays, rechargeable batteries, and improved physical durability. This tier also includes entry-level pedal tuners with basic metal enclosures and standard bypass switching.
- Premium (Above S$60): This tier features professional-grade pedal tuners and high-precision strobe clip-ons. These devices offer exceptional tuning accuracy (often down to a fraction of a cent), robust metal chassis, and advanced features like true bypass routing.
Purchasing Checklist for New Players
When you are ready to buy, keep a few practical verification steps in mind to ensure a smooth purchasing experience. Whether shopping at a local music store in Singapore or browsing an online marketplace, use this checklist:
- Warranty Coverage: Verify that the tuner comes with a manufacturer's warranty, typically covering electronic defects for at least one year.
- Return Policy: Ensure the retailer offers a clear return or exchange window in case the device is dead on arrival or incompatible with your instrument.
- Authorized Sellers: Purchase from reputable, authorized music dealers to avoid counterfeit products, which often suffer from poor accuracy and fragile construction.
- Included Accessories: Check if the tuner includes the necessary batteries or charging cables, so you can start using it immediately without making an extra trip to the store.
Practical Tips for Using and Maintaining Your First Tuner
Once you have purchased your tuner, using it correctly and maintaining it properly will ensure accurate readings and prolong the lifespan of the device.
Optimizing Clip-On Placement
To get the most accurate reading from a clip-on tuner, place it at the very tip of your guitar’s headstock. This area experiences the strongest physical vibrations when a string is plucked, allowing the piezo sensor to track the pitch quickly and accurately.
Always angle the screen so that you can view it clearly without having to tilt your head or alter your playing posture. Additionally, avoid clamping the tuner over brand logos or delicate decals, as the pressure and rubber pads can sometimes cause minor cosmetic wear over time.
Signal Chain Rules for Pedal Tuners
If you are using a pedal tuner, it should almost always be placed first in your signal chain, directly after your guitar. This ensures the tuner receives a clean, uncolored signal from your pickups before it is altered by distortion, modulation, or delay pedals.
Placing the tuner first also ensures that the mute function works as a master kill switch, instantly silencing your entire rig when activated. This is highly useful for stopping unwanted feedback or hum when you take a break from playing.
Minimizing Interference with Microphone Tuners
If you must use a smartphone app or a microphone-based tuner, find the quietest room possible for your practice sessions. Close windows and turn off fans or television sets that might introduce low-frequency hums that confuse the tuner’s microphone.
Position your phone as close to the guitar as possible. For acoustic guitars, place the phone near the soundhole; for electric guitars, place it close to your amplifier’s speaker. Pluck the strings firmly but cleanly, using a single stroke, and allow the note to ring out so the microphone has enough time to analyze the pitch.
Basic Maintenance and Battery Care
To keep your tuner functioning reliably for years, perform basic maintenance periodically. If you use a clip-on tuner, wipe down the rubber pads occasionally with a dry microfiber cloth to remove any dust or oils that could cause the clamp to slip.
If you plan to store your tuner unused for more than a few weeks, always remove the batteries. Alkaline and coin cell batteries can leak corrosive chemicals over time, which can permanently damage the internal circuitry of your device. Store the tuner in a cool, dry place away from direct sunlight and extreme humidity.
Frequently Asked Questions (FAQ)
Do I need a polyphonic tuner as a beginner?
No, you do not need a polyphonic tuner as a beginner. Polyphonic tuners allow you to strum all six strings simultaneously to see which ones are out of tune at a glance. While this is a convenient feature for experienced gigging musicians who need to make rapid adjustments between songs, it is a premium feature that adds unnecessary cost for a beginner.
As a new player, you should focus on tuning your guitar note-by-note. This practice helps you develop your ear, learn the names of individual strings, and understand how minor adjustments affect the pitch of each string. A standard chromatic tuner is perfectly adequate and highly cost-effective for this learning process.
Can I just use a free smartphone app instead of buying a physical tuner?
While you can certainly start with a free smartphone app, investing in a dedicated physical tuner is highly recommended for long-term practice. Dedicated tuners, especially clip-ons, use physical vibrations rather than microphones, making them far more reliable in noisy environments.
Furthermore, using a physical tuner helps eliminate the distractions associated with smartphones. When you use your phone to tune, you are highly likely to be distracted by incoming messages, social media notifications, or emails, which can disrupt your practice flow. A dedicated tuner keeps your focus entirely on your instrument.
What is the standard calibration setting I should use?
Your tuner should always be calibrated to the standard reference pitch of A4 = 440Hz. This is the universal tuning standard used by the vast majority of modern music, instructional videos, and online chord charts. Keeping your tuner set to 440Hz ensures that your guitar will sound in harmony with any backing tracks or lessons you follow.
You should only adjust this calibration setting if you are playing in a specialized ensemble, such as an orchestra or a historical performance group, that specifically requires an alternate reference pitch (such as A4 = 415Hz or 442Hz). For all standard guitar learning, leave the calibration locked at 440Hz.

Community discussion
Share your experience or ask a question. Comments are reviewed before publication.