
Cleaning a violin is a delicate balancing act between maintaining the instrument’s aesthetic beauty and preserving its structural integrity. Over time, a combination of fine rosin dust, skin oils, sweat, and environmental dust accumulates on the surface of the wood. If left unaddressed, this mixture can harden into a stubborn grime that dulls the instrument’s appearance and can eventually damp its acoustic resonance. While a dedicated violin cleaner is an excellent tool for restoring your instrument’s natural luster, applying it incorrectly can lead to catastrophic, irreversible damage to the delicate varnish.
Understanding how to safely navigate this cleaning process is essential for every string player. The varnish on a violin is not merely a cosmetic coating; it is a highly specialized layer that protects the wood while allowing it to vibrate freely. Because different instruments utilize different types of varnish, a universal approach to cleaning does not exist. By learning how to assess your instrument’s finish, selecting the correct tools, and executing a precise, gentle cleaning technique, you can keep your violin looking and sounding its best for years to come.
Assess Your Violin's Finish and Cleaner Compatibility
Before you allow any liquid cleaning agent to touch your violin, you must determine whether the product is chemically compatible with your instrument’s specific finish. Violin varnishes are generally categorized into oil-based, spirit-based, or modern synthetic lacquers. Antique and high-quality bench-made instruments typically feature delicate oil or spirit varnishes, which are highly sensitive to moisture, heat, and chemical solvents. Conversely, many student-model violins are finished with durable polyurethane or nitrocellulose lacquers, which are more resilient but still susceptible to scratching and chemical dulling.
Products mentioned in this guide

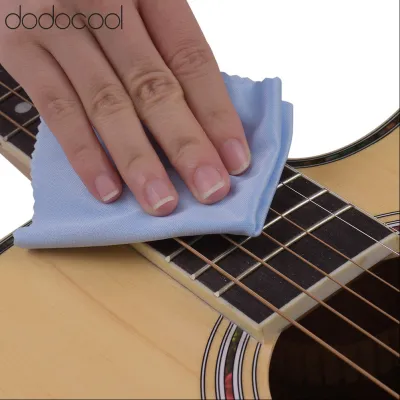
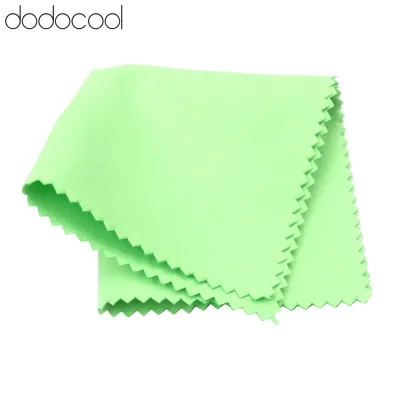

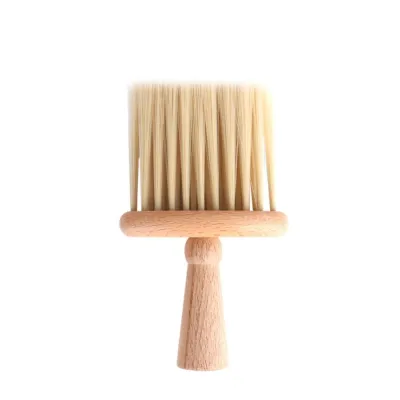

Prices are valid at publication and may change. Please refer to the product page for the latest price.
To identify the type of finish on your instrument, consult the original maker’s documentation or reach out to the shop where you purchased it. If this information is unavailable, you must proceed with extreme caution. Check the label of your chosen violin cleaner to see if it specifies compatibility with certain varnish types. Many commercial cleaners are formulated specifically for oil varnishes and can quickly dissolve or cloud a spirit-based finish.
The safest way to prevent widespread damage is to perform a localized spot test before committing to a full cleaning. Select a tiny, inconspicuous area of the violin, such as the lower rib near the chinrest or the very edge of the back plate. Apply a microscopic drop of the cleaner to a clean cloth and gently press it against the test area for a few seconds.
Carefully observe the spot for any immediate or delayed reactions. Look closely for signs of softening, stickiness, clouding, or any transfer of color from the varnish onto your cloth. If you notice even the slightest change in the texture or appearance of the finish, stop immediately. Wipe away any remaining residue with a dry, clean microfiber cloth and do not use that product on your instrument.
Gather the Right Tools for Safe Violin Cleaning
Safe violin cleaning relies heavily on using the correct, specialized tools. You must never use household wood polishes, glass cleaners, or generic furniture oils on a stringed instrument. These commercial products often contain silicones, waxes, or harsh solvents that can penetrate the wood, permanently damage the varnish, and make future structural repairs nearly impossible because glues cannot adhere to silicone-contaminated wood. Always select a dedicated liquid cleaner formulated specifically for fine string instruments.

In addition to the cleaner, you will need several high-quality, lint-free microfiber cloths. Microfiber is the preferred material because its split fibers are designed to trap dust and oils rather than pushing them around the surface. Dedicate one cloth solely for dry wiping, a second cloth for applying the liquid cleaner, and a third cloth for final buffing. Mixing these cloths can introduce abrasive rosin particles back onto the delicate varnish, causing micro-scratches.
Preparation of your physical workspace is another critical step in preventing accidental damage. Choose a flat, stable table in a quiet area of your home, away from foot traffic and pets. Cover the surface with a soft, padded barrier, such as a clean yoga mat, a thick microfiber towel, or a specialized instrument work mat. This padding cushions the violin, prevents scratches to the back plate, and keeps the instrument from sliding around while you work.
Step-by-Step Guide to Applying Violin Cleaner
To begin the cleaning process, you must first prepare the instrument and secure your workspace. Loosen your bow hair completely and place the bow safely inside its case, far away from your cleaning area. This simple precaution prevents any accidental splashes of liquid cleaner from contacting the bow hair, which would ruin its ability to grip the strings and require an expensive rehair.
Next, address the loose, dry rosin dust that has settled on the top plate of the violin. Use your dedicated dry microfiber cloth to gently sweep away this powder from the body, fingerboard, and strings. It is vital to remove this dry dust before applying any liquid; if you skip this step, the liquid cleaner will mix with the loose rosin, creating a sticky, abrasive paste that can scratch the varnish and become incredibly difficult to remove.
Once the surface is free of loose dust, prepare your cleaning cloth. Apply a very small, pea-sized drop of the violin cleaner directly onto your second microfiber cloth. Never spray or pour any liquid cleaner directly onto the wood of the violin. Controlling the amount of moisture is paramount, as excess liquid can easily seep into the open f-holes, the seams of the instrument, or the raw wood of the bridge.
Gently work the damp cloth over the affected areas of the violin using light, circular motions. Focus your efforts on the fingerboard, the lower bout where rosin dust tends to settle, and the area around the chinrest where skin oils and sweat accumulate. Avoid applying any cleaner near the bridge, the soundpost area, or the open f-holes. Liquid entering the interior of the violin can cause the raw wood to swell, potentially shifting the soundpost or causing the water-soluble hide glue holding the instrument together to dissolve.
As you clean, work in small, manageable sections rather than trying to cover the entire instrument at once. Immediately after cleaning a section, take your third, dry microfiber cloth and gently buff the area. Use light, circular motions to lift any remaining cleaner residue and restore the varnish’s natural, warm luster. Buffing immediately prevents the cleaner from drying on the wood, which can leave unsightly streaks or a cloudy film.
Post-Cleaning Care and Maintenance Tips
The most effective way to care for your violin’s finish is to minimize the need for liquid cleaners in the first place. Establish a strict habit of wiping down your instrument after every single playing session. Use a clean, dry microfiber cloth to gently remove rosin dust from the strings, fingerboard, and top plate, and wipe away skin oils from the neck and chinrest. This simple, daily routine takes less than a minute and prevents grime from building up and bonding with the varnish.
Environmental factors also play a massive role in preserving your violin’s wood and finish. In Singapore’s tropical climate, high humidity and rapid temperature shifts—such as moving from a humid outdoor environment to an air-conditioned concert hall—can cause the wood to expand and contract rapidly. To mitigate these risks, always store your violin in a high-quality, well-insulated hard case when it is not in use. Depending on the specific conditions of your home, you may need to use a properly fitted humidity control pack or a specialized case humidifier/dehumidifier system to maintain a stable internal environment.
Keep in mind that liquid violin cleaners should be reserved for occasional deep cleaning rather than daily maintenance. Limit the use of these products to once every few months, or only when you notice stubborn fingerprints and grease that a dry cloth cannot remove. Overusing liquid cleaners can gradually build up a dulling residue or slowly wear down the delicate layers of varnish.
Finally, maintain the cleanliness of your cleaning tools. Wash your microfiber cloths regularly using a mild, scent-free detergent, and avoid using fabric softeners, which leave chemical residues that can transfer onto your violin. Allow the cloths to air dry completely in a dust-free environment before using them on your instrument again.
When to Stop and Consult a Luthier
While basic cleaning is a task you can safely perform at home, you must recognize when a situation exceeds your skill level. If you notice any structural issues during your inspection or cleaning, stop immediately. Open seams along the ribs, cracks in the top or back plates, loose pegs, or varnish that is peeling, bubbling, or lifting are serious issues that require professional attention. Applying liquid cleaner to exposed wood or open cracks can cause severe warping and permanent structural damage.
You must also avoid attempting to clean or adjust the critical structural components of the instrument. The bridge and the soundpost are held in place solely by tension and must never be exposed to liquids or shifted during cleaning. If you notice heavy rosin buildup on the bridge or around the bridge feet, do not attempt to scrub it off yourself, as you risk shifting the bridge’s alignment or damaging the delicate wood.
Valuable, antique, or historically significant instruments should always be handled with extreme care. The original varnish and the natural patina of an old violin are crucial to both its acoustic properties and its monetary value. Amateur cleaning can easily strip away historical layers, drastically reducing the instrument’s worth. Always entrust these precious instruments to a professional luthier for any cleaning, polishing, or maintenance.
If your violin has a thick, hardened crust of old rosin that does not respond to gentle rubbing with a dry cloth, do not apply more pressure or use sharp tools to scrape it away. A professional luthier has access to specialized, safe solvents and the training required to dissolve stubborn buildup without harming the underlying varnish. Investing in professional care is always safer than risking irreversible damage to your instrument.
Frequently Asked Questions (FAQ)
Can I use rubbing alcohol or household glass cleaner on my violin?
No, you must never use rubbing alcohol, denatured alcohol, or household glass cleaners on your violin. These substances are powerful solvents that will instantly dissolve, strip, or cloud spirit varnishes, causing severe and expensive damage to your instrument’s finish. Even a tiny drop of alcohol can ruin a beautiful varnish job in seconds. Always stick to products that are explicitly formulated and labeled as safe for delicate stringed instruments.
How often should I use a liquid violin cleaner?
Liquid violin cleaner should only be used occasionally, typically once every few months, or when you observe visible buildup and fingerprints that a dry cloth cannot remove. For daily maintenance, a simple wipe-down with a clean, dry microfiber cloth after every playing session is highly recommended. This daily habit keeps the instrument clean and minimizes the need for chemical cleaning agents.
Community discussion
Share your experience or ask a question. Comments are reviewed before publication.