
Integrating an electric drumset into your electronic music production workflow allows you to perform, record, and sequence drum patterns with natural physical expression. To connect an electric drumset to DJ or music production software, you must configure the drum module to act as a MIDI controller. This setup is achieved either by connecting a direct USB cable from your module to your computer, or by routing traditional 5-pin MIDI cables through an external audio interface. Once physically connected, you can map the individual drum pads to trigger software samples, drum racks, or synthesizer presets.
Using an electronic kit instead of a keyboard or mouse grid preserves the subtle dynamics of a live drummer, such as ghost notes, rimshots, and cymbal chokes. This guide covers the essential gear requirements, physical connection methods, software configuration steps, playability optimization techniques, and troubleshooting solutions to get your hybrid performance rig running smoothly.
Gear Check: What You Need Before Connecting
Before initiating the physical setup, you must verify the compatibility of your hardware and software. The hardware configuration depends entirely on the outputs available on your electric drumset’s drum module (sometimes referred to as the brain).
Products mentioned in this guide
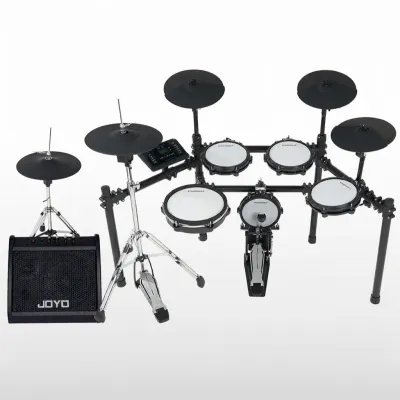
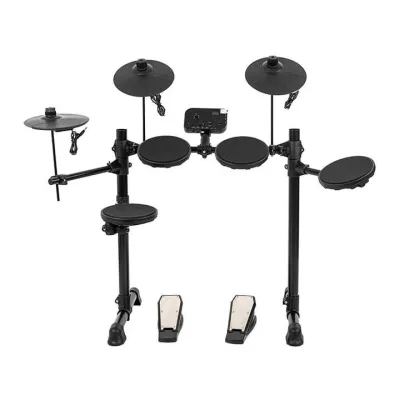
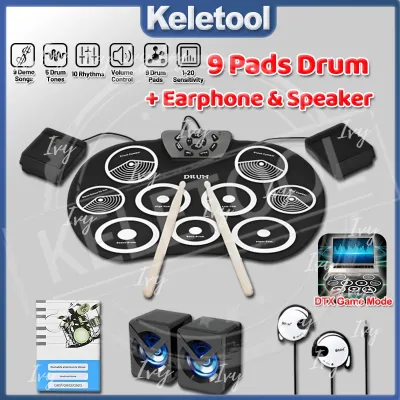
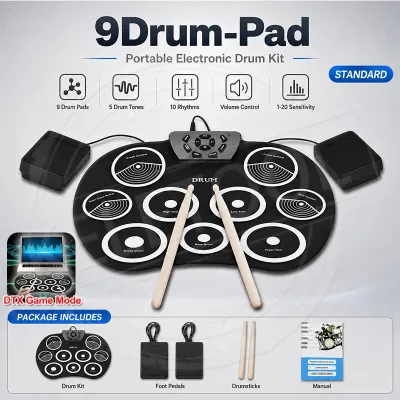
![[SG] Portable Electronic Drum Set USB Roll-Up Silicon Drums Pad w Drumsticks Compact Size Kit Hand Practice With Pedals](https://img.lazcdn.com/g/p/73aace46fc1f8c7268623b73f5d18efb.jpg_400x400q80.jpg_.webp)
Prices are valid at publication and may change. Please refer to the product page for the latest price.
First, inspect the back and sides of your drum module to identify its output ports. Modern drum modules typically feature a USB Type-B port, which is a square-shaped connector commonly found on office printers. If your module has this port, it can transmit MIDI data directly to a computer without additional hardware. Older, vintage, or highly specialized professional drum modules may lack a USB port entirely, featuring instead traditional 5-pin MIDI DIN ports labeled “MIDI OUT” and “MIDI IN.”
Second, check your computer’s available ports. Modern laptops often feature USB-C or Thunderbolt ports, whereas older desktop computers utilize USB-A ports. Based on your drum module’s outputs and your computer’s inputs, you will need to gather the correct cabling. This could be a standard USB-A to USB-B cable, a USB-C to USB-B cable, or a dedicated 5-pin MIDI cable.
Third, confirm that your chosen DJ software or Digital Audio Workstation (DAW) supports custom MIDI controller mapping. While standard DJ applications like Serato DJ Pro, Rekordbox, and Traktor Pro support basic MIDI mapping, dedicated production platforms such as Ableton Live, FL Studio, Logic Pro, or Cubase offer far more robust routing options for multi-sampled drum kits.
Finally, determine whether you need an external audio interface. Although a direct USB connection is sufficient for sending digital MIDI data (the messages that tell the computer which pad was hit and how hard), your computer’s built-in soundcard is not optimized for real-time audio generation. To prevent audible delays between striking a pad and hearing the sound, an external audio interface is highly recommended. High-quality entry-level interfaces in Singapore typically range from S$130 to S$300 and connect via USB to handle low-latency audio processing while routing the software’s sound output to studio monitors or professional headphones.
Hardware Setup: Connecting Your Drum Module
Once you have verified your ports and gathered the correct cables, you can proceed with the physical installation. Choose the method below that corresponds to your drum module’s output ports.

Method 1: Direct USB Connection
For modern drum modules equipped with a USB Type-B port, the direct USB connection is the most straightforward, plug-and-play approach.
- Connect the square end of the USB cable (USB Type-B) to the "USB Computer" or "MIDI USB" port on your drum module.
- Connect the flat end of the cable (USB-A or USB-C) directly to an open port on your computer. Avoid using passive, unpowered USB hubs, as they can cause power fluctuations or introduce data transmission delays.
- Power on your drum module. Access the module's internal settings menu using its physical screen and buttons, and verify that the USB driver mode is set to "MIDI" or "Generic" rather than "Vendor" or "Audio" (unless you are specifically using the module's internal audio interface capabilities).
- Check driver requirements. If you are using macOS, the operating system will typically recognize the drum module automatically as a class-compliant MIDI device. If you are using Windows, you may need to visit the manufacturer's official support website to download and install the proprietary USB-MIDI driver designed for your specific drum module model to ensure stable communication.
Method 2: 5-Pin MIDI via Audio Interface
If your drum module does not have a USB port, you must route the MIDI signal through an external audio interface or a dedicated MIDI-to-USB utility adapter.
- Plug one end of a standard 5-pin MIDI DIN cable into the "MIDI OUT" port on your drum module.
- Plug the opposite end of the same cable into the "MIDI IN" port on your external audio interface. It is critical to double-check this routing: the signal must flow from the drum module's output to the interface's input. Reversing this connection (such as connecting MIDI OUT to MIDI OUT) is a common error that prevents any signal from reaching the computer.
- Connect your audio interface to your computer using its designated USB or Thunderbolt cable.
- Install the official, proprietary drivers for your audio interface (such as dedicated ASIO drivers for Windows systems). These drivers ensure that both the incoming MIDI signals and the outgoing audio signals are processed with maximum stability and minimal latency.
Software Configuration: Enabling MIDI and Mapping Samples
With the hardware connected and powered on, you must configure your production or DJ software to recognize the incoming MIDI messages and assign them to specific sounds.
First, launch your software and open the preferences or settings menu. On Windows, this is typically found under Options or Settings; on macOS, click the application’s name in the top menu bar and select Preferences (or use the keyboard shortcut Ctrl + , on Windows / Cmd + , on macOS). Navigate to the tab labeled “MIDI,” “Link/MIDI,” or “Controller.”
Second, locate your connected drum module or audio interface in the list of active MIDI Input devices. You must explicitly enable the input to receive data. In DAWs like Ableton Live, you will see configuration toggles next to the input device name. Ensure that “Track” is turned on so the software can receive note play data, and turn on “Remote” if you intend to map physical knobs or faders on your drum module to software parameters.
Third, understand and execute the process of MIDI mapping. When you strike a pad on your electric drumset, it sends a specific MIDI note number (for example, MIDI Note 36 is the industry standard for a bass drum). To link these physical hits to software sounds:
- Enter the software's MIDI mapping mode. In Ableton Live, this is done by clicking the "MIDI" button in the top-right corner, which turns mappable parameters blue. In DJ software, click the "MIDI" or "Map" button in the utility bar.
- Click on the specific virtual pad, sample slot, or control on your screen that you wish to trigger.
- Strike the physical pad on your electric drumset that you want to associate with that sound. The software will instantly detect the incoming MIDI note number and assign it to the selected on-screen parameter.
- Repeat this process for your snare, hi-hats, toms, and cymbals.
- Exit the software's MIDI mapping mode to test your configuration.
Fourth, verify the active MIDI channels. By industry standard, electronic percussion instruments transmit data on MIDI Channel 10. If your software allows you to filter incoming MIDI data by channel, ensure the track or input channel is set to “All Channels” or specifically to “Channel 10.” If the channel is accidentally set to Channel 1, the software may ignore the signals sent by your drum module.
Finally, save your configuration. Mapping an entire drum kit pad-by-pad can be time-consuming. Once your mapping is complete, save the project as a default template, or export the MIDI map configuration file within your software’s settings. This allows you to load your custom layout instantly in future production sessions.
Optimizing Playability: Latency, Velocity, and Sound Design
Simply establishing a connection is only the first step. To make the electric drumset feel like a real instrument when triggering software, you must optimize the system’s physical and sonic response.
Reducing Latency
Latency is the delay between the physical moment you strike a drum pad and the moment you hear the corresponding sound from your speakers or headphones. High latency makes real-time drumming nearly impossible. To minimize this delay, open your software’s audio preferences and adjust the “Buffer Size.” Buffer size is measured in samples; a lower buffer size (such as 64 or 128 samples) reduces latency, making the drumset feel highly responsive.
However, lower buffer sizes place a heavier processing load on your computer’s CPU. If your CPU cannot process the audio fast enough, you will hear distracting clicks, pops, or audio dropouts. You must find a balance: a buffer size of 128 or 256 samples typically offers an unnoticeable delay (under 10 milliseconds of round-trip latency) while maintaining system stability. Always ensure you are utilizing high-performance audio drivers, such as CoreAudio on macOS or the official manufacturer-provided ASIO driver on Windows.
Adjusting Velocity Curves
Electronic drum pads utilize internal piezo sensors to measure the physical force of your strike, translating that force into a MIDI velocity value ranging from 0 (silent) to 127 (maximum volume). If your software sounds too quiet when you play normally, or if a light tap triggers a maximum-volume sample, you must adjust the velocity curve.
This adjustment can be made in two places. First, you can adjust the “Sensitivity,” “Threshold,” or “Velocity Curve” settings directly inside your drum module’s trigger menu. Changing the curve from linear to exponential or logarithmic alters how the module interprets your strike force. Second, you can insert a MIDI velocity scaling plugin (such as Ableton’s native “Velocity” MIDI effect) onto your software instrument track to compress, expand, or boost the incoming velocity values to match your natural playing style.
Using Dedicated Plugins
While basic DJ software sample decks are suitable for triggering simple, single-shot sound effects, they lack the architectural depth required for expressive drumming. For professional music production, load dedicated virtual instrument (VST or AU) drum samplers inside a DAW. Dedicated plugins offer several critical performance features:
- Multi-Sampling: These plugins load multiple audio recordings of a single drum struck at different volumes. When you play softly, the plugin triggers a soft recording; when you strike hard, it triggers a loud recording, creating a realistic acoustic or electronic response.
- Choke Groups: In a real drum kit, hitting a closed hi-hat instantly silences an open hi-hat, and grabbing a cymbal silences its ring. Dedicated drum samplers allow you to group pads together so that triggering one pad instantly cuts off the sound of another, which is essential for realistic hi-hat and cymbal performance.
- Round-Robin Triggering: This feature alternates between slightly different recordings of the same drum hit at the same volume, preventing the unnatural "machine-gun effect" that occurs when the exact same audio file is played rapidly in succession.
Troubleshooting Common MIDI and Audio Issues
When configuring a hybrid hardware and software setup, you may encounter technical roadblocks. Use these logical diagnostic steps to resolve the most common issues.
No MIDI Signal Received
If striking your pads produces no response in your software, first look for a visual MIDI activity indicator. Most DAWs and DJ software feature a small LED light in the top corner of the user interface that flashes whenever a MIDI message is received. If this light does not flash:
- Verify that the drum module is powered on and that the cables are securely seated at both ends.
- If using a 5-pin MIDI cable, confirm that the cable runs from the module's "MIDI OUT" to the interface's "MIDI IN."
- Reopen your software's MIDI preferences and confirm that your specific input device is enabled.
- Try swapping the USB cable or plugging it into a different USB port directly on your computer to rule out a faulty cable or port.
Audio Delay (Latency) is Unplayable
If you experience a noticeable delay between striking a pad and hearing the sound:
- Navigate to the audio settings in your software and verify that you are using a dedicated low-latency driver (ASIO on Windows or CoreAudio on macOS) rather than a generic system driver like MME or DirectSound.
- Lower the audio buffer size to 128 or 256 samples.
- Close any demanding background applications, such as web browsers, video editing software, or system updates, to free up CPU processing power for your audio software.
Pads Triggering the Wrong Sounds
If hitting your snare pad triggers a bass drum sound, or if a tom pad triggers a cymbal crash:
- Check for overlapping MIDI note assignments in your software's MIDI mapping editor. If multiple software parameters are mapped to the same physical pad, clear the mapping and reassign them carefully.
- Verify that your drum module is not transmitting on multiple MIDI channels simultaneously.
- Access your drum module's internal settings and check the MIDI note numbers assigned to each physical trigger pad. If necessary, reset the module's MIDI settings to their factory default values to ensure standard note mapping.
Double Triggering or Missed Hits
If a single physical strike on a pad triggers two rapid notes in the software, or if light hits are completely ignored by the computer:
- Access the physical trigger settings menu on your drum module.
- To fix double-triggering, increase the "Retrigger Cancel" or "Mask Time" setting. This tells the module's processor to ignore secondary vibrations that occur immediately after an initial strike.
- To fix missed hits, lower the "Threshold" setting on the module so that the sensor registers lighter physical vibrations.
- Adjust the "Crosstalk" (often labeled XTALK) settings. If hitting your tom causes your crash cymbal to trigger due to physical vibrations traveling through the metal drum rack, increasing the crosstalk rejection on those pads will prevent the module from sending accidental MIDI notes.
Frequently Asked Questions (FAQ)
Can I use an electric drumset with standard DJ software like Serato or Rekordbox?
Yes, you can connect and map an electric drumset to standard DJ software, but the integration has notable limitations. DJ platforms like Serato DJ Pro, Rekordbox, and Traktor Pro allow you to map incoming MIDI messages to basic functions, such as triggering sample slots in a remix deck, activating hot cues, or toggling audio effects. However, these applications are fundamentally designed for track mixing and dual-deck performances rather than real-time instrument expression.
For dedicated electronic beat production and expressive drumming, it is highly recommended to use a Digital Audio Workstation (DAW) such as Ableton Live, FL Studio, or Logic Pro. DAWs are engineered to host advanced virtual drum instruments, manage precise MIDI sequencing, handle complex velocity curves, and support multi-track audio routing, providing a far superior environment for musical performance.
Do I need an audio interface if my drumset already has a USB port?
Strictly speaking, you do not need an external audio interface solely to transmit MIDI data. A direct USB connection from your drum module to your computer is fully capable of sending MIDI note and velocity messages.
However, an external audio interface remains highly recommended for audio monitoring. Your computer’s built-in headphone jack and standard system audio drivers are optimized for media playback rather than real-time music production. Without an audio interface and its dedicated low-latency drivers, you will likely experience frustrating audio latency (delay) when playing. An audio interface processes the software’s sound output instantly, routing it to studio monitors or high-quality headphones so that the sound matches the exact physical moment you strike a drum pad.
Community discussion
Share your experience or ask a question. Comments are reviewed before publication.