
Integrating an electronic drum kit into a digital audio workstation (DAW) or DJ software setup bridges the tactile world of acoustic-style performance with the infinite soundscapes of electronic music production. Whether you want to trigger custom synthesized samples in Ableton Live, record precise MIDI performances in Logic Pro, or drop live drum fills over a house track in Rekordbox, the connection process follows a logical path of hardware routing, software configuration, and MIDI mapping. By understanding how MIDI data and audio signals travel from your drum module to your computer, you can build a highly responsive, low-latency performance rig that fits perfectly into a compact home studio or a live performance booth.
In high-density living environments like Singapore, where minimizing noise is essential for maintaining good neighborly relations in HDB flats or condominiums, electronic drums are the go-to solution for silent practice. However, transitioning from simple headphone practice to a fully integrated digital production setup requires a clear understanding of signal paths. Properly routing your drum triggers ensures that your physical dynamics translate accurately to your software instruments, allowing you to produce professional-grade electronic music without compromising playability.
What You Need Before Connecting
To establish a stable connection between your electronic drum kit and your computer, you must gather the correct hardware and software components. Ensuring compatibility between these devices before you begin will prevent routing conflicts and hardware recognition issues later in the setup process.
Products mentioned in this guide
![AROMA TDX-22II Electronic Drum Kit [AROMA TDX22II DIGITAL DRUM SET]](https://img.lazcdn.com/g/p/7d7389c167838b148b4bc49229e02574.jpg_400x400q80.jpg_.webp)
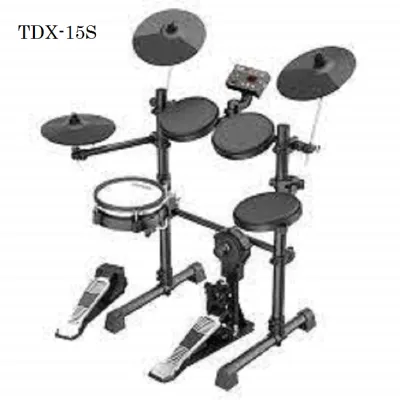
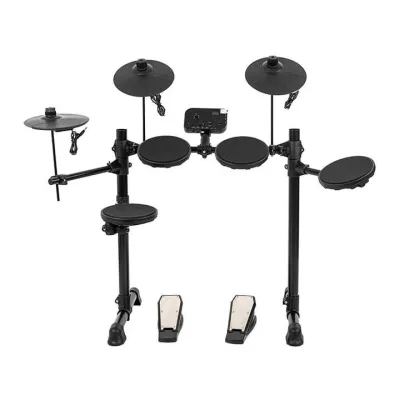
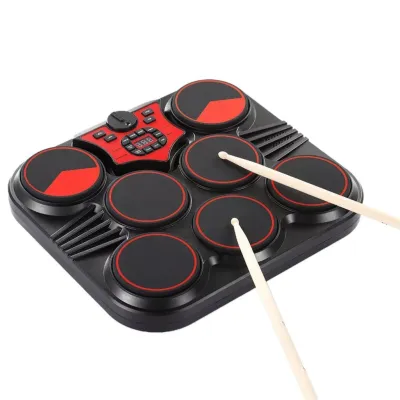
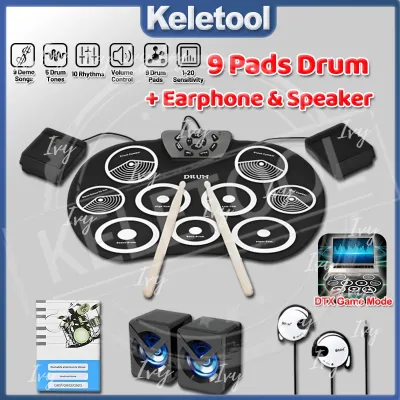
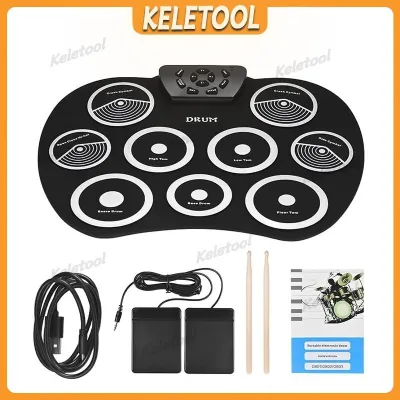
Prices are valid at publication and may change. Please refer to the product page for the latest price.
Hardware Requirements
The centerpiece of your physical setup is an electronic drum kit equipped with a drum module (often called the “brain”) that supports MIDI output. Modern drum modules typically feature a USB Type-B port, while older or highly specialized professional modules utilize traditional 5-pin DIN MIDI ports. You will also need a computer (macOS or Windows) with a sufficiently fast processor and adequate RAM to handle real-time audio processing without stuttering or dropouts.
Software Selection
Your choice of software depends on your creative goals. For music production, beat-making, and recording, a DAW such as Ableton Live, Logic Pro, FL Studio, or Reaper is ideal. If your focus is live performance and mixing, DJ software like Serato DJ Pro, Pioneer DJ Rekordbox, or VirtualDJ allows you to map physical drum pads to trigger performance features, sampler decks, or live effects. Before purchasing or downloading software, always check the developer’s official system requirements to verify operating system compatibility and hardware support.
Cables and Interfaces
The physical links between your devices require specific cables:
- USB Cables: A standard USB Type-A to Type-B cable is the most common tool for connecting modern drum modules directly to your computer.
- 5-Pin MIDI Cables: If your module lacks a USB port, you will need a 5-pin DIN MIDI cable combined with a dedicated MIDI-to-USB interface or an audio interface with built-in MIDI ports.
- Audio Cables: If you plan to route the analog sounds generated directly by your drum module, you will need standard 1/4-inch TS (unbalanced) or TRS (balanced) audio cables.
- External Audio Interface: A dedicated USB audio interface is highly recommended. It handles the heavy lifting of digital-to-analog conversion, significantly reducing latency and providing balanced outputs for studio monitors or PA systems.
Preparation Step
Before connecting any cables, visit the drum kit manufacturer’s official website to download and install the latest firmware updates for your specific module. Many modern modules require proprietary USB-MIDI drivers to communicate correctly with your computer’s operating system. Installing these drivers beforehand ensures that your software recognizes the module immediately upon connection and prevents data transmission errors.
Step 1: Establishing the Hardware Connection
Once you have gathered the necessary equipment, you can begin making the physical connections. Depending on whether you want to use your drum kit as a software controller or record its internal sounds, you will choose between MIDI routing, audio routing, or a hybrid of both.

USB-MIDI Connection
The simplest and most common connection method is routing MIDI data via a direct USB cable. Connect the USB Type-B end of the cable to the drum module, and plug the USB Type-A (or USB-C, using a suitable adapter) end into an open port on your computer. This single connection transmits digital performance data, including which pad you struck, when you struck it, and how hard you hit it. It is important to note that a USB-MIDI connection does not transmit the actual audio sounds generated by your drum module; it only transmits digital instructions to trigger sounds inside your software.
5-Pin MIDI Connection
If you are using an older drum module or experience electrical interference, a traditional 5-pin MIDI connection is a reliable alternative. Connect a 5-pin MIDI cable from the “MIDI Out” port of your drum module to the “MIDI In” port of your external audio interface. This method physically isolates the electrical connection between the drum module and the computer, which can help eliminate high-frequency ground loop hum—a common issue when multiple audio devices are plugged into the same electrical circuit in a home studio.
Audio Routing Options
Depending on your desired workflow, you must decide how to handle the audio signal:
- Option A: Software Instruments (MIDI Only): If you plan to trigger virtual drum libraries (such as EZdrummer, Superior Drummer, or built-in DAW drum racks), you only need the MIDI connection. Your drum module acts purely as a MIDI controller, and all sound generation occurs within your computer. You will monitor your playing through headphones or speakers connected directly to your computer or external audio interface.
- Option B: Module Internal Sounds (Audio Routing): If you prefer the built-in drum sounds of your physical module, you must route its analog audio outputs. Connect 1/4-inch audio cables from the module’s "L/Mono" and "R" outputs to two line inputs on your external audio interface. This setup allows you to record the actual audio generated by the hardware module into your DAW or route it into a DJ mixer channel for live processing.
Safety and Order of Operations
To protect your equipment and your hearing, always follow a safe order of operations when powering on your system. Turn on your audio interface and drum module before launching your DAW or DJ software. This ensures that the software detects the active MIDI devices during its startup scan. Additionally, keep the volume levels on your studio monitors, headphones, and audio interface turned completely down when powering devices on or off to prevent loud electrical pops that can damage speaker drivers or cause hearing strain.
Step 2: Configuring Your DAW or DJ Software
With the physical connections established, you must configure your software preferences so that it correctly receives MIDI data from your drum kit and routes audio signals without conflicts.
Enabling MIDI Inputs
Open your DAW or DJ software and locate the preferences or settings menu. Navigate to the MIDI, Link, or Controller tab. You should see your drum module or your MIDI interface listed in the active input devices section. Enable the device by checking the “On” or “Active” box. In DAWs like Ableton Live, ensure that the “Track” option is enabled for your drum kit’s input to allow note data to reach your tracks, and enable “Remote” if you plan to map drum pads to software control parameters like buttons or switches.
Audio Interface Setup
In the audio settings tab of your software, set your external audio interface as the default input and output device. This bypasses your computer’s internal sound card, utilizing the interface’s dedicated hardware to process audio. Ensure that the sample rate is set consistently across your software, audio interface, and any digital hardware. A standard sample rate of 44.1 kHz or 48 kHz is ideal for digital music production and live mixing, providing excellent audio fidelity without placing unnecessary strain on your computer’s processor.
Track Creation
The next step is setting up the software channels to receive the incoming signals:
- In a DAW: Create a new MIDI or Instrument track. Load a virtual drum rack, sampler, or synthesizer onto the track. Set the track's MIDI input routing to receive data specifically from your electronic drum kit's dedicated port, rather than "All Active MIDI Inputs." This prevents other connected controllers, like MIDI keyboards, from accidentally triggering your drum sounds.
- In DJ Software: Open the MIDI mapping panel or the sampler deck interface. Ensure that your software's sampler volume is turned up and routed to an active channel on your DJ mixer, allowing you to hear the triggered samples alongside your playing tracks.
Channel Matching
MIDI data is transmitted across 16 independent channels. By industry standard, electronic drum modules default to transmitting data on MIDI Channel 10, which is historically reserved for percussion. Verify that your software track or mapping utility is configured to receive MIDI data on Channel 10, or set the input channel to “Omni” (all channels) to ensure that the incoming signals are captured regardless of your drum module’s default settings.
Step 3: MIDI Mapping for Beats and Mixing
MIDI mapping is the process of assigning physical pads on your electronic drum kit to specific software instruments, samples, or performance controls. This step allows you to customize your layout for seamless live mixing or studio production.
Understanding MIDI Messages
To map your kit effectively, you must understand the two primary types of MIDI messages:
- MIDI Note Data: These are momentary triggers that carry a specific pitch (note number) and velocity (force value from 1 to 127). Striking a drum pad sends a MIDI Note message, which is ideal for triggering individual drum samples, synth stabs, or hot cues in DJ software.
- MIDI CC (Control Change) Data: These messages transmit continuous values (from 0 to 127) and are generated by physical controls that change state gradually. On an electronic drum kit, the continuous variable position of the hi-hat pedal generates MIDI CC data, which can be mapped to control continuous software parameters like filter sweeps, volume faders, or effect wet/dry dials.
Mapping in a DAW
Most modern DAWs feature a user-friendly MIDI Learn function. Activate this mode (usually by clicking a “MIDI” button in the top corner of the screen), select the virtual pad or parameter you wish to control on your screen, and physically strike the corresponding pad on your electronic drum kit. The software will instantly detect the incoming MIDI note and bind it to that virtual instrument slot.
To ensure your playing feels natural, check the velocity curve settings within your drum module or your DAW’s MIDI preferences. Physical drum pads respond differently depending on whether they use mesh heads or rubber pads. Adjusting the velocity curve ensures that a light tap on a physical pad triggers a quiet software sample, while a heavy strike triggers a loud, aggressive sample, preserving the expressive dynamics of your performance.
Mapping in DJ Software
In DJ software like Serato or Rekordbox, you can map your drum pads to trigger performance elements during a live set. Map your snare and tom pads to trigger vocal drops, sirens, or custom build-up samples in the software’s sampler deck. For advanced performance mixing, map your cymbals or auxiliary pads to trigger performance effects. For example, you can map your hi-hat pedal to control a low-pass filter sweep on a playing deck, or map a crash cymbal pad to trigger a dramatic beat repeater or delay freeze effect, allowing you to execute energy-building transitions on the fly.
Saving Presets
Once you have completed your custom MIDI mapping, navigate to your software’s controller settings and export the configuration as a dedicated mapping preset file (such as a .tsi file for Traktor or a custom XML template). Save this file in a secure location on your computer. Creating a dedicated template track in your DAW with these mappings already loaded will save you valuable time, allowing you to start future production or mixing sessions instantly without reconfiguring your layout.
Step 4: Optimizing Latency and Verifying the Setup
Latency is the short delay between the physical action of striking a drum pad and the audible sound coming out of your monitors or headphones. High latency makes rhythmic playing nearly impossible, so optimizing your system’s performance is crucial for a natural playing feel.
Managing Latency
To minimize latency, open your software’s audio preferences and locate the buffer size setting. The buffer size dictates how many audio samples your computer processes before sending them to your audio interface. Lowering the buffer size reduces latency. For real-time drum tracking, aim for a buffer size of 128 samples or 256 samples. This typically keeps the overall round-trip latency below 10 milliseconds, which is the threshold where the human ear begins to perceive delay as a distinct echo.
Driver Selection
The choice of audio driver is the single most important factor in achieving low latency. If you are using a Windows computer, always select the dedicated ASIO driver provided by your audio interface manufacturer. Avoid generic Windows system drivers like MME, WASAPI, or DirectSound, as they introduce massive, unplayable delays. On macOS, the native Core Audio driver is highly optimized and provides excellent low-latency performance out of the box without requiring third-party software.
CPU Load Warning
Be aware that lowering your audio buffer size places a significantly higher processing load on your computer’s CPU. If your buffer size is set too low, your computer may struggle to process the audio in time, resulting in audible pops, clicks, or digital distortion. If you experience these artifacts, slightly increase your buffer size (e.g., from 128 to 256 samples) or close unnecessary background applications to free up system resources, finding the optimal balance between low latency and system stability.
Verification Checklist
Before starting your performance or recording session, perform a quick verification check:
- Trigger Check: Strike every pad, rim, and cymbal systematically to confirm that each trigger registers the correct MIDI note and responds accurately to your playing dynamics.
- Signal Level Check: Observe the audio meters in your DAW or DJ software. Ensure that your master output levels are healthy and do not clip (peak into the red), which causes harsh digital distortion.
- Groove Test: Play a simple, steady rhythm for a few minutes. Focus on the timing feel; if the response feels sluggish or disconnected from your physical strikes, revisit your buffer settings and driver configurations to fine-tune your setup.
Frequently Asked Questions (FAQ)
Why is there a noticeable delay when I hit the drum pads?
A noticeable delay (latency) is almost always caused by an excessively high audio buffer size in your software’s audio preferences. To resolve this, open your DAW or DJ software settings, locate the audio buffer size, and lower it to 128 or 256 samples. Additionally, ensure you are using a dedicated low-latency audio driver, such as an ASIO driver on Windows or Core Audio on macOS. Finally, close any resource-heavy background applications on your computer to prevent CPU throttling, which can force the audio engine to drop packets and introduce lag.
Can I use my electronic drum kit to control both a DAW and DJ software simultaneously?
Yes, though the ease of doing so depends on your operating system. On macOS, the CoreMIDI framework natively allows multiple applications to receive MIDI data from a single USB device simultaneously. On Windows, standard USB-MIDI drivers are often exclusive, meaning only the first software opened can access the drum kit. To bypass this limitation on Windows, you can use virtual MIDI routing tools (such as loopMIDI) to split the incoming signal, or route the MIDI output of one software into another using built-in MIDI Thru features. Ensure you assign different MIDI channels or specific note ranges to avoid triggering conflicting sounds in both applications.
Community discussion
Share your experience or ask a question. Comments are reviewed before publication.