
Connecting your Yamaha DD-75 to a Digital Audio Workstation (DAW) transforms this portable digital drum kit into a powerful MIDI controller for electronic music production. By routing MIDI data from the velocity-sensitive pads to your computer, you can trigger high-quality virtual instruments, sequence intricate drum patterns, and control synthesizer parameters in real time. The process involves establishing a physical connection via USB or traditional 5-pin MIDI, configuring your DAW to recognize the incoming signals, and mapping the pads to your preferred software drum kits. This integration allows you to combine physical playability with the infinite sound design possibilities of modern music software, making it an excellent space-saving solution for home studios in Singapore where space is at a premium.
Prerequisites for Connecting the Yamaha DD-75
Before starting the connection process, gathering the correct hardware and software components ensures a seamless setup. The Yamaha DD-75 does not feature a direct USB-to-Host port on the unit itself; instead, it relies on traditional 5-pin MIDI IN and OUT ports. To connect it to a computer, you will need either a dedicated USB-to-MIDI interface cable or standard MIDI cables if routing through an external audio interface. If you choose a standalone USB-to-MIDI cable, select a reputable, class-compliant model—typically costing around S$30 to S$50 at local music retailers—to avoid data transmission errors during fast drum rolls.
On the software side, ensure you have a compatible DAW installed and updated on your computer. Popular choices for electronic music production include Ableton Live, FL Studio, Logic Pro, Reaper, or Cubase. Your DAW must be configured for audio playback, preferably utilizing low-latency audio drivers such as ASIO on Windows or Core Audio on macOS to prevent noticeable delays.
Products mentioned in this guide
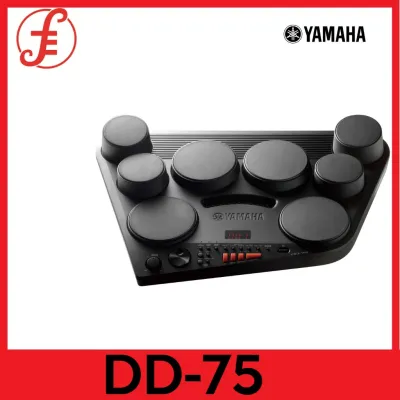
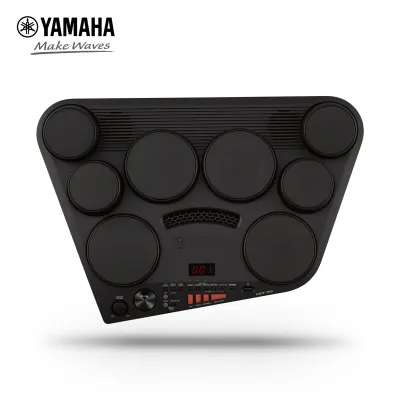
![Yamaha DD75 Digital Percussion Set DD-75 Portable Musical Electronic Instrument DD 75 [PREORDER]](https://img.lazcdn.com/g/p/c2c5758c27b7e76ef28a58fa17673cb1.jpg_400x400q80.jpg_.webp)
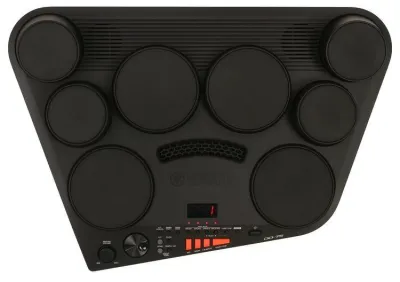
Prices are valid at publication and may change. Please refer to the product page for the latest price.
Power management is another critical prerequisite. Always power the DD-75 using a compatible AC adapter or fresh batteries to prevent sudden power loss during a recording session. As a best practice, ensure the DD-75 is turned off before plugging in or unplugging any MIDI or data cables. This precaution prevents minor electrical surges that could temporarily disrupt the device’s internal firmware.
Physical Setup: Connecting via USB or MIDI
Establishing the physical link between your Yamaha DD-75 and your computer requires careful cable routing. If you are using a dedicated USB-to-MIDI interface cable, locate the 5-pin plugs labeled “IN” and “OUT”. Connect the plug labeled “IN” on the cable to the “MIDI OUT” port on the back of the DD-75. Conversely, connect the plug labeled “OUT” on the cable to the “MIDI IN” port. This cross-connection is vital: the data flows out of the drum pad and into the interface, so “MIDI OUT” must always connect to the interface’s “IN” pathway.

If you are routing through an external audio interface, use standard 5-pin MIDI cables. Run one MIDI cable from the “MIDI OUT” port of the DD-75 to the “MIDI IN” port of your audio interface. If you plan to send MIDI data back to the DD-75 to use its internal sound engine, run a second MIDI cable from the “MIDI OUT” of the audio interface to the “MIDI IN” of the DD-75. Ensure the audio interface is powered on and connected to your computer.
After making the physical connections, turn on the Yamaha DD-75. Most modern operating systems will automatically recognize class-compliant USB-MIDI interfaces without requiring manual driver installation. You can verify the physical link is active by observing the indicator lights on your USB-to-MIDI interface. Tapping any of the eight pads or pressing the foot pedals should cause the MIDI data light on the interface to flash, confirming that physical impacts are successfully translated into digital MIDI messages.
Configuring Your DAW to Receive MIDI Data
With the physical connection established, you must instruct your DAW to listen to the incoming MIDI signals from the Yamaha DD-75. Open your DAW and navigate to the preferences or settings menu, which is typically found under “Options”, “Setup”, or “Preferences”. Locate the tab labeled “MIDI”, “Link MIDI”, or “Audio/MIDI Device Settings” to view all recognized MIDI input and output devices.
In the MIDI input list, look for the name of your USB-to-MIDI interface or your audio interface. If you are using a class-compliant cable, it may appear under a generic name such as “USB MIDI Interface”. To enable the device, check the box or toggle the switch next to its name to activate it for input tracking. In DAWs like Ableton Live, ensure that the “Track” option is enabled for this input so the software records note data.
Once the input is enabled, close the preferences menu and return to your main project window. Create a new MIDI track or Instrument track. In the track’s routing section, locate the input dropdown menu and change this setting to explicitly target the specific USB-MIDI interface connected to your DD-75. Finally, arm the track for recording or enable input monitoring so the DAW actively processes and routes the incoming MIDI data.
Mapping Pads and Knobs for Electronic Beat Production
To produce electronic beats, you must map the physical pads of the Yamaha DD-75 to trigger specific sounds within a virtual instrument. Load a virtual drum machine, sampler, or drum rack plugin onto your armed MIDI track. By default, the DD-75 pads transmit specific MIDI note numbers corresponding to the General MIDI (GM) drum map standard. For instance, the default pad layout typically sends note C1 for the kick drum, D1 for the snare, and F#1 for the closed hi-hat, which should immediately trigger the correct corresponding drum samples.
If your software drum kit uses a custom layout, or if you want to assign specific pads to unique electronic samples like sub-kicks, synthesized claps, or vocal chops, you can use your DAW’s MIDI learn function. Activate the MIDI learn mode in your DAW or virtual instrument plugin, which usually highlights assignable parameters. Click on the virtual pad or sample slot you wish to control, and then physically strike the desired pad on the DD-75. The software will instantly detect the incoming MIDI note number and bind it to that specific sample slot.
The DD-75 also includes two foot pedals, which default to controlling the hi-hat open/close status and the kick drum. In electronic music, these pedals can be repurposed to control Continuous Controller (CC) messages. By using your DAW’s MIDI mapping matrix, you can assign the physical movement of these pedals to modulate synthesizer parameters such as filter cutoff frequency, resonance, or the wet/dry mix of a delay effect. This allows you to perform dynamic filter sweeps live while maintaining your drumming rhythm.
Troubleshooting Latency and Signal Dropouts
One of the most common obstacles when using an electronic drum pad as a MIDI controller is audio latency, which is the slight delay between striking a physical pad and hearing the triggered sound. To resolve this, access your DAW’s audio preferences and locate the buffer size setting. A high buffer size gives your computer’s CPU more time to process audio but introduces noticeable latency. Lower the buffer size to 128 or 64 samples to reduce latency to a playable level. If you experience audio crackling, slightly increase the buffer size until the audio is clean.
If you strike the pads but hear no sound and see no MIDI activity indicators in your DAW, verify the MIDI channel assignments. The Yamaha DD-75 typically transmits MIDI data on Channel 10, which is the standard channel reserved for percussion in the General MIDI specification. Ensure your DAW track is set to receive MIDI data from “All Channels” or is explicitly set to “Channel 10” to prevent the DAW from ignoring the incoming data.
Another common issue is inconsistent volume or missed triggers, which can stem from velocity sensitivity settings. If physical hits are not triggering dynamic volume changes in your software, check the velocity curve settings within your virtual instrument or adjust the pad sensitivity directly on the DD-75 hardware. If the DAW consistently fails to detect the hardware even after verifying all connections and settings, stop the troubleshooting process and consult the Yamaha DD-75 owner’s manual or contact manufacturer support.
Advanced Routing for Electronic Music Workflows
Once you master the basic setup, you can implement advanced routing techniques to expand your creative workflow. For complex electronic performances, you can split the MIDI output of the DD-75 to trigger multiple virtual instruments simultaneously. By using MIDI filter plugins or advanced routing utilities within your DAW, you can configure the four upper pads to trigger a synthesizer playing melodic stabs on MIDI Channel 1, while the four lower pads and pedals trigger a drum sampler on MIDI Channel 10.
Recording your live performance as MIDI clips in your DAW’s arrangement or session view opens up powerful editing possibilities. Unlike recorded audio, MIDI data captures only your performance parameters, allowing you to quantize slightly off-beat hits to a perfect grid, adjust individual note velocities after the fact, or swap out the entire drum kit sound with a single click. You can also extract the groove of your live drumming to apply its natural human timing to other programmed tracks.
Finally, do not limit the DD-75 to traditional drum sounds. In electronic music genres like techno, drum and bass, or ambient, you can repurpose the pads to trigger non-drum elements. Map the pads to trigger long-evolving synth pads, vocal phrases, or sound effect sweeps. By treating the eight pads as a general-purpose MIDI launcher, you can perform live arrangements, trigger scene changes in your DAW, or play complex melodic sequences using a sampler loaded with single-note synthesizer waveforms.
Frequently Asked Questions (FAQ)
Can I use the Yamaha DD-75 without a computer?
Yes, the Yamaha DD-75 is fully functional as a standalone instrument. It features built-in stereo speakers, a wide selection of onboard drum kits, and a dedicated headphone output for silent practice. You can also connect an external music player to the auxiliary input (AUX IN) port using a standard 3.5mm stereo cable, allowing you to play along with your favorite tracks directly through the unit’s speakers or headphones without needing a computer.
Do I need to install special drivers for the DD-75 on macOS or Windows?
No, the Yamaha DD-75 does not require proprietary drivers for basic MIDI operation because it relies on standard 5-pin MIDI connections. The driver requirement depends entirely on the USB-to-MIDI interface cable or audio interface you use to connect it to your computer. Most modern USB-to-MIDI interfaces are class-compliant, meaning they work automatically on both macOS and Windows without manual driver installation. Ensure you have installed the latest official drivers for your specific interface.
Community discussion
Share your experience or ask a question. Comments are reviewed before publication.