
Connecting an electric drum kit to DJ software for live mixing allows you to blend the physical energy of live percussion with the precision of digital track mixing. By routing your drum module to trigger software samples, hot cues, or effects, you can transform a standard DJ set into a dynamic, hybrid performance. Achieving this integration requires a clear understanding of hardware connections, MIDI mapping, and audio routing.
Whether you are performing at a local venue in Singapore or practicing in a space-conscious home studio, setting up this hybrid rig is highly achievable. By configuring your equipment correctly, you can eliminate latency, prevent double-triggering, and gain complete control over your live sound. Here is how to successfully link your electronic drum kit to your preferred DJ software and elevate your live mixes.
Gear and Software Requirements for Live Electric Drum Mixing
Before attempting to connect your equipment, you must ensure you have the necessary hardware and software components. The foundation of this setup is an electric drum kit equipped with MIDI output capabilities. Most modern modules feature a USB-to-Host port, while older or more professional-grade modules rely on traditional 5-pin MIDI Out ports. You will also need a reliable laptop or computer with sufficient processing power to run your DJ software and handle real-time MIDI data without performance lag.
Products mentioned in this guide
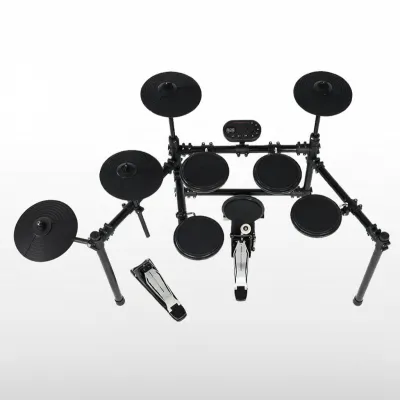

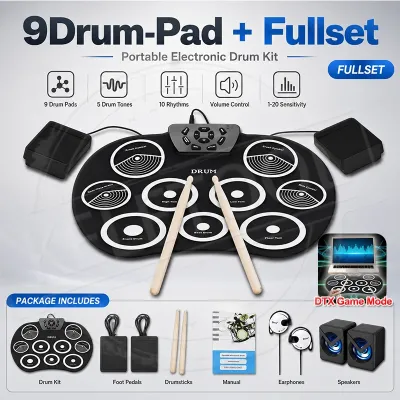
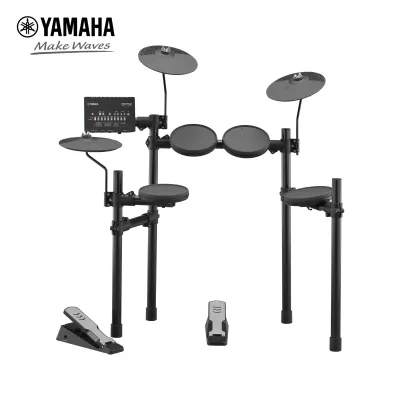
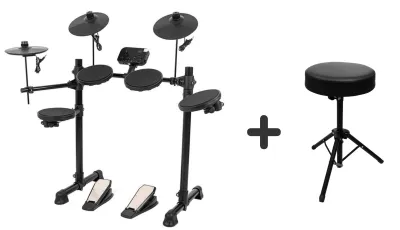
![[SG] Portable Electronic Drum Set USB Roll-Up Silicon Drums Pad w Drumsticks Compact Size Kit Hand Practice With Pedals](https://img.lazcdn.com/g/p/73aace46fc1f8c7268623b73f5d18efb.jpg_400x400q80.jpg_.webp)
![AROMA TDX-18SC Electronic Drum Kit [AROMA TDX18SC Digital Drum]](https://img.lazcdn.com/g/p/f3eb7bc4d0fcaf4316f92647395675b8.jpg_400x400q80.jpg_.webp)
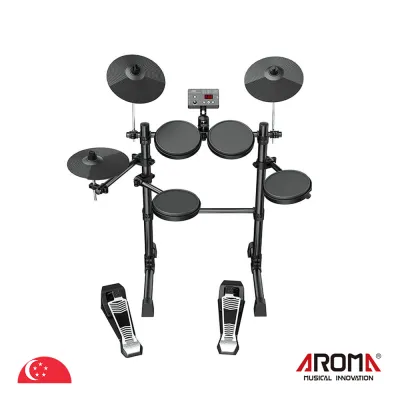
Prices are valid at publication and may change. Please refer to the product page for the latest price.
Your choice of DJ software plays a critical role in this integration. Platforms such as Pioneer DJ Rekordbox, Serato DJ Pro, Native Instruments Traktor Pro, and VirtualDJ are highly capable, but you must verify that your specific software edition supports custom MIDI mapping. Some entry-level or free versions of these programs restrict external MIDI controller mapping, which would prevent you from assigning your drum pads to software functions. Always check your software license and edition features before proceeding.
An external audio interface is another essential component, especially if you plan to route the drum module’s internal sounds alongside your DJ software’s digital audio. While you can trigger software samples using MIDI alone, using the actual high-quality drum sounds generated by your module requires physical audio routing. A dedicated audio interface—available from local music retailers in Singapore for around S$150 to S$400—manages this audio conversion, ensuring pristine sound quality and reducing the processing burden on your computer’s internal sound card.
Finally, do not overlook the importance of high-quality cables. If you are using USB, choose a shielded USB cable to protect the digital signal from electromagnetic interference, which is common near stage lighting and high-power DJ equipment. If your setup requires traditional 5-pin MIDI or analog audio connections, invest in balanced 1/4-inch TRS cables and rugged MIDI cables. Low-grade cabling can introduce unwanted hum, signal degradation, or intermittent connection drops during a live performance.
Hardware Connections: Linking Your Electric Drum Kit to the Computer
Establishing a secure physical connection between your drum module and your computer is the first step in the integration process. Depending on the age and model of your drum kit, you will use either a streamlined USB connection or a traditional MIDI and audio interface setup.

Connecting via USB (MIDI over USB)
The most common and straightforward method for modern electronic drums is connecting via MIDI over USB. This method uses a single USB cable to transmit digital performance data directly from your drum module to your computer.
To begin, locate the USB-to-Host port on your drum module, which typically looks like a square USB Type-B port. Connect a standard USB cable from this port to an open USB port on your computer. If you are using a modern laptop that only features USB-C ports, use a high-quality, direct USB-B to USB-C cable rather than relying on multi-port dongles, which can introduce connection instability or minor transmission delays.
Once connected, determine whether your drum module is class-compliant. Class-compliant devices work automatically on macOS and Windows without requiring manual driver installation. However, many professional modules require proprietary drivers to enable full MIDI functionality and low-latency performance. Visit the official support website of your drum manufacturer, locate the downloads page for your specific module model, and install the latest drivers designed for your operating system.
After installing any necessary drivers, verify that your computer recognizes the drum kit. On macOS, open the “Audio MIDI Setup” utility (found in Applications > Utilities) and open the MIDI Studio window to confirm the drum module icon is active. On Windows, open “Device Manager” and expand the “Sound, video and game controllers” section to ensure your drum kit is listed without any yellow warning triangles.
Connecting via Traditional MIDI and Audio Interfaces
If you are using an older electric drum kit or a highly complex performance rig, your module may not feature a USB port. In this scenario, you must use traditional 5-pin MIDI connections and an external interface.
To establish this connection, you will need an audio interface or a dedicated MIDI interface that features 5-pin MIDI ports. Connect a high-quality 5-pin MIDI cable from the “MIDI Out” port on your drum module to the “MIDI In” port on your interface. This physical path allows the digital triggers from your drum pads to reach your computer.
If you want to incorporate the actual synthesized drum sounds from your module into your live set, you must also route the analog audio. Connect the Left/Mono and Right 1/4-inch audio outputs of your drum module to two input channels on your audio interface, or route them directly into the auxiliary or line-in channels of a hardware DJ mixer. This dual-routing setup allows you to blend the module’s onboard drum sounds with the digital tracks playing from your DJ software.
Before moving to the software setup, consult your drum module’s instruction manual to verify its MIDI transmit settings. Ensure that the module is set to send MIDI data and note the active transmit channel. Most electronic drum kits default to MIDI Channel 10, which is the industry standard for percussion mapping, but some modules allow you to customize this setting to avoid conflicts with other connected MIDI gear.
Software Configuration: Audio Routing and MIDI Mapping
With your hardware physically connected and recognized by your computer, you must configure your DJ software to handle the incoming MIDI data and route the audio output smoothly.
Setting Up Audio Preferences and Buffer Size
To ensure your software outputs clean, uninterrupted audio while keeping latency to an absolute minimum, you must configure your software’s audio preferences.
Open your DJ software and navigate to the settings or preferences menu. Locate the “Audio Setup” or “Audio Device” section and select your external audio interface as the primary output device. Routing your audio through a dedicated interface rather than your computer’s default headphone port ensures professional-grade digital-to-analog conversion and significantly improves overall sound quality.
The audio buffer size is the critical setting that balances system stability with performance speed. Measured in samples, the buffer size determines how long your computer takes to process audio signals. A smaller buffer size (such as 64 or 128 samples) reduces the physical delay between striking a drum pad and hearing the sound, which is essential for maintaining tight timing. However, low buffer sizes demand substantial CPU power. If your computer struggles, you will experience audio dropouts, pops, or crackling. Start at a medium setting of 128 samples, test your system, and adjust accordingly.
For Windows users, it is highly recommended to select optimized ASIO drivers provided by your audio interface manufacturer. If your interface does not have a dedicated ASIO driver, you can use a universal third-party utility like ASIO4ALL to achieve low-latency performance. Mac users benefit from CoreAudio, which is natively optimized for professional audio processing and generally handles low-latency demands without requiring additional driver configurations.
MIDI Mapping and Assigning Drum Pads
MIDI mapping is the process of linking the physical pads on your electronic drum kit to specific functions, sample decks, or effects within your DJ software.
First, navigate to the MIDI or Controller settings menu in your DJ software. Locate the list of detected MIDI controllers and ensure that your electric drum module is checked and enabled as an active input device. This step tells the software to listen for incoming MIDI notes from your drum kit.
Because most DJ software platforms do not include pre-made mapping templates for electronic drum kits, you will need to create a custom MIDI map. Enter your software’s “MIDI Learn” or “MIDI Mapping” mode. In this mode, click on the specific software function you wish to control—such as a sample slot in a remix deck, a hot cue button, or an effect toggle. Once the software function is selected, physically strike the corresponding pad on your drum kit. The software will detect the unique MIDI note transmitted by that pad and pair the two instantly.
Work your way systematically through your drum kit to build a logical performance layout. For example, you can map your physical kick drum pad to trigger a deep sub-bass sample, assign your snare pad to trigger a crisp handclap, and map your cymbals to trigger vocal chops or dramatic white noise sweeps. Once you have mapped all your desired pads, exit the MIDI Learn mode and save your custom mapping profile as a dedicated file. Exporting this mapping file ensures you can easily reload your configuration if you update your software or switch computers.
Live Performance: Triggering Samples and Mixing Techniques
Once your physical connections and software configurations are complete, you can begin exploring creative performance techniques to integrate live drumming into your DJ sets.
Start by loading high-quality, one-shot samples, drum loops, vocal chops, or instrument stems into your DJ software’s sampler decks or remix slots. Ensure that your loaded samples are organized logically and key-matched to the tracks you plan to play. This preparation prevents harmonic clashes and ensures that your live drum additions blend seamlessly with the backing music.
To make your live drumming sound natural and expressive, you must configure the velocity sensitivity on your electronic drum module. MIDI velocity ranges from 0 to 127, representing how hard a pad is struck. If your module’s velocity curve is set too flat, every hit will trigger the software sample at maximum volume, resulting in a stiff, robotic sound. Adjust your module’s velocity settings to a linear or natural curve so that light taps trigger quiet, subtle sounds while hard strikes deliver powerful, dynamic accents.
During a live performance, try layering live drum hits directly over a playing track to build energy. For instance, you can use your DJ mixer’s EQ knobs to cut the low frequencies of the playing track, then play your own live kick drum pattern to drive the mix. Alternatively, map a cymbal pad to trigger a long-tail delay or reverb effect on an active deck, allowing you to physically “crash” into a transition while washing out the outgoing track.
Maintaining proper gain staging is essential to prevent digital clipping when combining multiple audio sources. When you layer live-triggered samples over a fully mastered DJ track, the combined audio level can easily overload your master output. Monitor the output meters in your DJ software and on your hardware mixer; keep the levels out of the red zone by slightly lowering the volume sliders of your sample decks or reducing the input gain of your live drum channels.
Troubleshooting Latency, Mapping Errors, and Audio Dropouts
Performing live with a hybrid digital setup introduces technical variables that can occasionally cause issues. Understanding how to troubleshoot common problems ensures your performance remains smooth and professional.
Dealing with Audio Latency and CPU Overload
If you notice a distinct delay between striking a drum pad and hearing the corresponding sound, your system is experiencing high audio latency. This delay makes it extremely difficult to play in time with the music.
To resolve latency issues, access your DJ software’s audio preferences and incrementally lower the audio buffer size (for example, from 256 samples down to 128 or 64 samples). Test the response after each adjustment. If you lower the buffer size too much, your computer’s CPU may struggle to process the audio in time, resulting in audible crackling, pops, or sudden dropouts. If this occurs, raise the buffer size slightly until you find a balance between imperceptible latency and stable audio playback.
You can also optimize your computer’s performance to free up valuable CPU resources for your DJ software. Close all unnecessary background applications, disable Wi-Fi and Bluetooth if they are not needed for your performance, and turn off automatic system updates. Additionally, ensure your laptop is connected to a stable power source and configured to a high-performance power plan to prevent hardware throttling during intense performance segments.
Finally, keep your system’s software components up to date. Regularly check the official websites of your drum manufacturer and audio interface brand for firmware updates. Outdated firmware can cause communication errors, digital clock sync issues, and unexpected audio dropouts mid-performance.
Fixing MIDI Mapping Conflicts and Double Triggering
If hitting a drum pad triggers the wrong sound, fails to register, or fires multiple times from a single strike, you are dealing with mapping conflicts or trigger issues.
First, check for MIDI channel conflicts. Ensure your electronic drum module is transmitting data on a single, dedicated MIDI channel and that your DJ software is configured to listen exclusively to that channel. If you have other MIDI controllers connected to your computer, verify that they are not sharing the same MIDI channel or note assignments, as this can cause overlapping commands and unexpected triggers.
Double triggering occurs when a single physical strike on a pad registers as multiple hits in your software. This is often caused by natural physical vibrations traveling through the drum rack and triggering adjacent pads. To fix this, access your drum module’s trigger settings and adjust the “retrigger cancel,” “crosstalk (XTALK),” or “mask time” parameters. Increasing these values slightly tells the module to ignore rapid, accidental secondary vibrations without sacrificing your ability to play intentional fast double-strokes.
Additionally, make sure your DJ software is not receiving duplicate MIDI inputs from multiple active sources. If your drum module is connected to your computer via both a USB cable and a 5-pin MIDI cable simultaneously, it may send duplicate notes for every hit. Disconnect one of the redundant physical paths to ensure a clean, singular data stream.
Advanced Techniques for Live Electronic Drum Sets
Once you have mastered the basic connection and mapping setup, you can explore advanced configurations to take your live performances further.
One powerful technique is routing your drum audio through a separate, dedicated channel on a hardware DJ mixer. Instead of mixing the drum sounds inside your computer, output the drum audio through a dedicated channel on your audio interface and connect it to a spare channel on your physical mixer. This setup allows you to use the mixer’s physical EQ knobs, color filters, and built-in hardware effects (such as tape delays or sweeps) on your drum sounds independently from the main music track, providing highly tactile control over your live mix.
You can also expand your sound palette by running dedicated software samplers or Virtual Studio Technology (VST) instruments—such as EZdrummer or Superior Drummer—alongside your DJ software. By routing these specialized instruments through virtual audio cables or a multi-channel audio interface, you can access highly detailed, multi-layered acoustic and electronic drum libraries that far exceed the sonic capabilities of standard DJ software samplers.
Maintaining perfect rhythm is the hallmark of a professional live hybrid set. Practice playing your electric drum kit along with a visual beatgrid or a private click track routed only to your headphones. Over time, you will develop the muscle memory and rhythmic precision needed to seamlessly sync your physical drumming with the shifting tempos of your DJ tracks, creating a cohesive, high-energy experience for your audience.
Frequently Asked Questions (FAQ)
Can I use any electronic drum kit with DJ software?
Yes, provided the electronic drum kit features MIDI output capabilities, either through a modern USB-to-Host port or traditional 5-pin MIDI ports. Kits that lack these digital output options cannot send trigger data to a computer and therefore cannot control or trigger samples within DJ software. Before purchasing or setting up your gear, check the manufacturer’s product specifications to ensure the module supports class-compliant USB MIDI, which guarantees seamless, plug-and-play compatibility with modern operating systems without requiring complex manual driver installations.
Community discussion
Share your experience or ask a question. Comments are reviewed before publication.