
Integrating NUX electronic drums into a live DJ set offers an exciting way to elevate your performances, allowing you to blend real-time percussion with electronic tracks. By routing your drum kit into your DJ software, you can either play along using the module’s internal drum sounds or use the physical pads to trigger software-based samples, loops, and effects. This hybrid setup bridges the gap between traditional musicianship and modern digital mixing, giving you the flexibility to improvise and add dynamic energy to your transitions.
To successfully establish this connection, you must understand the dual nature of electronic drum modules, which can transmit both analog audio signals and digital MIDI data. The routing path you choose depends on whether you want to use the pre-programmed drum kits built into your NUX module or harness the virtual instruments and sampler decks inside your DJ software. Both methods require careful hardware configuration, precise software routing, and proper gain staging to ensure a clean, low-latency audio output that blends seamlessly with your music library.
Before beginning the setup process, it is essential to verify the specific capabilities of your hardware and software editions. Not all DJ controllers or software versions support external audio routing or custom MIDI mapping, so checking your equipment specifications beforehand will save time and prevent technical roadblocks during your performance.
Products mentioned in this guide
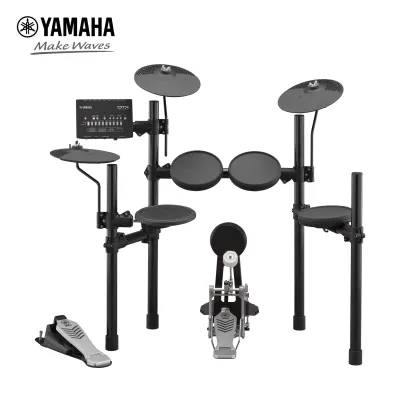
![NUX DM-210 Electronic Drum Kit [All Mesh Drum Pad] with [Bluetooth Audio/MIDI]](https://img.lazcdn.com/g/p/d5e0c23076a125810eaf8e8bf13b82db.jpg_400x400q80.jpg_.webp)
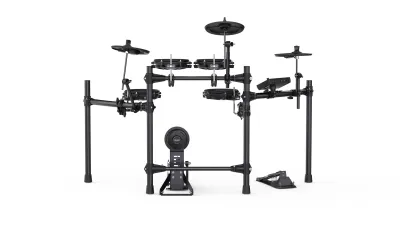
![Alesis Nitro Max Kit Foldable Electronic Drum Set With Dual Zone Mesh Head Snare Toms Cymbals Kick Pedal Module Drumsticks [LIMITED STOCK]](https://img.lazcdn.com/g/p/b547a4b2e62e79fe5eee647b3c9dfb29.png_400x400q80.png_.webp)
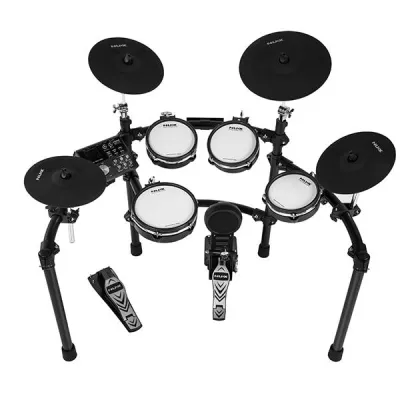
Prices are valid at publication and may change. Please refer to the product page for the latest price.
Gear and Software Requirements
To build a reliable hybrid performance setup, you need a compatible NUX electronic drum module, such as those equipped with USB MIDI or standard audio outputs. The back panel of your drum module serves as the starting point for your routing path. You will need to identify whether your module features standard 1/4-inch (6.35mm) line outputs, a USB Type-B port, or traditional 5-pin MIDI ports, as these determine the types of cables and interfaces required for the connection.
On the software side, you must use a professional DJ platform that supports external audio inputs and customizable MIDI mapping. Standard platforms like Serato DJ Pro, Traktor Pro, VirtualDJ, or Rekordbox generally offer these advanced routing capabilities, whereas entry-level or mobile applications often restrict external inputs. Before purchasing or upgrading your software, verify the exact feature set of your current edition to confirm that it allows for live auxiliary inputs and external MIDI controller integration.
An external audio interface or a DJ controller with physical input channels is also necessary to bring the analog sound of your drums into the mixing environment. If you plan to route analog audio, your controller or mixer must have available line-in or auxiliary channels with dedicated physical gain knobs. For setups relying solely on MIDI triggering, a direct USB connection to your computer is usually sufficient, though an audio interface remains highly recommended for managing low-latency audio output.
Finally, you must gather the appropriate high-quality cables to prevent signal degradation or interference during live performances. For analog routing, you will typically need a pair of 1/4-inch TS mono cables to transmit a stereo signal from the drum module to your mixer. If you are utilizing MIDI control, a standard USB-A to USB-B cable is required to connect the module directly to your computer, along with any necessary USB-C adapters depending on your computer’s available ports.
Physical Connection and Audio Routing
The first step in the physical setup is deciding between a digital USB connection or an analog audio routing path. If your NUX drum module supports USB audio and MIDI transmission, you can connect the USB-B port on the module directly to an open USB port on your computer. This single-cable solution allows the computer to receive both MIDI data and digital audio directly, though you should check the manufacturer’s website to see if specific operating system drivers are required for your model.

For setups that require routing the module’s internal sounds through a DJ mixer, the analog method is the most reliable option. Connect the Left/Mono and Right 1/4-inch outputs on the back of the NUX module to an available pair of line-in inputs on your DJ controller or external mixer. It is crucial to ensure that the input switch on your DJ hardware is set to “Line” rather than “Phono” or “Mic,” as these latter settings use different preamplification levels that will cause severe distortion or signal clipping.
Once the physical cables are connected, you must configure the internal settings of your NUX drum module to optimize the signal flow. Access the module’s system menu using the onboard screen and locate the audio output settings. If you are routing analog audio, set the master output volume of the drum module to a moderate level, typically around 70% to 80%, which provides a strong, clean signal to your mixer without overloading the input stage.
If your goal is to use the NUX pads to trigger software instruments or samples inside your DJ software rather than playing the module’s built-in sounds, you must disable the local sound engine. Navigate to the MIDI settings on your drum module and turn the “Local Control” setting to “Off.” This disconnects the physical pads from the internal synthesizer, ensuring that when you strike a pad, you only hear the triggered software sound rather than a doubled, clashing sound from both the module and the computer.
Configuring Your DJ Software for Drum Input
With the physical connections established, you must configure your DJ software to recognize and route the incoming drum signal. Open your software’s preferences menu and locate the audio setup or routing tab. If you are using an external audio interface or a DJ controller to receive the analog drum signal, ensure that this device is selected as the primary audio input and output device within the software settings.
Next, you need to assign the physical input channels where your drums are connected to a specific software channel or deck. Most professional DJ software allows you to configure an auxiliary channel, a sampler deck, or a “Live Input” deck to receive external audio. By routing the drum input to a dedicated channel, you gain the ability to apply software effects, adjust the volume fader, and use the channel EQ to blend the live drums with your playing tracks.
Proper gain staging is critical at this stage to prevent digital clipping and ensure your live drumming sits well in the overall mix. While watching the input meters in your DJ software, strike your drum pads with the maximum force you plan to use during your live performance. Adjust the input gain or trim knob on your DJ controller or audio interface so that the signal peaks safely in the green or amber range, leaving enough headroom to prevent the meters from hitting the red clipping zone.
If you are routing digital audio directly via USB from the NUX module, you may need to configure the software’s input routing to recognize the drum module as a secondary audio device. Some operating systems allow you to create an aggregate audio device that combines your DJ controller and the drum module into a single virtual interface. This advanced configuration requires careful setup in your operating system’s audio MIDI utility to ensure both devices remain synchronized and do not cause audio dropouts.
MIDI Mapping for Live Performance Controls
Using your NUX electronic drums as a MIDI controller opens up creative performance possibilities, such as triggering vocal chops, firing off transition samples, or controlling software effects with physical pad strikes. To begin this process, connect your drum module to your computer via USB and open your DJ software’s MIDI settings. Verify that the NUX module is listed in the connected devices directory and ensure that the input option is checked or enabled.
Once the device is active, enter the software’s MIDI mapping or “MIDI Learn” mode, which is typically activated by clicking a dedicated button at the top of the software interface. When this mode is active, the software will highlight all mappable on-screen controls. Click on the specific software function you wish to control, such as a slot in your sampler bank or a hot cue button on an active deck, to prepare it for mapping.
With the software control selected, physically strike the NUX drum pad or cymbal that you want to assign to that function. The software will detect the incoming MIDI note message sent by the pad and instantly link it to the selected control. Repeat this process for each pad and cymbal you wish to integrate into your performance, making sure to save your custom MIDI mapping profile once you are finished so you do not lose your configuration.
To ensure your pads respond expressively and predictably during a live set, you may need to adjust the velocity curves and sensitivity settings. In your DJ software’s MIDI preferences or within the NUX module’s trigger settings, you can select different velocity response curves. For triggering static samples or loops, a flat or constant velocity curve is often ideal, as it ensures the sample plays at maximum volume regardless of how hard you hit the pad, while a linear curve is better suited for dynamic percussion instruments.
Sound Check and Live Mixing Verification
Before performing in front of an audience, conducting a thorough sound check is essential to verify that your hybrid setup is stable, responsive, and sounding balanced. The first priority during a sound check is monitoring and managing audio latency, which is the slight delay between striking a drum pad and hearing the sound from the speakers. If you experience a noticeable delay that disrupts your rhythmic timing, open your software’s audio settings and lower the buffer size, aiming for a setting of 128 samples or lower.
Keep in mind that reducing the buffer size increases the processing load on your computer’s CPU. During your sound check, monitor the software’s CPU load meter while playing rapid drum patterns to ensure there are no audio dropouts, pops, or crackles. If your computer struggles to maintain stable audio at low buffer sizes, you may need to close unnecessary background applications, disable wireless connections, or slightly increase the buffer size to find a reliable balance between latency and system stability.
Once latency is minimized, focus on balancing the volume of your live drum channel against the master mix of your pre-recorded tracks. Play a typical electronic track on one of your software decks and play along on your NUX drums, adjusting the channel faders so the live percussion complements the track rather than overpowering it. Live drums generally require a bit of extra presence to cut through a dense electronic mix, but they should not be so loud that they cause the master output to clip.
Finally, use your mixer’s channel EQ and software processing to blend the live drums into the acoustic space of the electronic tracks. Applying a high-pass filter or rolling off some of the low-end bass frequencies on your drum channel can prevent muddy build-up, especially when playing over tracks with heavy sub-bass lines. If your software supports it, adding a light compressor to the drum channel or the master output can help glue the live and recorded elements together, creating a cohesive and professional live mix.
Frequently Asked Questions (FAQ)
Can I use NUX electronic drums with any DJ software?
To integrate NUX electronic drums into your live sets, your DJ software must support external audio inputs or custom MIDI mapping. Most professional-grade platforms, such as Serato DJ Pro, Traktor Pro, Rekordbox, and VirtualDJ, include these features in their standard editions. However, entry-level, free, or mobile-based DJ applications often lack the advanced routing capabilities required to accept external hardware inputs or map custom MIDI controllers, so it is important to verify your software edition’s specifications before planning your setup.
How do I reduce audio latency when playing live?
Reducing audio latency requires optimizing your computer’s audio processing settings and hardware connections. Start by lowering the audio buffer size in your DJ software’s preferences to 128 samples or lower, which reduces the time it takes for your computer to process the drum signals. Additionally, ensure you are using high-performance audio drivers, such as ASIO drivers on Windows operating systems, and connect your NUX module directly to your computer’s USB ports rather than using unpowered USB hubs, which can introduce processing delays.
Community discussion
Share your experience or ask a question. Comments are reviewed before publication.