
A scratchy volume knob on a DJ mixer or karaoke system is typically caused by dust, dirt, or oxidation accumulating on the internal conductive track of the potentiometer. When you turn the knob, the metal wiper scrapes against these microscopic particles, disrupting the electrical signal and creating an audible crackle or static sound. In most cases, this issue can be resolved with a thorough cleaning using specialized electronic contact cleaner, though severe physical wear may require replacing the component entirely.
Is It the Volume Knob? Identifying the Symptoms
To resolve the issue effectively, you must first isolate the problem to ensure the volume knob itself is the culprit. If the crackling or static noise only occurs when you physically rotate the knob, the issue is almost certainly localized to that specific potentiometer. If the noise persists when the knob is completely stationary, the cause is more likely a faulty audio cable, ground loop interference, or an issue with the input source.
Test the signal routing systematically. Turn the knob while listening to different outputs. Does the scratchiness affect only one channel, or does it impact the master output or the headphone cue? If the noise is isolated to a single channel, you can rule out global mixer issues. Complete signal loss at certain points of the knob’s rotation indicates a severe dead spot on the internal track, which often points to physical wear rather than simple dust accumulation.
Products mentioned in this guide
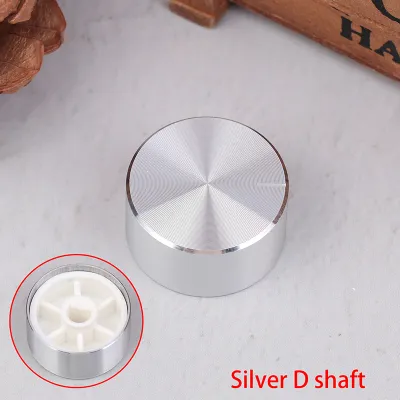
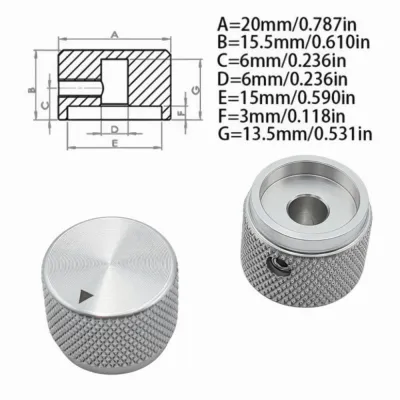
Prices are valid at publication and may change. Please refer to the product page for the latest price.
Why Your Volume Knob is Crackling or Scratchy
Inside every standard volume knob is a rotary potentiometer. This component features a resistive carbon track and a tiny metal wiper that slides across it to adjust the electrical resistance, thereby controlling the volume. Over time, airborne dust, smoke residue, and ambient moisture settle inside the housing. This mixture forms a microscopic layer of grime and oxidation on the track.

As the wiper moves over this uneven layer, it momentarily loses clean contact with the carbon track, resulting in rapid voltage fluctuations that your speakers reproduce as scratchy static. Additionally, heavy use—especially during intense DJ sets or frequent karaoke adjustments—physically wears down the delicate carbon material. Once the carbon track is physically scraped away or grooved, cleaning will no longer restore smooth audio performance.
| Observable Symptom | Likely Cause | Recommended Next Step |
|---|---|---|
| Crackling only when turning the knob | Dust, dirt, or minor oxidation on the carbon track | Clean with specialized electronic contact cleaner |
| Constant static or hum when stationary | Grounding issue, bad cable, or external interference | Check cables, power sources, and input connections |
| Audio cuts out completely at specific positions | Severely worn or damaged carbon track (dead spot) | Inspect potentiometer for physical wear or replace |
| Knob is physically loose, wobbly, or hard to turn | Bent shaft, broken internal casing, or physical impact | Seek professional repair or replace the potentiometer |
| Audio plays only on one side (left or right channel) | Uneven wear or dirt on a stereo potentiometer track | Clean the potentiometer; replace if balance remains uneven |
How to Safely Clean a Scratchy Potentiometer
Before attempting any maintenance, safety must be your absolute priority. Always power down the DJ mixer or karaoke system and completely unplug it from the wall outlet. Disconnect all audio cables to prevent accidental short circuits or damage to your amplifiers and speakers. Consult your equipment’s user manual or service guide to understand its construction and check if opening the chassis voids any active warranty.
Begin with external cleaning. Gently pull the plastic knob cap straight up and off the metal or plastic potentiometer shaft. If the cap is tight, you can sometimes slide a thin plastic tool or a piece of string underneath to lift it evenly without bending the shaft. Once the cap is removed, use a can of compressed air to blow away loose dust, hair, and debris from around the base of the shaft. Keep the nozzle a safe distance away to avoid pushing dirt deeper into the housing.
For internal cleaning, you must access the openings in the potentiometer casing. On some mixers, you can spray directly down the shaft or through small gaps in the top panel, but the most effective method usually involves opening the outer chassis to access the back of the circuit board. Locate the small access ports or openings on the side of the metal potentiometer housing. Insert the straw of a specialized, fast-evaporating, plastic-safe electronic contact cleaner into the port. Spray a short, controlled burst of cleaner inside. Immediately rotate the knob shaft back and forth through its full range of motion 20 to 30 times to distribute the cleaner and scrub away oxidation.
Never use standard household lubricants, multi-purpose oils, or generic penetrating sprays, as these leave behind sticky residues that attract more dust and can permanently degrade the internal plastic parts. After cleaning, allow the mixer to sit in a well-ventilated area for at least 15 to 30 minutes to ensure the solvent has completely evaporated. Once dry, plug the unit back in, reconnect your audio sources, and test the volume knob to verify if the scratchiness has cleared.
When to Replace the Knob or Seek Professional Repair
While cleaning resolves the majority of scratchy knob issues, some potentiometers are beyond saving. If the volume knob feels physically loose, wobbly, or gritty even after cleaning, the internal mechanical components may be broken. A bent shaft or a cracked casing cannot be repaired with spray. Furthermore, if the audio still crackles or cuts out completely at the exact same spot after multiple cleaning attempts, the carbon track has likely worn away entirely, leaving a permanent dead zone.
Replacing a potentiometer requires desoldering the old component from the circuit board and soldering a new one in its place. If you are not experienced with soldering, you risk overheating the delicate circuit board traces, which can cause permanent, costly damage to your mixer. If your equipment is still under warranty, attempting a DIY repair will almost certainly void it. In these cases, or if you lack the official service manual and schematic diagrams, it is highly recommended to take the unit to a qualified audio technician.
If you decide to source a replacement part yourself, you must match the original specifications exactly. Potentiometers are defined by their resistance value (commonly measured in kilohms, such as 10k or 50k ohms) and their taper type. Volume controls typically use a logarithmic (or audio) taper, often labeled with an “A” (e.g., A10K), whereas linear tapers are labeled with a “B”. You must also verify the physical footprint, including the number of pins, the shaft length, and whether the shaft is knurled, D-shaped, or smooth, to ensure it fits perfectly onto your mixer’s circuit board and accepts your original knob cap.
How to Prevent Future Volume Knob Issues
Preventing dust and moisture accumulation is the easiest way to extend the lifespan of your DJ mixer or karaoke system. When your equipment is not in use, always protect it with a fitted dust cover, a hard case, or a decksaver. This simple step blocks airborne particles from settling into the open gaps around the faders and knobs.
Keep food and drinks far away from your performance setup. Spilled sugary drinks or alcohol can instantly ruin potentiometers by creating a sticky, corrosive mess inside the housing that is incredibly difficult to clean. Additionally, make it a habit to periodically rotate all the knobs and slide the faders on your equipment, even on channels you rarely use. This regular movement helps rub off minor oxidation before it can build up into a thick, stubborn layer that disrupts your audio signal.
Frequently Asked Questions (FAQ)
Can I Use Standard Lubricants to Clean a Scratchy Knob?
No, you should never use standard household lubricants, multi-purpose oils, or automotive penetrating sprays on a scratchy volume knob. These products are designed for mechanical joints and leave behind a wet, oily residue that does not evaporate. This sticky film acts like a magnet for dust, hair, and dirt, which will quickly clog the potentiometer and make the scratchiness far worse than before. Additionally, some household lubricants contain solvents that can dissolve or warp the delicate plastic components inside your mixer. Always use a fast-evaporating, plastic-safe electronic contact cleaner specifically formulated for audio potentiometers and sensitive electronics.
Why Does Only the Master Volume Knob Crackle?
The master volume knob often crackles first because it is typically the most heavily used control on a DJ mixer or karaoke system. During a performance, you might set individual channel faders and leave them, but you frequently adjust the master volume to adapt to room acoustics, crowd noise, or system limits. This constant adjustment causes faster mechanical wear on the master potentiometer’s internal carbon track. Additionally, because the master knob controls the final summed stereo signal of the entire mix, any minor imperfection or dust particle on its track is immediately audible across the entire sound system, making the issue much more noticeable than a scratchy knob on an unused input channel.
Community discussion
Share your experience or ask a question. Comments are reviewed before publication.