
Finding the perfect EM guard (commonly referred to as a pickguard or electromagnetic shielding guard) for your guitar requires verifying three critical elements: the exact manufacturer specifications of your instrument, the physical dimensions of the existing guard, and the precise alignment of the mounting holes and pickup cutouts. Because guitar manufacturers frequently alter their designs across different production years, factories, and sub-series, assuming a guard will fit based solely on the general model name often leads to alignment issues. By systematically mapping your guitar’s layout and comparing it to detailed technical diagrams, you can ensure a seamless fit that protects your instrument’s finish and maintains its structural integrity.
To achieve a perfect installation, you must treat the replacement process as a precise technical matching task rather than a generic accessory purchase. Even iconic guitar shapes have dozens of subtle variations in screw placement, control spacing, and pickup routing that are invisible to the naked eye. Taking the time to document your guitar’s exact pedigree and physical layout before ordering will save you the frustration of dealing with misaligned screw holes, overlapping edges, or restricted control knobs.
Identify Your Guitar's Guard Configuration
Before purchasing a replacement EM guard, you must establish the exact baseline specifications of your instrument. Guitar models that look identical from a distance often feature distinct internal routing and external dimensions depending on their origin and production era. Start by locating the precise manufacturer model name, specific series, and exact production year. This information is typically printed on the back of the headstock, stamped onto the neck plate, or detailed on a label inside the control cavity or soundhole. If the serial number is visible, you can use the manufacturer’s official online lookup tool to decode the exact factory and date of manufacture.
Products mentioned in this guide

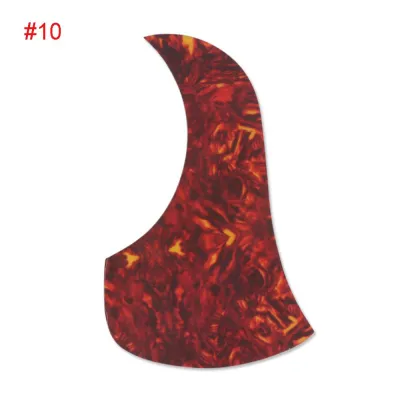
Prices are valid at publication and may change. Please refer to the product page for the latest price.
Once you have identified the specific model, analyze the pickup configuration and control layout. Common configurations include the classic three single-coil setup (SSS), the versatile humbucker-single-single layout (HSS), and the dual humbucker arrangement (HH). Beyond the pickups, note the number and positioning of the volume and tone potentiometers, as well as the type of pickup selector switch, whether it is a blade switch or a toggle switch. Different production runs may position these controls slightly closer to or further from the edge of the body, which directly impacts whether a replacement guard will sit flush.
To confirm these details, consult the manufacturer’s official specifications, the original user manual, or authorized dealer catalogs from the corresponding production year. Many manufacturers maintain digital archives of past catalogs that detail the exact hardware and guard styles used during specific runs. If your guitar is a signature model or part of a limited-edition series, it may feature unique body contours or control placements that deviate from standard production models. Verifying these details at the source prevents the common mistake of purchasing a standard guard for a highly customized or non-standard instrument.
Measure the Existing Guard or Guitar Body
To obtain accurate physical dimensions for comparison, you must measure the existing guard or the routing on the guitar body itself. Begin by carefully removing the current guard. Use a properly sized screwdriver to avoid stripping the mounting screws, and gently lift the guard away from the body. Be extremely cautious not to scratch the guitar’s finish or pull on the underlying wiring connected to the pickups, pots, or ground wires. If the electronics are mounted directly to the guard, you may need to desolder the output jack and ground connections, or carefully support the assembly on a soft cloth next to the guitar body.

With the guard removed, use digital calipers or a high-quality flexible measuring tape to capture the maximum length, maximum width, and specific contour curves. Measure the distance between the outer edges of the pickup cutouts and the perimeter of the guard. Pay close attention to the radius of the curves around the neck pocket and the lower horn, as these areas are highly prone to fitment discrepancies between different manufacturers. Write down these measurements in millimeters, as most technical diagrams provided by guard manufacturers use metric units for precision.
A highly reliable method for verifying compatibility is to create a physical template of your original guard. Place the intact original guard flat onto a sheet of stiff paper or cardstock and trace its outline precisely with a fine-tipped pencil. Mark the exact center of every screw hole and the boundaries of all pickup and control cutouts. This physical template can be cut out and placed directly over the guitar body to verify the fit, or laid over a printout of a prospective replacement guard’s technical diagram to check for any deviations in shape or hole placement.
Verify Mounting Holes and Pickup Cutouts
One of the most common points of failure when replacing an EM guard is the misalignment of mounting holes. You must count and map the exact location of every screw hole on your current guard. For example, standard double-cutaway style guards often come in 8-hole or 11-hole configurations, and even within the 11-hole category, the spacing of the top screw near the middle pickup can vary significantly between vintage-style and modern-style layouts. Note any asymmetrical patterns or unique hole placements that are specific to your guitar’s country of manufacture, as models produced in different regions often use distinct tooling templates.
Next, inspect the precise dimensions and routing depth of the pickup cavities and potentiometer holes. The cutouts in the replacement guard must align perfectly with the routed cavities in the guitar body. If your guitar features active electronics or humbuckers with large mounting legs, the pickup cutouts on the guard must accommodate these specific dimensions without binding. Measure the diameter of the potentiometer holes as well; imperial-sized pots (often found on American-made instruments) require larger holes than metric-sized pots (common on Asian-made instruments), and forcing a larger pot through a small hole can crack the guard material.
Finally, inspect the guitar body for any non-standard modifications, aftermarket routing, or previous repairs. If a previous owner modified the pickup cavities to accommodate a different pickup style, or if the original screw holes in the wood have been plugged and redrilled, the factory-standard guard specifications may no longer apply. Look for signs of hand-routing or extra screw holes hidden beneath the current guard. Identifying these modifications early allows you to determine whether you need a custom-cut guard or if you will need to perform minor modifications to the body or the replacement guard during installation.
Pre-Purchase Compatibility Checklist
Before finalizing your order and purchasing a replacement EM guard, run through a comprehensive compatibility checklist to prevent fitment failures and avoid the hassle of return shipping. First, cross-reference your physical measurements and your paper template with the detailed dimensional diagrams provided by the guard manufacturer or seller. Reputable sellers typically provide downloadable PDF templates at a 1:1 scale. Print these diagrams at actual size (ensuring your printer settings are set to “100%” or “Do Not Scale”) and place your original guard or paper template directly on top of the printout to verify every dimension and hole alignment.
Next, confirm that the material thickness and the style of the beveled edge match your guitar’s design. Standard guards are typically available in single-ply, 3-ply, or 4-ply configurations, which affect both the thickness and the visual border of the guard. Ensure that the thickness of the new guard will not interfere with the height of your pickups, the action of your strings, or the seating of your control knobs. Additionally, check if the guard features integrated electromagnetic shielding foil on the underside, which is essential for reducing hum and interference in single-coil configurations.
Lastly, review the seller’s return policy and modification guidelines. Because wood can expand or contract over time and factory tolerances can vary slightly, minor adjustments are sometimes necessary even with high-quality replacement guards. Verify if the seller permits returns if the guard has not been altered, and check if they provide instructions for minor modifications. Knowing the return terms beforehand ensures that if the guard is significantly misaligned, you can return it for a refund or exchange rather than attempting to force a fit that could damage your instrument.
Frequently Asked Questions (FAQ)
Can I use a standard guard on a guitar with aftermarket pickups?
Using a standard guard with aftermarket pickups is possible, but it requires careful verification of the pickup dimensions. While many aftermarket pickups conform to standard single-coil or humbucker dimensions, some models feature larger plastic covers, active electronics housing, or unique mounting ears that exceed standard cutout sizes. You must measure the physical casing of your aftermarket pickups and compare those dimensions to the cutout specifications on the replacement guard. If the new pickups are slightly larger, you may need to carefully file the edges of the guard cutouts using a fine-toothed hand file, or consult a professional luthier to adjust the routing of the guitar body if the internal cavities are too tight.
What should I do if the screw holes do not align perfectly?
If the screw holes on your new EM guard do not align perfectly with the existing holes in your guitar body, the correct course of action depends on the severity of the misalignment. For minor discrepancies of less than a millimeter, you can sometimes use a hand drill with an appropriate bit to slightly enlarge or ovalize the hole in the guard material itself, allowing the screw to enter the wood at the correct angle. However, if the misalignment is significant, forcing the screw in will strip the wood or crack the guard. If the adjustment requires drilling entirely new holes into the guitar body, risking damage to the finish or structural integrity, you should stop immediately. In these cases, consult a qualified luthier or guitar technician who can safely plug the old holes with hardwood dowels and drill precise new pilot holes.

Community discussion
Share your experience or ask a question. Comments are reviewed before publication.