
Transitioning smoothly between ukulele chords is one of the most common hurdles for beginners and intermediate players alike. When your fingers feel clumsy, slow, or tangled, the issue is rarely a lack of natural speed or flexibility. Instead, fluid ukulele movement is built on muscle memory, efficient finger placement, and a relaxed hand posture. By identifying the physical bottlenecks in your current playing style and applying targeted, deliberate practice drills, you can train your hand to glide effortlessly from one chord shape to the next. Improving your transitions is not about rushing your fingers; it is about eliminating wasted motion so that every shift is as short and direct as possible.
Identify the Root Causes of Clumsy Chord Changes
Before you can fix slow chord transitions, you must diagnose the specific habits that are holding your fingers back. The most common culprit is excessive finger pressure on the fretboard. When you press down much harder than necessary to make a note ring out, you introduce tension into your entire hand, wrist, and forearm. This physical tension acts like a brake, making it incredibly difficult to release one chord and quickly shape the next.
Another frequent issue is flat-finger placement. If you press the strings with the flat pads of your fingers rather than the tips, your fingers will naturally collapse across the fretboard. This flat posture often causes your fingers to accidentally touch and mute adjacent strings, while also limiting your reach and making your hand feel cramped.
Products mentioned in this guide
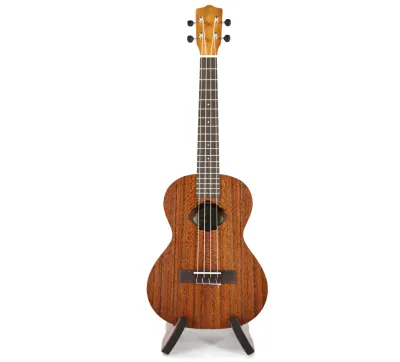
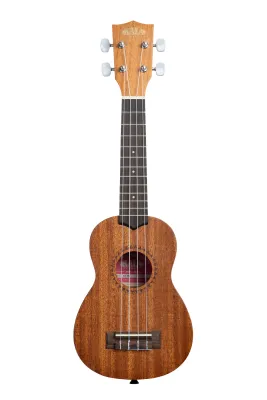



Prices are valid at publication and may change. Please refer to the product page for the latest price.
Finally, watch out for “flying fingers.” This occurs when you release a chord and your fingers fly far away from the fretboard, sometimes curling upward or flaring out into the air. Every millimeter your fingers travel away from the strings is extra distance they must cover to get back down. This wasted energy and motion dramatically slows down your ukulele movement, turning a simple transition into a frantic scramble.
Optimize Your Hand Posture and Finger Placement
Establishing a proper physical foundation is essential for allowing your fingers to move freely and efficiently across the fretboard. The way you position your hand determines how much leverage and reach your fingers have. Start by adjusting your thumb position on the back of the ukulele neck. Instead of wrapping your thumb tightly over the top of the neck, place the pad of your thumb against the center of the back of the neck. This creates a supportive pivot point, giving your fingers the space they need to arch over the strings.

Next, focus on maintaining a curved finger arch. Your fingers should resemble small hooks, with each joint bent so that you press the strings cleanly with the very tips of your fingers, right next to the fingernails. Keeping your nails trimmed short is highly recommended, as long nails will force your fingers to flatten out to avoid hitting the wood.
Additionally, practice keeping your idle fingers hovering close to the fretboard. Even when a finger is not actively pressing a string, it should remain relaxed and positioned just a few millimeters above the frets. This minimizes the travel time required for the next chord change, allowing your hand to remain calm and composed even during fast-paced songs.
Targeted Exercises to Build Muscle Memory and Speed
To turn awkward transitions into automatic movements, you need to train your brain and muscles to recognize chord shapes without conscious effort. One of the most effective ways to do this is through the “Hover and Drop” exercise. To practice this, form a chord shape with your fretting hand but do not press down on the strings. Instead, let your fingers hover just a millimeter above the fretboard in the exact shape of the chord. Once the shape is perfectly formed in the air, drop all your fingers simultaneously onto the strings. Release, hover, and drop again. This teaches your fingers to move as a single, coordinated unit rather than landing one by one.
Another excellent tool is the timed change drill. Choose two chords that you struggle to switch between, such as C to G7 or G to E minor. Set a timer for one minute. Start a metronome at a very slow tempo and count how many clean transitions you can make between those two chords within the minute. Do not rush; only count transitions where every note rings out clearly. Keep a practice log to track your progress over days and weeks, watching your speed naturally increase as your muscle memory solidifies.
You can also make transitions much easier by utilizing anchor fingers or pivot fingers. When moving between certain chords, you will often find that one finger stays on the same string, or even the exact same fret. For example, when transitioning from an F chord to a D minor chord, your index finger can stay anchored on the first fret of the E string. Instead of lifting your entire hand, leave that anchor finger firmly in place and simply pivot your other fingers around it. This drastically reduces hand movement and provides a physical reference point for the rest of your hand.
Techniques for Smoother Transitions in Actual Songs
Isolating chord changes in drills is highly effective, but bridging the gap to playing actual music requires a few strategic adjustments. One of the best techniques for maintaining a steady rhythm is anticipating the next chord. Many beginners make the mistake of waiting until the very first beat of a new measure to start moving their fingers. Instead, try preparing your finger movements during the final strum of the current measure. You can actually release the current chord a fraction of a second early—often playing the final upbeat on open strings—to give your hand the time it needs to travel to the next shape.
If you encounter a song with a complex chord voicing that repeatedly halts your momentum, do not hesitate to simplify it temporarily. For instance, if a song calls for a challenging barre chord, you can often substitute a simpler open-chord variation or focus on playing just the root notes while you build baseline dexterity. This keeps the music flowing and prevents frustration from stalling your practice sessions.
Always practice your transitions with a metronome. Start at a slow, manageable tempo where you can make every single chord change perfectly in time, even if it feels agonizingly slow. Only when you can play the progression flawlessly at that speed should you gradually increase the metronome by five beats per minute. Rushing into fast tempos with sloppy technique only reinforces bad habits, whereas slow, perfect practice builds permanent, reliable muscle memory.
Troubleshooting Common Finger Movement Roadblocks
Even with consistent practice, you may encounter physical or technical hurdles that slow down your progress. Finger fatigue is incredibly common, especially when you are building up new muscles in your hand. If you feel a dull ache or tension building up in your wrist or fingers, stop immediately and shake out your hand. Taking short, frequent breaks during your practice sessions is far more effective—and safer—than pushing through pain, which can lead to repetitive strain injuries.
If you notice buzzing or muted strings, it is usually a sign that your fingers are either not pressing close enough to the metal fret wire or are accidentally touching adjacent strings. Check your finger arch; make sure your knuckles are bent and your fingers are pressing straight down rather than leaning to one side.
Finally, keep in mind that different ukulele sizes require slight adjustments to your hand positioning. If you are practicing on a soprano ukulele and find that your fingers feel cramped, the narrow fret spacing may be restricting your movement. Transitioning to a concert or tenor ukulele, which feature longer necks and wider fret spacing, can provide your fingers with more physical room to maneuver. Conversely, if you have smaller hands and struggle to reach across a tenor fretboard, a smaller instrument might help you maintain proper, relaxed posture.
Frequently Asked Questions (FAQ)
How long does it take to get fast at changing ukulele chords?
Developing fast, automatic chord transitions is a gradual process that depends heavily on consistent practice. For most players, practicing for just 10 to 15 minutes every day yields much better results than a single two-hour session once a week. With daily, focused practice, you will typically begin to notice a significant improvement in your finger coordination and transition speed within two to four weeks.
Should I look at my fretting hand while changing chords?
When you are first learning a new chord shape, looking at your fretting hand is completely natural and necessary to ensure accurate finger placement. However, as soon as you understand the shape, try to look away or close your eyes during transitions. Relying on physical feel rather than visual cues helps build deep muscle memory, allowing you to eventually change chords fluidly while reading sheet music or looking at your audience.
Do finger strengtheners help with ukulele chord transitions?
Grip strengtheners and spring-loaded finger devices are generally unnecessary for playing the ukulele. The instrument requires very little physical force to press down the nylon strings. Instead of raw grip strength, smooth chord transitions require finger independence, flexibility, and precise coordination. You will gain far more benefit from practicing actual chord shapes and finger-stretching exercises on your ukulele fretboard than from using external training devices.
Community discussion
Share your experience or ask a question. Comments are reviewed before publication.