
Integrating an electronic drum pad into your DJ setup allows you to transition from a traditional track-to-track mixer to a dynamic live performer. By triggering custom samples, finger drumming over instrumental sections, or layering live percussion onto electronic beats, you can elevate your transitions and inject unique energy into your sets. The process involves establishing a reliable connection between your drum pad and your mixing console or laptop, then configuring your signal flow to prevent audio clashes. Whether you are performing in a compact home studio in Singapore or setting up in a crowded club, understanding your routing options is the first step toward a seamless performance.
Choosing Between Audio and MIDI Connection Paths
Before connecting any cables, you must determine how your electronic drum pad will interact with your existing DJ setup. The two primary methods are audio routing and MIDI/USB routing. Each path changes how sounds are generated, processed, and controlled during a live mix, and your choice will largely depend on the hardware and software you currently use.
Audio routing involves sending the actual, pre-synthesized drum sounds directly from the physical outputs of your drum pad into a dedicated channel on your DJ mixer. In this scenario, the drum pad acts as an independent instrument, much like a synthesizer or a media player. When you strike a pad, the internal sound engine of the drum pad generates the audio wave, which travels through analog cables into the mixer. This path is ideal if you use a standalone hardware setup, such as vinyl turntables or media players connected to an analog mixer, without a laptop. It keeps your setup stable and free from computer processing overhead, though it limits you to the onboard sounds of your drum pad.
Products mentioned in this guide
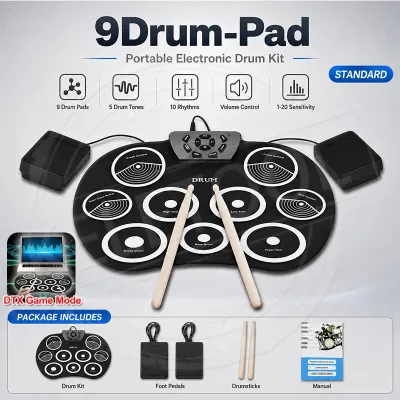
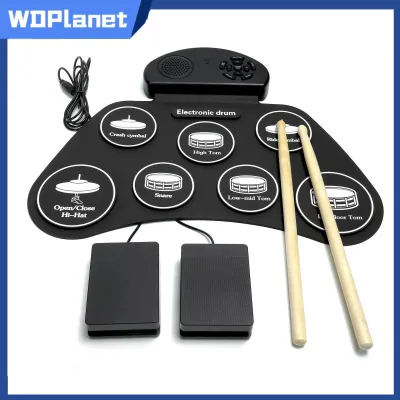
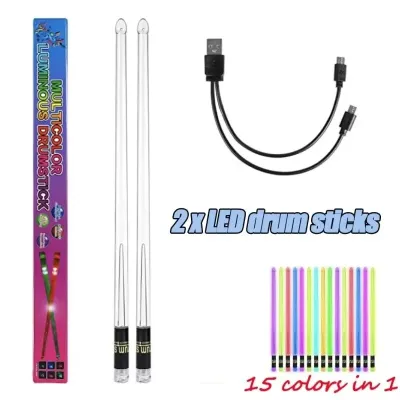
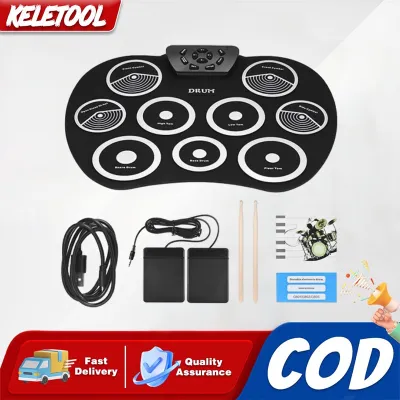

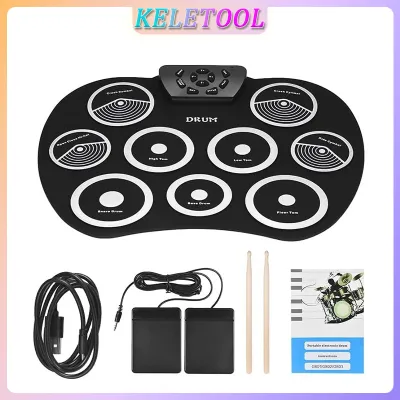
Prices are valid at publication and may change. Please refer to the product page for the latest price.
Conversely, MIDI or USB routing does not transmit any actual audio signals. Instead, it sends digital trigger data—detailing which pad was struck, when, and how hard (velocity)—to your laptop or DJ controller. Your DJ software or a digital audio workstation (DAW) receives this data and uses it to trigger software-based samples, hot cues, loops, or digital effects. This method is highly flexible, allowing you to load infinite sound libraries and map pads to various software commands. It is the preferred choice for laptop-based digital DJs. However, it requires a computer and introduces the potential for audio latency if your system is not optimized.
To select the correct approach, evaluate your current equipment. If you rely on a standalone DJ system or a traditional club mixer without a computer, physical audio routing is your primary option. If your workflow centers on a laptop running DJ software, MIDI routing via USB offers deep integration and creative flexibility. Always consult the user manuals for both your electronic drum pad and your DJ controller or mixer to confirm which connection types, drivers, and protocols are supported before purchasing additional gear.
Essential Gear and Cables for Your Setup
To bridge your electronic drum pad and your DJ equipment safely, you must gather the correct cables and utility hardware. Using the wrong connectors can degrade your sound quality, introduce unwanted noise, or even damage your sensitive ports.

For audio routing, the most common cables are 1/4-inch TS (unbalanced) or TRS (balanced) instrument cables. These are typically used to connect the left and right main outputs of your drum pad to the line-level inputs on your DJ mixer. If your mixer uses RCA inputs for its auxiliary channels, you may need a dual 1/4-inch TS to dual RCA cable. For MIDI setups, a standard USB Type-A to Type-B cable or a modern USB-C cable is standard for direct laptop connections. If you are integrating older hardware, you might require traditional 5-pin MIDI DIN cables or a dedicated MIDI-to-USB interface.
Depending on your mixer’s configuration, you might also need an external audio interface or a Direct Injection (DI) box. If your DJ mixer has no available line-level inputs, an external audio interface can route the drum pad’s audio into your laptop, which then mixes the sound internally within your DJ software. A DI box is highly recommended if you must run long audio cables from your drum pad to a house mixer, as it converts unbalanced high-impedance signals into balanced low-impedance signals, preventing signal degradation and shielding your audio from electrical interference.
Before making any purchases, carefully inspect the input and output panels on your devices. Read the labels printed on the hardware and cross-reference them with the manufacturer’s specification sheets to confirm whether your ports are balanced or unbalanced, mono or stereo, and line-level or phono-level.
Never attempt to force mismatched connectors into ports, and avoid using unverified, cheap adapters to bridge incompatible connections. Doing so can cause signal degradation, short circuits, or permanent hardware damage to both your drum pad and your mixer.
Step-by-Step Connection Guide
Physically integrating your gear requires a systematic approach to prevent loud audio pops, protect your speakers, and ensure that your signal flows correctly from the pads to your main output. Follow these sequential steps to establish a clean connection.
Routing Audio Directly Into the DJ Mixer
To route the physical sound of your drum pad into your DJ mixer, follow these steps to ensure a clean, distortion-free signal.
First, power off all your equipment, including your drum pad, DJ mixer, and active monitor speakers. If powering off is not feasible, ensure that the specific mixer channel you plan to use, as well as the master output volume, are completely muted. This prevents sudden electrical surges from causing loud pops that can damage your hearing or blow your speaker drivers.
Second, connect your verified audio cables from the main left and right outputs of the electronic drum pad to an available line-level or auxiliary input channel on your DJ mixer. If your drum pad has a mono output option and your mixer channel supports it, you can use a single cable, though stereo connections are preferred for spatial drum samples. Ensure the connectors are firmly seated in their respective jacks.
Third, turn on your equipment in the correct order: first your drum pad, then your DJ mixer, and finally your speakers. Strike a pad repeatedly while slowly raising the master output volume on the drum pad to its nominal level (usually around 70% to 80%). Next, adjust the gain or trim knob on your mixer’s input channel so that the channel meter peaks in the green or amber zone, avoiding the red clipping zone entirely to prevent digital distortion.
Fourth, test the signal at a low volume through your speakers or headphones. Play a track on your main DJ deck and tap the drum pad to hear how the sounds blend. Use the channel EQ on your mixer to make basic adjustments, such as pulling back the high frequencies if the cymbals are too harsh, or cutting the low frequencies if the drum pad’s kick drum clashes with your playing track.
Syncing via MIDI or USB for Software Control
If you prefer to use your drum pad as a controller to trigger software samples or hot cues, follow these steps to configure the digital connection.
First, connect your electronic drum pad directly to your laptop using a compatible USB cable. If your laptop lacks standard USB ports, use a high-quality, multi-port hub that is rated for high-speed data transfer. Turn on your drum pad and wait for your computer’s operating system to recognize the device.
Second, launch your preferred DJ software and navigate to the settings or preferences menu. Locate the MIDI mapping, controller, or hardware configuration tab. Ensure that your specific electronic drum pad is listed as an active MIDI input device and check the box to enable it.
Third, assign your drum pad’s physical triggers to your desired software functions. Most modern DJ software packages offer pre-configured MIDI maps for popular drum pads, which you can load instantly. If a pre-configured map is unavailable, use the software’s “MIDI Learn” function to manually assign each pad to a specific sample slot, hot cue, loop control, or effect toggle.
Fourth, test your custom mapping by striking each pad and observing the software’s response. If you experience missed triggers or find that you have to strike the pads too hard, access your software’s controller settings or your drum pad’s internal menu to adjust the velocity curves and pad sensitivity until the response feels natural and expressive.
Live Mixing Techniques and Performance Workflow
Once your electronic drum pad is connected and configured, the challenge shifts to blending your live drumming seamlessly with pre-recorded tracks. Without proper technique, adding live percussion can quickly make your mix sound cluttered, chaotic, or muddy.
Effective frequency management is essential for a clean mix. Most electronic dance music tracks already feature heavy, highly compressed kick drums and basslines. If you layer a deep, acoustic-style kick drum from your drum pad over an active track, the low-end frequencies will clash, causing phase cancellation or severe clipping on your master output. To prevent this, use your mixer’s channel EQ to cut the low frequencies (bass) on your drum pad channel entirely when playing over tracks that already have a strong bassline. Reserve your drum pad’s low-end for minimalist tracks, intro sections, or ambient breakdowns where the lower frequencies are empty.
You should also use your mixer’s faders rhythmically to control how the drum pad sits in the mix. Avoid leaving the drum pad channel wide open while playing a continuous, repetitive pattern, as this can make your performance sound like an unpolished background layer. Instead, treat the drum pad as a dynamic instrument. Use the channel fader or the crossfader to bring your live percussion in and out of the mix during builds, drops, and transitions. Quick, rhythmic cuts can add excitement, while gradual fades can help blend a live shaker or tambourine pattern into a house track.
Applying time-based effects can also help create space and glue your live percussive elements to the pre-recorded music. A subtle touch of reverb or delay on your drum pad channel can soften the sharp transients of your live hits, making them sound like they belong in the same acoustic space as the playing track. However, use these effects sparingly; excessive reverb can wash out your drum sounds and turn your live performance into an indistinct wall of noise.
Keep a close eye on your master volume meters throughout your set. Layering multiple percussive elements from a drum pad on top of a fully produced track naturally increases the overall signal level. If you do not monitor your levels, your master output will quickly push into the red, causing harsh digital distortion that can ruin the listening experience for your audience. If necessary, slightly lower the volume of your playing decks to accommodate the added energy of your live drumming.
Finally, practice your transitions and record your rehearsal sessions regularly. Listening back to your recorded sets is the best way to objectively evaluate how well your live drum pad elements sit in the overall mix, allowing you to adjust your volume levels, EQ settings, and timing before performing in front of an audience.
Troubleshooting Common Setup Issues
When integrating multiple hardware and software systems, you are likely to encounter technical hurdles. Having a structured troubleshooting routine will help you identify and resolve issues quickly during a setup or a live performance.
If you experience a “no sound” issue, begin by systematically checking your physical signal path. Ensure all cables are firmly plugged into the correct ports and that all devices are powered on. Verify that your mixer’s channel input selector is set to the correct source (such as Line or Aux rather than Phono or USB). Check your gain staging: ensure that the master output volume on your drum pad is turned up, the mixer channel trim is active, and neither the channel fader nor the master fader is muted.
If your MIDI mapping fails to respond, first confirm that the USB connection is secure. If you are using a USB hub, try connecting the drum pad directly to your laptop’s built-in port to rule out hub failure. Check your DJ software’s preferences to ensure that MIDI input is enabled and that the drum pad is communicating on the correct MIDI channel. If the software still fails to recognize your inputs, restart the software and the drum pad, and verify if your operating system requires specific driver updates for the hardware.
Audio hum, buzz, or ground loop noise is a common issue, especially when connecting multiple mains-powered devices in older venues or residential buildings in Singapore. To eliminate this noise, try using a DI box with a ground-lift switch between your drum pad and the mixer. Ensure that your audio cables are kept physically separate from power cables, as running them parallel to each other can induce electromagnetic interference. If possible, plug your laptop, mixer, and drum pad into the same high-quality, surge-protected power strip to maintain a common ground.
However, you must know when to stop troubleshooting for your own safety and the protection of your gear. If your troubleshooting reveals physical hardware damage, if any device becomes unusually hot to the touch, if you detect a burning smell, or if you experience even a minor electrical shock when touching the metal chassis of your equipment, stop immediately. Disconnect the power cables from the wall sockets and consult the manufacturer’s support team or a qualified audio technician before attempting to use the gear again.
Frequently Asked Questions (FAQ)
Can I use a standard electronic drum pad with any DJ software?
Most modern DJ software platforms support standard MIDI controllers, allowing you to map an electronic drum pad to trigger various functions. However, you must verify if your specific drum pad is class-compliant, meaning it works plug-and-play without needing extra software, or if it requires proprietary drivers to communicate with your computer. While basic MIDI mapping is almost always possible, some advanced features, like visual feedback on the pad’s built-in LEDs or deep integration with specific software sample decks, may require dedicated manufacturer integration or custom mapping files.
How do I minimize audio latency during live drum triggering?
To minimize the delay between hitting your electronic drum pad and hearing the sound from your speakers, access your DJ software’s audio settings and reduce the audio buffer size. A lower buffer size (such as 128 or 256 samples) reduces latency, though it requires more CPU processing power. You can also use a dedicated external audio interface with optimized ASIO or Core Audio drivers to handle the sound processing. Finally, close all unnecessary background applications on your laptop to free up system resources and ensure your processor can handle the real-time audio demands of your live performance.
Community discussion
Share your experience or ask a question. Comments are reviewed before publication.