
Integrating an electronic drum kit into a live DJ set bridges the gap between structured playback and spontaneous live performance. By incorporating a Roland drum module into your setup, you can layer acoustic-style fills, trigger custom samples, and control software parameters in real time. Achieving a seamless integration requires a clear understanding of two distinct pathways: audio routing, which sends the physical sound of your drum pads to the audience, and MIDI configuration, which translates your physical strikes into digital commands for your DJ software.
Equipment and Software Requirements
Before making any connections, you must inventory your hardware and software to ensure compatibility. Start by examining the physical connections on your Roland drum module. Most modern modules feature a variety of output options, including dedicated left and right main audio outputs (typically 1/4-inch jacks), a headphone output, traditional 5-pin MIDI ports, and a USB Type-B port. Consulting your specific module’s user manual is essential here, as some entry-level modules may transmit audio and MIDI exclusively over USB, while professional-grade modules offer discrete analog outputs for individual drum components.
Next, assess your DJ mixer or controller. To blend the drum sounds directly with your music, your mixer must have an available stereo line-in or auxiliary input channel. If your mixer lacks spare inputs, or if you prefer to process the drum audio entirely within your computer, you will need an external audio interface with sufficient input channels to receive the drum module’s signals.
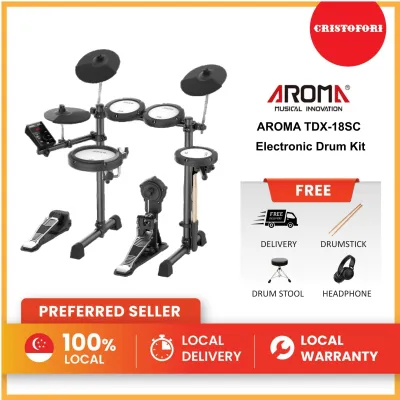
Products mentioned in this guide
![Yamaha DTX402K Electronic Drums DTX-402K DTX 402 K Digital Drum Set [LIMITED STOCK]](https://img.lazcdn.com/g/p/70cd82f589c9b929f2e99afd4e639545.jpg_400x400q80.jpg_.webp)
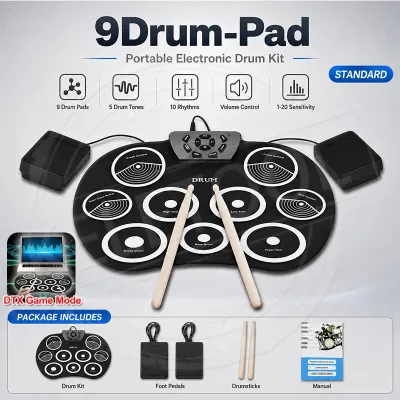
![[SG] Portable Electronic Drum Set USB Roll-Up Silicon Drums Pad w Drumsticks Compact Size Kit Hand Practice With Pedals](https://img.lazcdn.com/g/p/73aace46fc1f8c7268623b73f5d18efb.jpg_400x400q80.jpg_.webp)
Prices are valid at publication and may change. Please refer to the product page for the latest price.
On the software side, verify that your chosen DJ platform supports external MIDI mapping and live audio input routing. While most professional DJ applications allow custom MIDI mapping, some entry-level versions restrict these features behind software upgrades or subscription tiers.
Finally, gather the correct cabling. You will typically need a pair of standard 1/4-inch TS instrument cables for stereo audio routing, a high-quality USB cable for direct computer connection, or a dedicated MIDI-to-USB interface if your module only features traditional 5-pin MIDI ports. Ensuring these cables match your hardware specifications prevents signal degradation and connection dropouts during a performance.
Step-by-Step Audio Routing
Establishing a clean audio path is the foundation of a successful hybrid performance. Begin by connecting the main left and right audio outputs of your Roland drum module to an available stereo channel or auxiliary input on your DJ mixer. If your module only has a single mono output, connect it to a mono input channel, but utilizing a stereo connection is highly recommended to preserve the spatial panning of the drum kits.

Once the physical connections are secure, you must carefully manage the gain staging across your signal chain. Turn the master volume on your drum module to a moderate level, typically around 70% to 80%, to provide a clean signal without overdriving the module’s internal preamps. Next, strike the pads firmly while adjusting the gain or trim knob on your DJ mixer channel. Monitor the mixer’s LED meters, ensuring the signal peaks comfortably in the green or amber zone and never enters the red, which causes harsh digital clipping.
If your setup routes the drum audio through your computer via an external audio interface, you must configure the input routing within your DJ software. Open the software’s audio preferences, select your audio interface as the input device, and assign the physical input channels to an auxiliary or live input deck. This configuration allows you to apply software-based effects and utilize the software’s internal mixer to blend the drums with your playing tracks.
In scenarios where the DJ mixer’s cue system does not support monitoring external auxiliary inputs, you can use the drum module’s dedicated headphone output for personal cueing. By plugging your headphones directly into the module, you can practice patterns and check your sounds privately before raising the channel fader on the mixer to introduce the drums to the audience.
Configuring MIDI for DJ Software Integration
Using your electronic drum pads as a MIDI controller unlocks creative control over your DJ software. To begin, connect your Roland drum module to your computer using a USB cable or a MIDI-to-USB interface. Turn on the module and open your computer’s system settings or MIDI utility to verify that the operating system recognizes the device. Once confirmed, launch your DJ software and ensure the module is listed as an active MIDI input device in the preferences menu.
Next, enter the MIDI mapping mode within your DJ software. This mode allows you to assign physical actions on your drum kit to specific software commands. Select a function in the software, such as triggering a hot cue, activating a loop, or toggling an effect, and then strike the corresponding drum pad on your kit. The software should automatically detect the incoming MIDI note and bind it to that function.
To map your kit effectively, consult the MIDI implementation chart found in the back of your Roland drum module’s manual. This chart details the specific MIDI note numbers and Control Change (CC) messages transmitted by each pad. Understanding these values is crucial, as some pads may send dual-zone signals (such as separate head and rim shots) that can be mapped to distinct software actions.
Once you have completed your custom layout, save your MIDI mapping preset within the software’s preferences. Exporting this configuration file to a backup drive or cloud storage ensures you can quickly restore your settings on another computer or recover them in the event of a software update or system reset.
Testing and Troubleshooting the Setup
Before performing live, you must thoroughly test your integrated setup to identify and resolve potential technical issues. Play a steady test beat on the pads to check for audio latency, which is the delay between striking a pad and hearing the sound through your speakers. If you notice a distracting delay, open your audio interface or DJ software settings and lower the audio buffer size. A lower buffer size reduces latency but increases the processing load on your computer’s CPU.
Another common issue in hybrid setups is ground loop hum, a low-frequency buzz caused by multiple devices being plugged into different electrical outlets. To troubleshoot this, ensure all your equipment is connected to a single, high-quality power strip or surge protector. If the hum persists, inspect your audio cables for damage, keep them away from power cables to avoid electromagnetic interference, or use a dedicated ground lift adapter or direct input (DI) box with a ground lift switch.
Next, test all your mapped MIDI triggers to ensure they respond accurately. Watch for double-triggering, where a single physical strike registers as two separate MIDI inputs, or velocity inconsistencies where pads feel unresponsive. Adjust the pad sensitivity, threshold, and crosstalk settings within your Roland module’s trigger menu to fine-tune how the physical strikes translate into MIDI data.
If you encounter persistent synchronization drift between your software’s master tempo and your module’s internal metronome, or if the computer fails to recognize the hardware entirely, stop troubleshooting blindly. Consult the manufacturer’s official support documentation, update your device drivers, or seek assistance from a qualified audio technician to prevent hardware damage or performance failures.
Advanced Techniques for Live DJ Performances
With your audio and MIDI routing fully optimized, you can explore advanced performance techniques to elevate your live sets. One of the most effective methods is layering live rhythmic patterns or finger drumming over playing tracks. Adding a live snare roll, a syncopated cowbell, or a driving shaker pattern can inject organic energy into electronic tracks, making transitions smoother and more engaging for the audience.
You can also use your drum pads to trigger vocal chops, sound effects, or pre-recorded loops that are synchronized to the track’s BPM. By mapping your pads to your DJ software’s sampler deck, you can play melodic hooks or rhythmic accents on the fly, transforming your drum kit into a dynamic performance sampler.
Managing your stage volume and monitor mix is critical during a live performance. Because electronic drums do not produce acoustic stage volume, you rely entirely on your monitors to hear what you are playing. Work closely with the venue’s sound engineer to ensure your monitor mix has a balanced blend of the DJ master output and your live drum channel, allowing you to play in perfect time without overpowering the main sound system.
Finally, experiment with applying your DJ software’s built-in effects directly to the incoming drum audio channel. Applying a high-pass filter, a synchronized delay, or a lush reverb to your live drumming allows for real-time sound design, enabling you to blend the acoustic-style drums seamlessly into the electronic textures of your mix.
Frequently Asked Questions (FAQ)
Can I use a Roland drum module as a MIDI controller for DJ software?
Yes, most modern Roland drum modules can function as MIDI controllers because they transmit standard MIDI note data whenever a pad is struck. To use this feature, your DJ software must support custom MIDI mapping, allowing you to assign these incoming notes to specific software commands like hot cues or sample triggers. Always check your specific module’s manual to confirm whether it supports MIDI transmission over USB or if you will need a traditional 5-pin MIDI interface to connect to your computer.
How do I prevent audio latency when playing drums through a laptop?
To minimize audio latency, open your DJ software or audio interface control panel and lower the audio buffer size, aiming for a setting of 128 samples or lower. If you are using a Windows laptop, ensure you are using dedicated ASIO drivers designed for your audio interface, while macOS users should optimize their Core Audio settings. Keep in mind that setting the buffer size too low can cause audio dropouts, clicks, or pops, so you must find a stable balance that your computer’s processor can handle without compromising performance.
Community discussion
Share your experience or ask a question. Comments are reviewed before publication.