
Integrating a portable electronic drum pad into a live performance is one of the most effective ways to break out of the traditional DJ transition loop. The Yamaha DD75, with its compact frame and eight touch-sensitive pads, offers a highly versatile solution for DJs and live electronic musicians looking to inject organic energy into their sets. By configuring this unit as either a standalone sound source or a MIDI controller, you can layer live percussion, trigger custom samples, and perform expressive fills that elevate a standard mix into a dynamic live show.
To successfully bring this hardware into a performance environment, you must understand its physical routing options, software integration steps, and on-stage stability requirements. Whether you are performing in a compact club booth or a larger festival stage, proper preparation ensures your live drumming blends seamlessly with your playback tracks without technical interruptions.
Evaluating the Yamaha DD75 for Electronic and DJ Setups
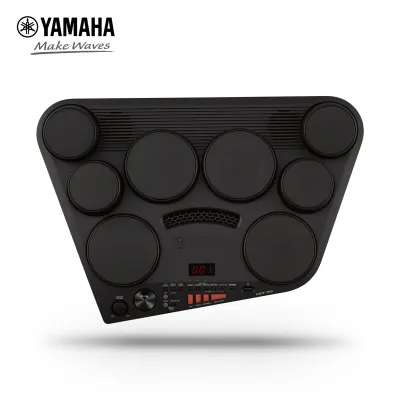
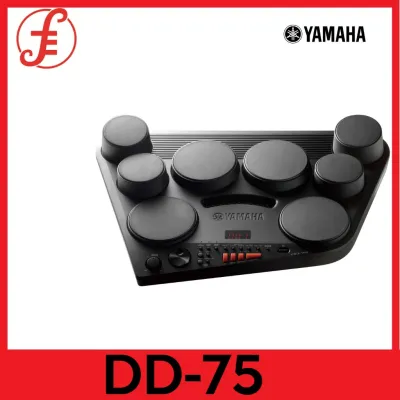
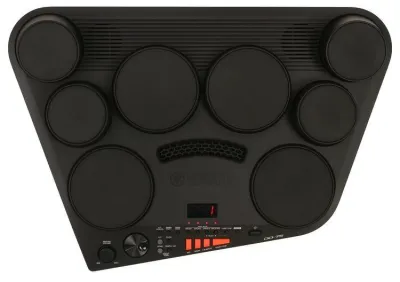
Before introducing any new hardware to your performance rider, you must evaluate how its physical interface and technical specifications align with your existing gear. The Yamaha DD75 features eight touch-sensitive drum pads arranged in a layout that mimics a traditional drum kit, alongside two foot pedals that can be assigned to kick drum and hi-hat duties. For electronic music producers and DJs, this layout provides a highly tactile surface for triggering rapid drum rolls, syncopated percussion, or sudden sound effects that are difficult to execute on standard DJ controller performance pads.
Products mentioned in this guide
![Yamaha DD75 Digital Percussion Set DD-75 Portable Musical Electronic Instrument DD 75 [PREORDER]](https://img.lazcdn.com/g/p/c2c5758c27b7e76ef28a58fa17673cb1.jpg_400x400q80.jpg_.webp)
Prices are valid at publication and may change. Please refer to the product page for the latest price.
From a connectivity standpoint, the unit relies on traditional 5-pin MIDI IN and OUT ports rather than a direct USB-B port. To integrate this device with modern laptops or digital audio workstations (DAWs), you will need to verify your audio interface has MIDI ports or utilize a dedicated, high-quality 5-pin MIDI-to-USB interface cable. This connection allows the pads to send MIDI note data and velocity values directly to your performance software.
For audio routing, the unit features a single 1/4-inch stereo headphone/output jack. Because this port serves dual purposes, you must use the correct cabling to split the stereo signal into two mono channels or run a high-quality stereo cable directly to your mixing console. Checking these physical connections beforehand prevents signal loss and ensures the internal drum voices are delivered to the venue’s sound system with maximum clarity.
Connecting the DD75 to DJ Mixers and Music Software
Integrating the drum pad into your signal chain depends on whether you want to use its internal sound library or leverage external software instruments. If you prefer to use the built-in drum kits, you can route the audio output directly into an available line-in or auxiliary channel on your DJ mixer. This setup is highly reliable because it bypasses the computer entirely, reducing the risk of software crashes during a live set. Use a 1/4-inch TRS to dual RCA or dual 1/4-inch TS cable to connect the unit’s output to an open channel on mixers from brands like Pioneer DJ or Allen & Heath.

If you want to use the hardware as a MIDI controller to trigger samples in software like Ableton Live, Serato DJ, or Traktor Pro, the connection path requires an intermediate step. Connect the 5-pin MIDI OUT port of the unit to your computer via a compatible MIDI interface. Once connected, open your software’s preferences menu to verify that the MIDI input device is recognized. You can then map each of the eight pads to specific sample slots, drum racks, or cue points within your performance software.
When using MIDI mode, driver compatibility is a crucial factor to verify on the manufacturer’s official support page. Ensure that any USB-MIDI interface cables or external audio interfaces you use have up-to-date drivers compatible with your computer’s operating system. Testing this connection at home under performance-like conditions helps you identify any latency issues, allowing you to adjust your software’s buffer size to achieve a near-instantaneous response when striking the pads.
Adding Live Percussion and Triggers to DJ Sets
Once your hardware is connected, the key to a successful performance is blending your live hits seamlessly with the pre-recorded music. One of the most common techniques is layering live acoustic or electronic percussion over a playing track. For example, adding live congas, shakers, or tambourines over a minimal tech-house groove can instantly make a transition feel more organic. To do this effectively, you must match the tempo of your playing to the track; practicing your timing with a metronome or monitoring the track’s beatgrid in your headphones is essential.
Another creative application is mapping the pads to trigger vocal chops, classic synth stabs, or transition risers. Instead of relying on pre-programmed software effects, you can manually play these elements during build-ups or drops to build crowd anticipation. Assigning high-impact sounds like white noise sweeps or sub-drops to the foot pedals allows you to trigger dramatic transitions while keeping both hands free to perform drum rolls on the main pads.
Managing your gain staging and equalization on the DJ mixer is critical when mixing live elements with mastered tracks. Because commercial tracks are heavily compressed and limited, raw drum hits from an external pad can easily clip your mixer channels or sound too quiet in comparison. Set your channel gain so that your loudest strikes sit comfortably below the red limit indicators. Use the channel EQ to carve out space for your live percussion; for instance, rolling off the low-end frequencies on your drum pad channel prevents your live kick drum from clashing with the heavy bassline of the playing track.
Performing Expressive Electronic Music with the DD75
For live electronic acts and producers, the drum pad serves as an expressive instrument rather than just a utility trigger. Transitioning from sequenced drum patterns to live finger-drumming or stick-play adds a human element that sequence grids cannot replicate. You can use the pads to play intricate fills at the end of eight-bar phrases or to completely take over the drum duties during a breakdown, stripping the track down to its bare elements before building it back up manually.
To maximize the expressiveness of your performance, take advantage of the device’s touch-sensitive pads. By adjusting the pad sensitivity and velocity curves in the system menu, you can customize how the unit responds to your physical playing style. If you are playing with wooden drumsticks, a lower sensitivity setting prevents accidental double-triggering; if you are playing with your hands or fingers in a tight booth, a higher sensitivity curve ensures that even light taps register clearly in the mix.
Furthermore, you can explore creative MIDI mapping options within your DAW to control more than just drum samples. Some advanced performers map the velocity data of specific pads to control synth parameters, such as filter cutoff or decay time. Striking a pad harder not only triggers a louder sound but also opens up a synthesizer’s filter, creating a highly dynamic and interactive performance where your physical energy directly shapes the texture of the electronic music.
Preparing Your Stage Setup and Troubleshooting Live Issues
Performing live introduces environmental variables that can disrupt your technical setup if not planned for in advance. The physical placement of your drum pad is paramount. Because striking the pads requires physical force, placing the unit on a flimsy table or a shared DJ stand can cause unwanted vibrations, potentially making turntable needles skip or causing nearby gear to shift. Secure the unit on a dedicated, heavy-duty snare drum stand or a highly stable utility table equipped with non-slip rubber mats.
Cable management is another critical factor in dark, crowded DJ booths or live stages. Route all audio, MIDI, and power cables cleanly along the frame of your stand, securing them with Velcro ties to prevent accidental snags. Ensure that your cables have enough slack so that sudden movements during an energetic performance do not pull them out of their ports. If you are performing in humid outdoor venues, such as rooftop lounges or beach clubs in tropical climates like Singapore, keep your gear protected from direct moisture and ensure adequate ventilation to prevent overheating.
Finally, always have a troubleshooting protocol prepared in case of mid-set technical issues. If you experience unexpected MIDI latency, double-triggering, or unresponsive pads, consult the user manual to perform a quick system check or calibration. Keeping a printed copy or a digital PDF of the manual on your phone allows you to quickly reference factory reset key combinations or diagnostic modes, ensuring you can resolve any hardware anomalies before your performance begins.
Frequently Asked Questions (FAQ)
Can the Yamaha DD75 be powered by batteries during a live set?
Yes, the unit can be powered using six C-size batteries, making it highly portable for outdoor performances, street busking, or mobile DJ setups. However, for professional live sets and extended club performances, it is highly recommended to use the official AC power adapter. Battery power can fluctuate as the charge drains, which may affect pad sensitivity or cause unexpected shutdowns mid-performance.
Do I need a separate audio interface if I only want to use the DD75 for MIDI?
If you only intend to use the hardware as a MIDI controller to trigger sounds inside your computer, you do not strictly need a multi-channel audio interface, but you will need a way to convert the 5-pin MIDI signal to USB. A simple, high-quality 5-pin MIDI-to-USB interface cable is sufficient to connect the unit directly to your laptop. However, using a dedicated audio interface with built-in MIDI ports is often preferred in live environments to ensure low-latency audio output from your performance software to the venue’s sound system.
Community discussion
Share your experience or ask a question. Comments are reviewed before publication.