
Maintaining a cello bow in peak playing condition requires a consistent routine of careful tension adjustment, precise rosin application, and protective storage. Because the bow is responsible for translating your physical movements into the rich, resonant voice of the cello, even minor issues like oil contamination or uneven rosin distribution can dramatically alter your tone and response. By establishing a disciplined maintenance habit, you preserve the structural integrity of the wood and extend the lifespan of the bow hair, ensuring a reliable grip every time you play.
Preparing Your Cello Bow and Workspace
Before performing any maintenance, establish a clean, stable workspace free of clutter, dust, and liquids. A flat table covered with a soft, lint-free cloth or towel provides an excellent surface to prevent the bow from rolling or getting scratched. Ensure your hands are thoroughly washed and dried to eliminate natural skin oils, which can easily transfer to the bow hair and ruin its gripping capability.
Begin by inspecting the bow stick for any signs of warping or structural damage. Hold the bow at eye level, looking down the length of the stick from the frog to the tip. The stick should curve slightly toward the hair when un-tensioned, and it should align straight along its vertical axis without bending to the left or right. If you notice any lateral warping, cracks in the wood, or a loose tip plate, stop immediately and avoid tightening the bow, as these issues require professional attention.
Products mentioned in this guide
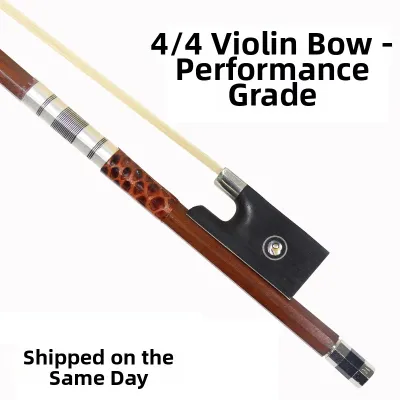
Prices are valid at publication and may change. Please refer to the product page for the latest price.
Next, adjust the bow hair tension to its standard playing clearance. Slowly turn the tension screw at the end of the frog clockwise. As you tighten, observe the gap between the middle of the stick and the hair. For most cello bows, the ideal playing tension is reached when this gap is roughly the width of a standard pencil or the diameter of the bow stick itself. Avoid over-tightening, which flattens the natural camber of the stick and puts excessive stress on both the wood and the tip.
Once the bow is tensioned, gently clean the wooden stick to remove accumulated rosin dust. Use a dry, clean microfiber cloth to wipe down the wood, paying close attention to the area near the frog and the middle of the stick where dust tends to settle. Never use water, alcohol, or commercial wood polishes on the stick, as these substances can strip the delicate varnish or seep into the wood fibers, causing permanent damage. Keep the cloth strictly on the wood and away from the bow hair.
Step-by-Step Guide to Applying Rosin
Selecting the right cello rosin is the first step toward achieving a balanced, warm tone. Cello strings are thicker and heavier than violin or viola strings, requiring a stickier, softer rosin to initiate and sustain string vibration. When choosing a rosin, check the manufacturer’s specifications for climate suitability. In warm, humid environments, a slightly harder, medium-grade rosin is often preferred to prevent the hair from becoming overly gummy. Conversely, in dry or heavily air-conditioned spaces, a softer, darker rosin provides the necessary tackiness to grip the strings effectively.

To apply the rosin, hold the cake in one hand and the bow in the other, keeping your fingers clear of the hair. Place the bow hair flat against the rosin cake near the frog. Using slow, deliberate strokes, glide the bow hair along the rosin from the frog all the way to the tip, then back again. Maintain a light, even pressure throughout the stroke; pressing too hard can cause the rosin to chip, crack, or build up unevenly on the hair.
Determining the correct amount of rosin depends on whether you are preparing a newly rehaired bow or performing daily maintenance. A brand-new bow hair surface has no grip and requires a thorough initial coating. You may need to stroke the bow across the rosin cake twenty to thirty times, or gently score the surface of a new, glossy rosin cake with a clean utility knife to help the powder transfer. For daily touch-ups, however, a much lighter application is required. Usually, three to five full strokes across the rosin cake before a practice session are more than enough to maintain a consistent grip.
You can verify the rosin level through visual and tactile feedback. Look closely at the hair under a bright light; it should have a subtle, matte appearance with a very fine, even coating of white powder. If you see thick clumps of white dust or if the hair looks glossy, you have applied too much. When you play, the bow should grip the string smoothly without slipping, producing a clear, immediate tone. If the bow slips or feels glassy, it needs more rosin; if it produces a harsh, scratchy sound with a cloud of white dust, it is over-rosined.
After every playing session, make it a habit to wipe off excess rosin dust from both the bow stick and the cello. Use your dry microfiber cloth to clean the wooden stick, the frog, and the area of the cello strings directly under the fingerboard. Rosin dust is highly acidic and, if left untouched, will fuse with the varnish of your instrument and bow over time, creating a stubborn, crusty layer that is incredibly difficult to remove without professional restoration.
Daily and Long-Term Hair Care and Maintenance
The most critical daily habit for preserving your cello bow is loosening the hair after every playing session. When you are finished playing, turn the tension screw counterclockwise until the hair relaxes and rests gently against the wooden stick, without being so loose that it tangles. Leaving the bow under tension permanently stretches the hair, rendering it useless over time, and can warp the wooden stick, destroying its natural spring and balance.
Protecting the bow hair from oil contamination is equally vital. Never touch the bow hair with your bare fingers, even when checking the tension or adjusting the hair. The natural oils, sweat, and dirt on your skin transfer instantly to the organic horsehair, creating slick spots that cannot hold rosin. Once contaminated with oil, those sections of the hair will slide uselessly across the cello strings, resulting in dead zones in your sound.
Proper storage is your primary defense against environmental damage and physical accidents. Always store your cello bow inside a hard instrument case when not in use. In tropical or highly humid climates, rapid fluctuations in humidity can cause the wooden stick to expand or contract, and the organic horsehair to stretch or shrink. To mitigate this, keep your case closed and consider using a small, instrument-safe humidity control pack inside the accessory compartment to maintain a stable environment. Never leave your bow resting on a music stand, chair, or floor, where it can easily be stepped on, knocked over, or exposed to direct sunlight.
Troubleshooting Common Bow Hair and Rosin Issues
If your bow feels slippery and fails to grip the strings, start by identifying the root cause. If the hair is relatively new and clean, it likely just needs a few more strokes of rosin. However, if the hair has been used for several months, the slippery feel may be due to oil contamination from accidental finger contact or a buildup of old, glazed rosin. You can check for oil contamination by looking for dark, discolored patches near the frog. If the hair is worn out or heavily contaminated, a professional rehair is the most effective solution.
A scratchy, harsh sound accompanied by a visible cloud of white powder indicates an excessive buildup of rosin. To resolve this, take a clean, dry toothbrush or a specialized bow hair brush and gently brush the hair from the frog to the tip to dislodge the excess powder. Be careful not to pull or snag the hairs. Additionally, clean your cello strings thoroughly with a dry microfiber cloth to remove any sticky residue, as rosin buildup on the strings themselves is a common cause of harsh, unresponsive tone.
Broken bow hairs are a normal consequence of regular playing, but how you handle them matters. Never pull a broken hair out from the frog or the tip, as this can loosen the wooden wedges that hold the hair bundle in place, eventually causing the entire hank of hair to fall out. Instead, use a sharp pair of scissors to trim the broken hair as close to the wooden plug at either end as possible. This keeps the remaining hair secure and maintains even tension across the ribbon.
When to Seek Professional Rehairing and Repair
Even with meticulous daily care, cello bow hair is an organic material that degrades over time. You should plan to take your bow to a professional luthier for a rehair every six to twelve months, depending on how often you play. Clear signs that a rehair is overdue include hair that has stretched so much that the tension screw cannot tighten it to playing level, hair that has lost its natural microscopic scales and no longer holds rosin, or a significant loss of hair on one side of the bow, which can cause uneven tension and warp the stick.
Structural issues require immediate professional intervention to prevent catastrophic damage. If you notice that the wooden stick remains bent to one side even when loosened, the frog is loose or wobbles sideways, the screw mechanism feels stripped or difficult to turn, or the protective tip plate is cracked, do not attempt to play or adjust the bow. These components require specialized tools, adhesives, and expertise to repair safely.
Attempting DIY structural repairs or rehairing without professional training carries a high risk of permanently ruining your bow. Cello bows are precision-engineered tools made from delicate materials like pernambuco, carbon fiber, or brazilwood, and they are held together by precise friction fits and specialized wedges. A single mistake, such as applying the wrong glue or over-tightening a wedge, can split the head of the bow or strip the internal brass eyelet, resulting in costly repairs (S$) or rendering the bow completely unrepairable.
Frequently Asked Questions (FAQ)
How often should I rosin my cello bow?
For a student or hobbyist playing about an hour a day, applying rosin every two to three practice sessions is generally sufficient. If you play more intensively or notice a loss of grip and a drop in volume, you may need to apply a few light strokes daily. Environmental factors also play a role; high humidity can make rosin feel stickier, reducing the need for frequent application, while dry, air-conditioned rooms may require more frequent touch-ups to maintain a reliable grip.
Can I use violin or viola rosin on a cello bow?
While you can physically apply violin or viola rosin to a cello bow in an emergency, it is not recommended for regular use. Violin and viola rosins are formulated to be harder and less sticky because their lighter strings require less friction to vibrate. Cello strings are much thicker and require a softer, stickier rosin to grab the string effectively. Using violin rosin on a cello bow will often result in a glassy, slipping sensation and a weak, thin tone.
Community discussion
Share your experience or ask a question. Comments are reviewed before publication.