
Cleaning a piano or keyboard requires a gentle, systematic approach using a dedicated instrument cloth to remove dust and oils without damaging the delicate key surfaces or internal mechanisms. Whether you play an acoustic upright piano or a portable digital keyboard, the keys are constantly exposed to dust, skin oils, and environmental debris. Over time, this buildup can affect the playability of the instrument and degrade the key surfaces. By establishing a proper cleaning routine with the correct materials, you can preserve both the aesthetic appeal and the mechanical responsiveness of your instrument.
Why the Right Instrument Cloth is Essential
Using a specialized instrument cloth is the foundation of safe keyboard maintenance. Standard household cleaning materials, such as paper towels, tissues, or old cotton t-shirts, often pose hidden risks to delicate musical instruments. Paper towels are made from wood pulp, which contains microscopic abrasive fibers that can leave fine scratches on high-gloss finishes and plastic keytops. Old clothing items may contain rough seams, buttons, or residual fabric softeners that transfer a greasy film onto the keys, attracting even more dust.
A high-quality instrument cloth, typically made of tightly woven microfiber, is designed specifically to address these issues. Microfiber features split fibers that create a microscopic hook-like structure. This structure lifts and traps dust particles, skin oils, and moisture instead of simply pushing them across the surface. Before using any cloth on your instrument, verify that it is completely lint-free, non-abrasive, and clean. You can check the texture by gently running the cloth over a sensitive surface, such as a smartphone screen, to ensure it leaves no lint or fine scratches behind.
Products mentioned in this guide
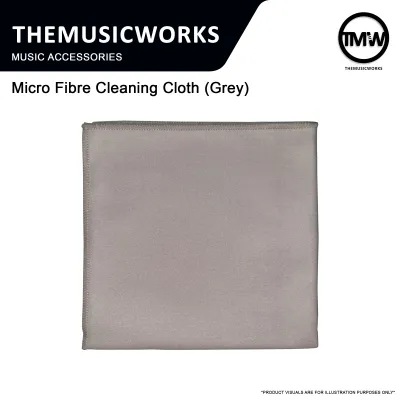

Prices are valid at publication and may change. Please refer to the product page for the latest price.
Preparing Your Instrument and Workspace
Before touching the keys with your instrument cloth, you must prepare both the instrument and your workspace to prevent accidental damage. For electronic keyboards and digital pianos, always turn off the power and unplug the power cord from the wall outlet. This step eliminates the risk of triggering accidental inputs, changing internal settings, or causing an electrical short circuit if any moisture accidentally enters the housing.

If you are cleaning an acoustic piano, close the fallboard—the hinged lid that covers the keys—while you prepare your cleaning area. This simple action prevents dust, loose fibers, or cleaning tools from falling into the open piano action or onto the soundboard. Additionally, take a moment to consult your instrument’s manufacturer manual. Different key materials require specific care; for instance, vintage acoustic pianos with genuine ivory keys demand a completely different approach to moisture compared to modern instruments with plastic or synthetic ivory keytops.
Step-by-Step Cleaning Technique
Safely cleaning your keyboard involves a structured, two-phase approach designed to minimize friction and protect the key surfaces. You must always perform a dry dusting phase first to remove loose, abrasive particles, followed by a targeted damp wiping phase to address stubborn oils and fingerprints.
Dry Wiping to Remove Dust and Debris
The first step is to remove loose dust using a completely dry instrument cloth. When dry wiping, always wipe each key from back to front—moving from the area closest to the fallboard toward the front edge of the key. Never wipe side-to-side or from front to back. Wiping side-to-side pushes dust and grit into the narrow gaps between the keys, where it can accumulate and eventually cause the keys to stick or sluggishly return.
Apply very light pressure with a flat hand, allowing the microfiber to lift the dust naturally. Avoid pressing down hard on the keys, as this can grind abrasive dust particles into the keytops, causing micro-scratches. As you work your way across the keyboard, shake out the cloth away from the instrument or fold it to a clean, unused section frequently. This ensures you are always using a clean surface and not dragging trapped debris onto the next set of keys.
Damp Wiping for Oils and Smudges
Once the loose dust is removed, you can address fingerprints, skin oils, and sticky residues using a damp wiping technique. Lightly dampen a small corner of your instrument cloth with clean, lukewarm water. Never spray water or any cleaning solution directly onto the keys or the instrument housing, as liquid can easily seep into the internal action or electronic components. The cloth should be barely damp to the touch—if you squeeze it and a drop of water falls, it is too wet.
Wipe one key at a time, moving from back to front with gentle strokes. Immediately follow each damp wipe by drying the key with a separate, completely dry section of your instrument cloth. This prevents moisture from sitting on the key surface or running down the sides of the keys. Stop the process immediately if you observe any moisture pooling in the gaps, or if the key material feels unusually soft, tacky, or shows signs of discoloration.
Common Cleaning Mistakes to Avoid
One of the most common mistakes beginners make is using harsh household cleaners, window sprays, alcohol, or bleach on their instruments. These chemicals can strip the protective finishes from wooden keys, cause plastic keytops to yellow and crack, and dissolve the adhesives holding the keytops to the key shafts. Stick strictly to clean water or specialized cleaning solutions recommended explicitly by your instrument’s manufacturer.
Another critical error is allowing excess moisture to drip between the keys. In acoustic pianos, the key shafts are made of wood; excess moisture can cause the wood to swell, warp, or throw the action out of alignment. In digital keyboards, moisture dripping between the keys can reach the underlying circuit boards, leading to permanent electronic failure. Always keep your instrument cloth barely damp and dry the surfaces immediately.
Finally, avoid the temptation to wipe the keyboard in a rapid, side-to-side motion. While this might seem faster, it actively forces skin oils, dust, and lint into the lateral gaps between the keys. Over time, this debris mixes with ambient humidity to form a sticky paste that binds the keys together, requiring a professional disassembly to clean.
Maintaining Your Instrument Cloth
To ensure your instrument cloth remains safe for future cleaning sessions, you must maintain it properly. Wash your microfiber cloths regularly to remove accumulated oils and grit. Always wash them separately or with other lint-free items using a mild, liquid detergent. Avoid using fabric softeners or dryer sheets, as these products leave a microscopic, greasy residue on the cloth fibers that will transfer onto your piano keys, making them slippery and prone to attracting more dust.
After washing, air dry the cloth or tumble dry it on a low-heat setting without dryer sheets. Once the cloth is completely dry, store it in a clean, sealed plastic bag or container. This prevents the cloth from collecting ambient dust, pet hair, or airborne grease while sitting in your music room. If your instrument cloth becomes stiff, heavily stained, or begins to shed lint, retire it immediately and replace it with a new one.
When to Stop and Seek Professional Help
While regular surface cleaning is an excellent DIY habit, some issues require the expertise of a professional piano technician or authorized service center. If you encounter deep stains, severe yellowing, or chipped and cracked keytops, do not attempt to scrub or sand them down. These issues require professional resurfacing, polishing, or keytop replacement to restore the instrument’s playability and appearance.
Additionally, if you notice sticky keys, sluggish key return, or uneven key heights that persist after a thorough surface cleaning, the problem is likely internal. Attempting to pry open the keys or spray lubricants into the action can cause catastrophic damage to both acoustic and digital instruments. Finally, if a liquid spill occurs and seeps deep inside the instrument casing, unplug the unit immediately and contact a professional technician to assess and clean the internal components safely.
Frequently Asked Questions (FAQ)
Can I use a slightly damp cloth on real ivory keys?
Real ivory is highly porous and extremely sensitive to moisture. Excessive water can cause ivory keytops to warp, crack, or separate from the wooden key shafts beneath them. For vintage pianos with genuine ivory keys, it is best to use a completely dry instrument cloth. If you must address stubborn dirt, use a barely damp cloth, wipe extremely gently, and dry the key immediately with a separate cloth. Always consult a qualified piano technician before applying any moisture or cleaning agents to genuine ivory.
How often should I wipe down my keyboard?
You should perform a quick dry dusting with your instrument cloth before and after every playing session. This simple habit prevents skin oils and ambient dust from bonding together on the key surfaces. A deeper damp cleaning should only be performed when you notice visible smudges, fingerprints, or oil buildup that cannot be removed by dry dusting alone. For most players, a damp wipe-down is only necessary once every few weeks or months, depending on usage frequency and room conditions.
Community discussion
Share your experience or ask a question. Comments are reviewed before publication.