
Restringing a violin is an essential maintenance skill that every player, from beginner to advanced, must eventually learn. While the process is highly manageable, it requires a methodical approach to protect the delicate structural balance of the instrument. Unlike many other stringed instruments, a violin’s bridge and internal soundpost are not glued or permanently fixed to the body. Instead, they are held in place solely by the downward pressure exerted by the tensioned strings. By adopting a careful, step-by-step replacement method, you can safely install a new set of strings without risking structural damage to these critical components.
Preparing Your Workspace and Tools
Before you begin handling your instrument, setting up a stable and secure workspace is vital to prevent accidental drops, scratches, or varnish damage. Choose a flat, sturdy surface such as a large table or a dedicated workbench. Lay down a clean, soft towel, a microfiber cloth, or a specialized instrument mat to cushion the back of the violin. This protective layer prevents the instrument from sliding around and shields the delicate oil or spirit varnish from abrasive contact with hard surfaces.
Next, gather all the necessary tools and accessories before opening any packaging. You will need your new set of violin strings, a soft graphite pencil (such as a 2B, 4B, or standard school pencil), and a small container of peg compound, often referred to as peg dope or peg paste. Ensure your workspace is brightly lit, preferably with an adjustable desk lamp, so you can clearly inspect the fine details of the pegbox, the tiny holes in the tuning pegs, the narrow slots on the nut, and the grooves on the bridge. Having everything within arm’s reach minimizes the need to leave the instrument unattended during the process.
Products mentioned in this guide




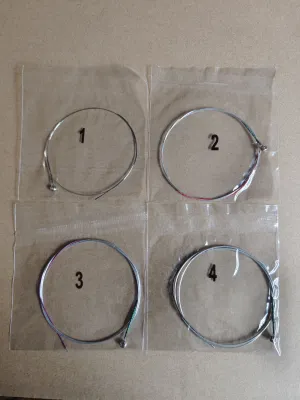



Prices are valid at publication and may change. Please refer to the product page for the latest price.
Removing the Old Violin Strings Safely
The absolute golden rule of violin maintenance is to replace only one string at a time. Removing all four strings simultaneously completely eliminates the downward tension on the top plate of the instrument. Without this pressure, the bridge will fall off, and more critically, the internal soundpost—the small wooden dowel inside the body that transfers vibrations—is highly likely to fall over. Resetting a fallen soundpost requires specialized tools and professional expertise, so maintaining constant tension by changing strings sequentially is essential.

Begin the process by selecting a single string to replace; starting with either the lowest string (G) or the highest string (E) is a common practice. Slowly turn the corresponding tuning peg toward the scroll to unwind the string and release the tension. Do this gradually to avoid sudden shifts in pressure across the bridge. Once the string is completely slack, gently unthread the plain end from the hole in the tuning peg and carefully pull it out of the pegbox.
With the pegbox end free, move down to the tailpiece. Carefully unhook the ball or loop end of the old string from the tailpiece slot or the fine tuner hook. Before you open the replacement string, take a moment to inspect the empty groove on the nut (near the pegbox) and the slot on the bridge. Use a dry, soft brush or a clean cloth to wipe away any accumulated rosin dust, dirt, or debris that could interfere with the seating of the new string.
Installing and Winding the New Strings
To install the new string, always begin at the tailpiece end. Carefully insert the ball or loop end of the new string into the correct slot of the tailpiece or onto the hook of the fine tuner. Ensure that the ball or loop is fully and securely seated so it does not slip out when you begin to apply tension. Keep a light, continuous tension on the string with one hand to keep it anchored at the tailpiece while you guide the opposite end toward the pegbox.
Thread the plain end of the new string through the hole in the corresponding tuning peg. Allow a very small portion of the string, approximately two to three millimeters, to protrude through the opposite side of the peg hole. This small tail is crucial for securing the string. As you begin to wind the peg away from you, guide the first turn of the string so that it crosses directly over this protruding tail. This action locks the string in place and prevents it from slipping under tension.
As you continue to turn the peg, wind the string in neat, parallel coils. Guide the winding toward the outer wall of the pegbox, rather than letting it bunch up in the center of the peg. Winding the string close to the pegbox wall creates a gentle outward angle that naturally pulls the peg deeper into its peg joint as tension increases. This mechanical advantage helps prevent the peg from slipping out of tune later.
Before the string becomes fully taut, use your soft graphite pencil to lubricate the corresponding grooves on both the nut and the bridge. Simply draw back and forth inside the slots to deposit a thin layer of graphite. The graphite acts as a dry lubricant, allowing the string to glide smoothly through the grooves as you tune. This reduces friction, prevents the string from binding or catching, and significantly lowers the risk of the string snapping or pulling the bridge out of alignment.
Tuning and Settling the New Strings
Once the new string is securely wound and lubricated, slowly turn the peg to bring it up to tension. It is highly recommended to tune the string slightly below its target pitch using the peg first. For the final, precise adjustments, rely on the fine tuners located on the tailpiece. This is especially important for the delicate E string, which is under high tension and can easily snap if adjusted too quickly with a tuning peg.
As you bring the string up to pitch, you must frequently check the alignment of the bridge. The friction of the rising string tension naturally pulls the top of the bridge forward toward the fingerboard. Look at the bridge from the side; the back surface facing the tailpiece must remain perpendicular to the top plate of the violin. Both feet of the bridge must sit completely flat against the spruce top. If the bridge begins to lean forward, gently grip the top of the bridge with your thumbs and index fingers and ease it back into a straight position.
New violin strings are highly elastic and will naturally stretch, causing them to drop in pitch rapidly during their first few hours of installation. To help them settle, you can gently stretch each string by placing your fingers under the string and pulling it slightly away from the fingerboard along its length. Retune the string immediately afterward. Repeat this process a few times, and expect to retune your instrument frequently over the next few days as the core material of the strings fully stabilizes.
When to Stop and Consult a Luthier
While changing strings is a standard maintenance task, certain physical warning signs indicate that you should stop and seek professional assistance. If you notice that the bridge is warped, bent, or has a visible curve, do not attempt to straighten it yourself under full tension. A warped bridge is structurally compromised and can easily snap, potentially damaging the top plate of your violin. A professional luthier can evaluate whether the bridge can be safely straightened or if it needs to be replaced.
Another critical warning sign is any change to the internal soundpost. If you hear a loose rattling sound inside the violin body, or if you look through the F-holes and see that the wooden soundpost has fallen over or shifted from its position behind the bridge foot, do not tune the strings. Tuning an instrument without a properly positioned soundpost can cause the top plate to crack under the immense downward pressure of the strings. Take the violin to a luthier immediately to have the soundpost safely reset using specialized tools.
Finally, consult a professional if you experience persistent mechanical issues with your pegs or bridge grooves. If your tuning pegs continue to slip or stick even after applying peg compound, the peg holes may need to be reamed or the pegs refitted. Similarly, if the grooves on the nut or bridge have worn down so deep that the strings sit too close to the fingerboard and cause a buzzing sound when played, a luthier will need to adjust or replace these components to restore proper playability.
Frequently Asked Questions (FAQ)
How often should I change my violin strings?
Violin strings should be replaced when they show physical signs of wear or when you notice a significant decline in sound quality. Visually inspect your strings regularly for signs of fraying metal winding, unraveling near the pegbox or tailpiece, or dark corrosion along the fingerboard area. Auditory indicators include a dull, muddy, or lifeless tone, a loss of projection, or difficulty keeping the instrument in tune. While regular players typically change their strings every six months to maintain optimal performance, you should consult the manufacturer’s guidelines for specific lifespan expectations based on your playing frequency and string type.
Can I replace all four strings at the same time?
No, you should never remove all four strings at the same time during routine maintenance. The downward pressure of the strings is the only force holding the bridge and the internal soundpost in place. Removing all tension simultaneously can cause the bridge to fall over and the soundpost to collapse inside the instrument, which requires a professional repair. Always use the one-string-at-a-time method to maintain stable downward pressure on the top plate. If your violin requires a complete teardown for deep cleaning, varnish touch-ups, or structural repairs, this work should be handled exclusively by a qualified luthier.
Community discussion
Share your experience or ask a question. Comments are reviewed before publication.