
A properly rosined bow is essential for producing a clear, resonant tone on any bowed string instrument. Without rosin, the bow hair will slide silently across the strings, producing nothing more than a faint whisper. Applying rosin is one of the first maintenance skills every string player must master, yet it is frequently done incorrectly. Over-application leads to a harsh, scratchy sound and a messy buildup of white powder on your instrument’s varnish, while under-application leaves you working twice as hard for a weak, airy tone.
Striking the correct balance requires understanding the physical relationship between the bow hair and the rosin cake. By learning the correct preparation, stroke technique, and testing methods, you can ensure your bow provides the ideal grip while preserving the delicate horsehair for years to come. This guide outlines the step-by-step process to achieve optimal friction without damaging your equipment.
Preparing Your Bow and Rosin for the First Application
Before the rosin cake ever touches the bow, both items must be prepared properly to ensure an even coating. Start by tightening your bow to its standard playing tension. You can verify this tension using a simple physical check: a standard wooden pencil should be able to slide snugly between the bow hair and the wooden stick at the middle of the bow. If the gap is too narrow, the hair is too loose; if it is too wide, the hair is over-tightened, which can warp the stick over time.
Products mentioned in this guide


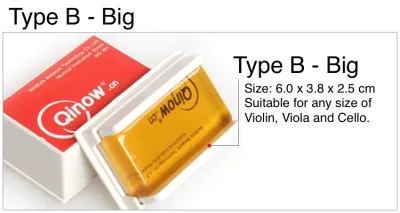
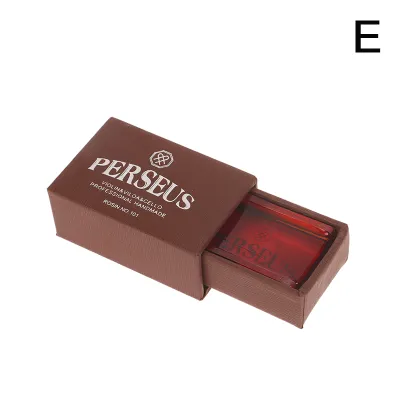
Prices are valid at publication and may change. Please refer to the product page for the latest price.
Next, inspect your rosin cake. A brand-new cake of rosin often has a smooth, highly glazed surface that resists transfer to the bow hair. To help the hair grip the rosin initially, you can gently score the surface. Use a clean, non-abrasive tool—such as the edge of a plastic key or a light piece of fine-grit sandpaper—to scratch a light crosshatch pattern into the top layer. Avoid using sharp metal blades that could slip and cause injury or deeply gouge the cake.
Finally, ensure the bow hair itself is clean and dry. New or freshly rehaired bows are naturally clean, but older bows can accumulate oils from your skin or ambient moisture. In humid environments, such as Singapore, moisture can easily settle on the hair, blocking the rosin from adhering properly. Always handle the bow only by the frog and the screw, keeping your fingers completely off the hair to prevent oil transfer.
Step-by-Step Guide to Applying Rosin Correctly
To begin the application, hold the rosin cake securely in your non-dominant hand. Position your thumb and fingers around the sides of the block or its protective cloth wrapping, keeping your fingers clear of the path where the bow will travel. Hold the bow by the frog in your dominant hand, just as you would when playing, to maintain maximum control and a natural range of motion.

Place the bow hair flat against the rosin cake at the frog, which is the wooden block near the screw end of the bow. Slowly and smoothly, draw the bow across the rosin from the frog all the way to the tip. Maintain a steady, continuous motion rather than rapid, jerky scrubbing. Once you reach the tip, reverse the direction and glide the bow back down to the frog.
Apply only gentle, consistent pressure throughout each stroke. The microscopic scales on the horsehair need to catch the rosin naturally; pressing down with heavy force will not speed up the process. Instead, excessive pressure risks snapping individual hair strands or cracking the rosin cake. Let the weight of the bow and a light guiding hand do the work.
The number of strokes you need depends entirely on the condition of your bow. A brand-new or freshly rehaired bow has completely bare hair, which requires a significant initial coating. You may need to make thirty to forty full-length passes to build up an adequate base layer. For routine maintenance on a bow that is already broken in, a much lighter touch is required. Usually, three to five full-length strokes before a practice session are more than enough to restore the necessary friction.
How to Tell If You Have Applied Enough Rosin
Verifying the amount of rosin on your bow prevents the common pitfall of over-application. The first test is visual. Hold the bow up to a clear light source and inspect the hair. You should see a very fine, even, translucent layer of white dust coating the entire length of the hair. If you see thick, powdery clumps or patches where the hair looks heavily caked, you have applied too much.
Next, perform an acoustic test by playing a few open strings on your instrument. Listen closely to the quality of the sound. A properly rosined bow will produce a clear, resonant, and full tone immediately upon contact. If the sound is airy, whispery, or slips without producing a clear pitch, the bow lacks grip. If the tone is scratchy, harsh, or produces an audible crunching sound at the start of each stroke, there is too much rosin on the hair.
Finally, pay attention to the physical sensation in your hands. As you draw the bow across the string, you should feel a slight, comfortable resistance—often described by string players as a “bite” or “pull.” This friction is what allows the string to vibrate consistently. If the bow feels like it is sliding effortlessly across ice, it requires more rosin. If it feels sticky, sluggish, or heavy, the hair is overloaded.
Common Mistakes and How to Avoid Over-Rosining
One of the most frequent mistakes is pressing the bow too hard into the rosin cake. This aggressive pressure does not distribute the powder more effectively; instead, it creates deep, uneven grooves in the cake, making it difficult to use in the future. More importantly, it puts unnecessary stress on the bow hair, leading to premature breakage and stretching.
Another common error is focusing the application solely on the middle of the bow. Players often fall into a habit of scrubbing the middle section of the cake back and forth, neglecting the frog and the tip. This results in uneven playability, where the middle of the bow grips well but the ends slip, disrupting your dynamic control and phrasing. Always use full, continuous strokes from end to end to maintain a uniform coating.
Over-rosining out of habit is a major issue for developing musicians. Many players apply rosin before every single practice session without testing the bow first. This leads to a massive buildup of fine white dust that settles on the instrument’s varnish. Over time, this dust can fuse with the varnish, damaging the finish and requiring expensive professional restoration. It also cakes the bow hair, deadening its natural elasticity and requiring a professional cleaning or premature rehair.
Lastly, never touch the bow hair with your bare fingers. The natural oils and sweat on your skin act as a barrier, preventing the rosin from adhering to the hair. This creates “dead spots” along the bow where the hair cannot grip the strings, resulting in sudden drops in sound quality. Always handle the bow by its wooden parts and mechanical fittings.
Maintaining Your Bow Hair and Rosin Between Sessions
Preserving your equipment requires a consistent post-playing routine. Every time you finish playing, use a dry, clean microfiber cloth to gently wipe down your instrument. Wipe the strings, the fingerboard, and the top of the instrument body directly under the bowing area. Removing the fresh rosin dust immediately prevents it from bonding with the varnish or building up on the strings, which can dull their tone.
Always loosen the bow hair before putting the bow back in its case. Turn the tension screw counterclockwise until the hair relaxes and almost touches the wooden stick. Leaving the bow under tension stretches the hair permanently, reducing its lifespan, and can warp the wooden stick, ruining its natural camber and balance.
Store your rosin cake carefully in its protective box, pouch, or wrap. Rosin is highly brittle and can easily shatter if dropped on a hard floor. Additionally, in warm, humid climates like Singapore, rosin can soften or become sticky if exposed to direct sunlight or left in a hot car. Keeping it in a cool, shaded compartment within your instrument case protects it from temperature extremes and prevents it from collecting dust and debris.
Frequently Asked Questions (FAQ)
Should I use light or dark rosin for my instrument?
Choosing between light and dark rosin depends on your instrument, playing style, and environment. Light rosin is harder, denser, and less sticky, making it the traditional choice for violins and violas, which require a swift, clean response. It is also highly suited for warmer, humid climates like Singapore, as it resists melting and remains stable. Dark rosin is softer, stickier, and provides a heavier grip, which is generally preferred for cellos and double basses to move their thicker strings. However, dark rosin can become overly gummy in hot weather. Consult your teacher or instrument manufacturer to find the best match for your specific strings and local climate.
How often should I rosin my bow?
There is no single schedule for applying rosin, as it depends on how many hours you play, the humidity of your room, and your string type. Instead of applying rosin automatically before every session, rely on the visual, acoustic, and physical checks. Many active players find that they only need to apply a few light strokes every few days or after every four to six hours of playing time. Let the physical feedback of the bow on the strings guide your routine.
Community discussion
Share your experience or ask a question. Comments are reviewed before publication.