
Selecting the right acoustic wall padding requires matching the physical properties of the absorption material to the specific frequencies generated by your instrument, while scaling the total coverage area to the physical dimensions of your room. A small room hosting a vocal setup needs a completely different treatment plan than a large space dedicated to a full acoustic drum kit. By understanding how sound behaves in enclosed spaces, you can avoid common mistakes like over-treating a room until it sounds unnaturally dead, or purchasing materials that fail to address the specific frequencies of your instrument. The goal is to create a balanced acoustic environment where you can hear your instrument clearly, make accurate mixing decisions, or capture clean recordings.
Understanding Acoustic Wall Padding Basics
To choose the right wall padding, it is essential to first distinguish between acoustic treatment and soundproofing. These two concepts are frequently confused, leading to costly mistakes and unmet expectations. Acoustic treatment focuses on improving the sound quality inside a room by controlling reflections, echoes, and reverberation. Soundproofing, or sound isolation, aims to prevent sound from entering or leaving a room entirely. Standard acoustic wall padding is designed solely for acoustic treatment; it does not possess the mass or structural decoupling properties required to block sound from transmitting through walls to neighboring spaces.
Porous wall padding materials, such as open-cell polyurethane foam, fiberglass, or stone wool, work by absorbing sound energy. When sound waves strike these porous surfaces, the air molecules are forced to vibrate within the intricate pathways of the material. This friction converts the kinetic energy of the sound wave into trace amounts of heat, effectively reducing the strength of the reflected wave that bounces back into the room. This process is highly effective for mid-to-high frequency sounds, which have shorter wavelengths and are easily captured by the surface fibers of the padding.
Products mentioned in this guide
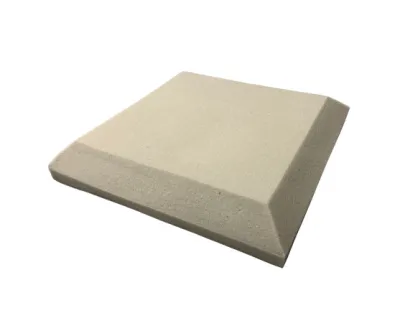
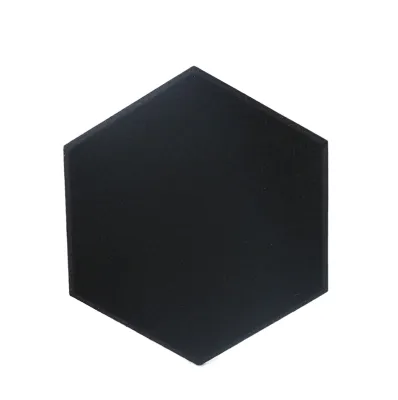
Prices are valid at publication and may change. Please refer to the product page for the latest price.
However, low-frequency sound waves, often referred to as bass, behave very differently. Bass wavelengths are much longer and carry significantly more energy, allowing them to pass through standard, flat wall padding with ease. These low frequencies tend to accumulate in the corners of a room, creating a muddy, boomy sound profile that distorts your perception of the music. Managing this low-end buildup requires specialized structural approaches, such as dedicated corner bass traps, which are much thicker and denser than standard wall panels. Relying solely on thin wall padding to treat a room with heavy bass output will leave the low-end frequencies completely uncontrolled.
Matching Wall Padding to Your Instrument
Different musical instruments produce sound across vastly different frequency spectrums, meaning a single approach to wall padding will not deliver optimal results. The physical relationship between the thickness of an acoustic panel and the lowest frequency it can absorb is governed by the laws of physics. Generally, for a porous absorber to be highly effective, its thickness must be at least one-quarter of the wavelength of the target frequency. Consequently, thin panels are limited to high-frequency absorption, while thicker panels are required to tame lower-mid and low frequencies.

When shopping for acoustic treatment, it is critical to look past generic marketing claims and instead verify the manufacturer’s technical specifications. Reputable manufacturers provide detailed frequency absorption charts, often displaying the absorption coefficients across standard octave bands from 125 Hz to 4000 Hz. By comparing these charts to the frequency range of your specific instrument, you can ensure you are purchasing padding that actually targets the problem frequencies in your space.
Drums and Percussion
Acoustic drum kits are among the most challenging instruments to treat because they produce high-impact, broadband sound that spans from the deep thud of the kick drum to the piercing high-frequency wash of cymbals. The sharp transients of a snare drum crack can quickly overwhelm an untreated room, creating harsh flutter echoes that cause rapid ear fatigue and ruin recordings. To manage these intense mid-to-high frequency reflections, a drum room requires a relatively high percentage of wall coverage using dense, high-quality padding.
However, standard wall padding has severe limitations when it comes to the low-end frequencies generated by a kick drum or floor tom. These deep frequencies will pass straight through standard 25 mm or 50 mm flat panels, reflecting off the hard drywall behind them and causing phase cancellation or muddy buildup. To achieve a balanced sound in a drum room, you must integrate thick corner bass traps alongside your wall padding. This hybrid approach ensures that the high-frequency cymbal wash is tamed while the low-frequency impact of the drums remains tight and defined.
Guitars and String Instruments
Guitars and other string instruments primarily focus their acoustic energy in the mid-range frequencies, typically ranging from around 80 Hz to over 1000 Hz, with higher harmonics extending upward. Because these instruments do not produce the extreme low-end energy of a drum kit or the ultra-high transients of cymbals, they do not require massive, heavy-duty acoustic treatment. Instead, moderate-thickness wall padding, such as 50 mm panels, is usually the ideal choice for controlling reflections without stripping the life out of the instrument.
When treating a space for acoustic or amplified guitars, the goal is to control flutter echo and mid-range buildup while preserving a natural, controlled room ambiance. Over-treating a guitar room can make the instrument sound dull, dry, and uninspiring to play. To avoid this, place your wall padding strategically at the primary reflection points near your listening or recording position. This targeted placement controls the most damaging reflections while allowing some of the room’s natural resonance to remain, resulting in a lively yet controlled acoustic environment.
Vocals and Podcasting
For vocal recording and podcasting, clarity and intelligibility are the absolute priorities. The human voice is highly sensitive to early reflections—sound waves that bounce off nearby walls and enter the microphone just milliseconds after the direct sound. These early reflections cause phase issues, comb filtering, and a boxy, hollow, or roomy vocal tone that is incredibly difficult to fix in post-production. To prevent this, vocal spaces require precise, high-density wall padding placed close to the performer.
When treating a small vocal booth or a dedicated recording corner, focus on managing the lower-mid frequencies (around 200 Hz to 500 Hz) where vocal muddiness typically resides. This requires checking the density of the padding material; denser materials like fiberglass or mineral wool are far more effective at absorbing these lower-mid frequencies than cheap, low-density packaging foam. Additionally, because vocal booths are often small, enclosed spaces with limited airflow, it is vital to verify the fire safety ratings of the materials you install, ensuring they meet local building safety standards.
Calculating Coverage Based on Room Size
Determining how much wall padding to purchase requires a systematic approach based on your room’s physical dimensions and its intended use. A common starting point is to estimate the room’s volume by multiplying its length, width, and height. Smaller rooms have walls that are closer to the sound source, meaning reflections return to your ears much faster and with greater intensity than they would in a larger space. Consequently, smaller rooms often require a higher percentage of wall coverage to control these rapid reflections.
To identify exactly where to place your padding, you can use a simple and highly effective technique known as the mirror method. Sit at your primary listening or recording position while a friend slides a small mirror flat against the walls at head height. Wherever you can see the reflection of your studio monitors, instrument amplifier, or microphone position in the mirror, that spot is a primary reflection point. Treating these specific areas first yields the greatest acoustic improvement per panel used.
The total amount of coverage you need also depends on the room’s function. A critical listening, mixing, or mastering environment requires a highly controlled, balanced sound, which typically translates to 30% to 40% wall coverage. In contrast, a live tracking room where multiple musicians practice or record together may only require 15% to 20% coverage, as some natural room reflection is desirable to keep the ensemble sounding cohesive and alive.
It is crucial to warn against the temptation to over-treat your space. Covering every square inch of your walls with thin, inexpensive foam panels is a common mistake. This approach will absorb almost all of the high frequencies while leaving the mid-to-low frequencies completely untouched. The result is an acoustically unbalanced room that sounds unnaturally dead, muffled, and incredibly fatiguing to work in, as your ears struggle to adjust to the lack of natural high-frequency reflections.
Key Specifications to Check Before Buying
Before purchasing any acoustic wall padding, you must carefully evaluate the technical specifications provided by the manufacturer to ensure the product is safe, effective, and suitable for your specific installation. The most common metric used to rate acoustic panels is the Noise Reduction Coefficient (NRC). The NRC is a single-number rating ranging from 0.0 (complete reflection) to 1.0 (complete absorption), representing the average absorption across four key mid-frequencies (250 Hz, 500 Hz, 1000 Hz, and 2000 Hz). While a high NRC rating is generally desirable, you should look deeper into the product documentation to verify how the panel performs at the specific frequencies of your instrument.
The core composition and density of the material are also critical factors. Open-cell polyurethane foam is lightweight and easy to install, but it is generally less dense and less effective at absorbing lower frequencies than rigid fiberglass or stone wool cores. When comparing products, check the density specification, typically measured in kilograms per cubic meter (kg/m³). Denser core materials provide enhanced low-mid absorption, allowing you to achieve better acoustic control with thinner panels.
Safety must never be overlooked when installing acoustic materials in your home or studio. You must verify the fire retardancy certifications of any wall padding you consider. Look for official documentation proving that the material has undergone standardized testing, such as achieving a Class A or Class 1 fire rating under ASTM E84 or equivalent local standards. Avoid products that make vague claims of being fire resistant without providing official test reports, as untreated polyurethane foam can ignite easily and release highly toxic smoke.
Finally, consider the aesthetic and mounting details of the panels. High-quality panels often feature acoustically transparent fabric wrapping, which allows sound waves to pass through to the core rather than reflecting off the surface. You can test this by attempting to breathe through the fabric; if air passes through easily, sound will too. Look for clean, beveled edges for a professional appearance, and decide whether your space is better suited for permanent adhesive mounting or non-destructive mechanical fasteners like Z-clips or impaling clips.
Installation and Placement Strategies
How you mount your acoustic wall padding depends on whether you own the space, your budget, and whether you need to preserve the underlying wall surface. For renters or temporary setups, non-destructive mounting options are essential. Heavy-duty adhesive strips, hook-and-loop fasteners, or specialized Z-clips allow you to hang panels securely without drilling large holes. Another popular temporary method is to mount your acoustic panels onto a lightweight backing board, which can then be hung on the wall using standard picture-hanging hardware.
If you decide to use permanent construction adhesives, be aware that removing the panels in the future will almost certainly tear the drywall paper and require extensive patching and painting. Before applying any adhesive to your walls, always test a small amount on a hidden, inconspicuous area to see how it reacts with the paint or plaster. Additionally, consult the manufacturer’s guidelines for both the adhesive and your specific wall material to ensure a secure, long-lasting bond that will not fail over time.
An excellent way to maximize the performance of your acoustic panels is to mount them with an air gap between the panel and the wall. If recommended by the manufacturer, leaving an air gap equal to the thickness of the panel can significantly increase its low-frequency absorption efficiency. This works because sound waves pass through the panel, reflect off the hard wall, and pass through the panel a second time. By positioning the panel slightly away from the wall, you place the absorbing material at a point where the sound wave’s velocity is higher, allowing it to absorb lower frequencies than it would if mounted completely flush.
Frequently Asked Questions (FAQ)
Does wall padding stop sound from leaking into other rooms?
No, acoustic wall padding is designed to improve the sound quality inside a room by absorbing reflections, but it does not stop sound from leaking into other rooms. Sound isolation requires blocking sound transmission, which can only be achieved through structural modifications that add mass, create air gaps (decoupling), and seal air leaks. To prevent sound leakage, you must look toward heavy materials like mass-loaded vinyl, specialized acoustic sealants to plug gaps around doors and windows, and double-wall construction techniques.
Can I use mattress foam or egg cartons as acoustic wall padding?
Using mattress foam or egg cartons is a common DIY myth that does not work and poses a serious safety hazard. Mattress foam is often closed-cell or lacks the specific density and open-pore structure required to absorb sound waves effectively, while egg cartons merely scatter a tiny amount of high-frequency sound without providing any meaningful absorption. More importantly, untreated household foams and cardboard egg cartons are highly flammable and lack fire-retardant chemicals, making them an extreme fire hazard when applied to studio walls.
How do I clean and maintain fabric-wrapped acoustic panels?
To keep your fabric-wrapped acoustic panels looking clean and performing well, establish a gentle, regular maintenance routine. For routine dust and pet hair removal, use a vacuum cleaner equipped with a soft upholstery brush attachment, running it gently over the fabric surface. Avoid using liquid cleaners, steam, or harsh chemical solvents, as moisture can seep into the acoustic core, causing the fibers to clump, degrade, or develop mold, while also potentially staining or shrinking the outer fabric wrap.
Community discussion
Share your experience or ask a question. Comments are reviewed before publication.