
Using a wireless in-ear monitor (IEM) system during practice sessions is one of the most effective ways to build precise timing and rhythm. By routing a metronome click track directly into your ears, you can isolate the timing reference from external room noise, allowing you to focus entirely on your performance. Setting up a Phenyx Pro IEM system for this purpose requires a clear understanding of signal routing, wireless synchronization, and proper gain staging to ensure a clean, safe, and distortion-free monitoring experience.
Whether you are practicing complex drum rudiments, running classical piano scales, or rehearsing guitar solos with sheet music, a dedicated click track keeps your tempo flawless. This guide outlines the step-by-step process to connect your metronome source to your wireless transmitter, configure your bodypack receiver, and optimize your volume levels for a productive practice session.
Gather Your Gear and Cables
Before beginning the setup process, you must assemble all the necessary hardware and cabling to establish a reliable audio path. The core of your monitoring setup consists of the Phenyx Pro IEM transmitter, the wireless bodypack receiver, and a pair of high-quality earpieces. Having these components clean and ready to use prevents interruptions once you begin practicing.
Products mentioned in this guide
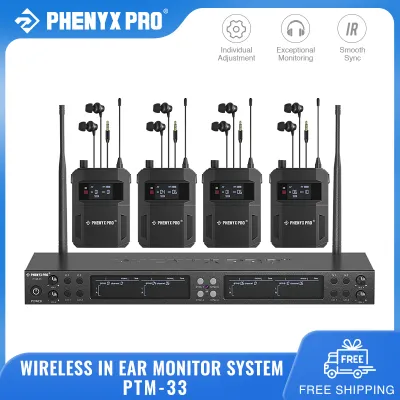
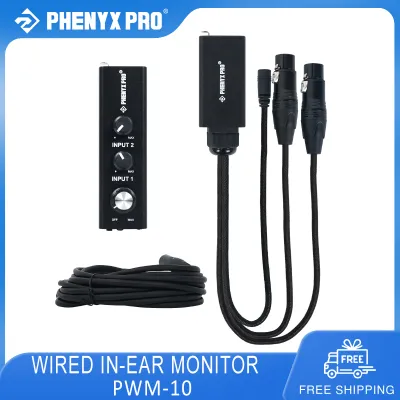
Prices are valid at publication and may change. Please refer to the product page for the latest price.
Next, identify your metronome source. This could be a standalone hardware metronome, a smartphone or tablet running a dedicated metronome application, or a digital audio workstation (DAW) routing a click track through an external audio interface. Each of these sources utilizes a different output jack, which dictates the type of cabling you will need.
To bridge the connection between your metronome source and the transmitter, you must select the correct audio cables and adapters. Most Phenyx Pro transmitters feature combination input jacks that accept either XLR or 1/4-inch (6.35mm) TRS/TS plugs. If your metronome source is a smartphone or tablet, you will typically need a 3.5mm TRS to dual 1/4-inch TS stereo breakout cable. If you are routing the click from an audio interface, standard balanced 1/4-inch TRS or XLR cables are the preferred choice.
Finally, verify the power status of all devices. Install fresh AA batteries or ensure the rechargeable battery pack is fully charged in your bodypack receiver. Connect the transmitter to a stable power source using its official power adapter. Ensuring consistent power prevents sudden signal dropouts or volume fluctuations during your practice session.
Route the Metronome Audio to the Transmitter
Establishing a clean signal path from your metronome to the transmitter is critical for preventing audio distortion. Start by locating the audio output jack on your metronome source. For smartphones and hardware metronomes, this is usually a 3.5mm headphone jack. For audio interfaces, look for the line outputs or headphone monitor outputs on the front or rear panel.

Connect the appropriate cable to your metronome source, then route the other end to the input jacks on the back of the Phenyx Pro transmitter. If you are monitoring a simple mono click track, you can plug the cable into the Left/Mono input channel. If your metronome app or DAW outputs a stereo signal or a split track—such as a backing track on one side and the click on the other—utilize both the left and right input jacks.
Before powering on any equipment, turn the volume control on your metronome source down to a moderate baseline level, approximately 40% to 50%. Sending an excessively hot signal into the transmitter can overload its internal preamps, resulting in a harsh, distorted click that is difficult to listen to and potentially damaging to your hearing.
Power on the transmitter and start the metronome. Observe the front panel display of the transmitter. Most models feature an audio frequency (AF) signal meter or indicator lights that bounce in time with the incoming audio. If you see the meter jumping with each click, the transmitter is successfully receiving the audio signal from your metronome source.
Set Up the Bodypack Receiver and Earpieces
With the transmitter receiving the audio signal, you can now configure the wearable portion of your IEM system. Power on the bodypack receiver using the volume/power knob. Ensure the volume is turned completely down to the minimum setting before putting the earpieces in your ears to protect your hearing from unexpected signal bursts.
Sync the bodypack receiver to the transmitter’s designated wireless frequency. This is typically achieved by aligning the infrared (IR) window on the bodypack with the IR window on the transmitter and pressing the sync button. Alternatively, you can manually adjust the group and channel numbers on the bodypack to match the transmitter exactly. Confirm that the radio frequency (RF) indicator light on the receiver illuminates, signaling a stable wireless connection.
Select the correct ear tips for your earpieces. Most IEMs come with various sizes of silicone and memory foam tips. Choosing a size that creates a tight, comfortable acoustic seal inside your ear canal is essential. This physical seal isolates you from ambient room noise, allowing you to hear the metronome clearly without needing to raise the volume to dangerous levels.
Plug the earpiece cable into the 3.5mm headphone jack on top of the bodypack receiver. Route the cable down your back or underneath your clothing to keep it out of the way of your hands and instrument. Use the cable’s built-in cinch slider to tighten the split behind your head, securing the earpieces firmly in place so they do not dislodge while you move.
Balance the Volume for Clear Click Monitoring
Achieving a balanced mix is the key to a comfortable and productive practice session. Put the earpieces in your ears and start the metronome click. Slowly turn up the volume dial on your bodypack receiver until you can hear the click track at a low, comfortable baseline level.
Next, adjust the input gain on the transmitter if your specific model features an input level control. Watch the transmitter’s AF meter while adjusting this setting. The goal is to set the gain high enough to provide a clean, robust signal with a low noise floor, but low enough that the meter never peaks into the red or clips during the loudest clicks.
Now, begin playing your instrument alongside the metronome. You must balance the volume of the click track against the natural acoustic sound of your instrument. If you play a loud instrument like drums or electric guitar, the physical isolation of the earpieces will naturally muffle the instrument, requiring you to find a balance where the click is distinct but not overpowering. If you play a quieter instrument, you may need to lower the click volume to prevent it from completely masking your natural performance.
If your Phenyx Pro system supports stereo or mixed modes, you can use the balance controls on the bodypack to adjust the spatial positioning of the click. Panning the click slightly to one ear while keeping your instrument’s natural sound in the other can sometimes make it easier to focus on both timing and tone simultaneously without experiencing ear fatigue.
Troubleshoot Static, Dropouts, and Audio Issues
Wireless audio systems can occasionally encounter interference or connection issues. If you experience static, hiss, or frequent audio dropouts while practicing, the wireless channel you are using is likely crowded. Switch both the transmitter and the bodypack receiver to a different, clear frequency channel to bypass local radio frequency interference.
If you hear no sound at all through your earpieces, systematically check every physical connection in your signal chain. Verify that the cable is fully seated in your metronome source, the transmitter inputs, and the bodypack receiver. Ensure the transmitter’s RF indicator is lit, confirming that the transmitter and receiver are communicating. If the RF light is off, re-sync the devices.
Muffled or weak click sounds are often caused by a poor acoustic seal or physical blockages. Inspect the earpiece nozzles for earwax buildup and clean them regularly using a small cleaning tool. Additionally, check the EQ settings on your metronome source. A click track with too much low-end bass can sound muddy through IEMs; switching to a higher-pitched woodblock or electronic beep sound often improves clarity.
If the click track sounds distorted or fuzzy even at low volumes, the input signal entering the transmitter is likely too hot. Lower the volume on your smartphone or audio interface, then compensate by turning up the volume dial on your bodypack receiver. If you have exhausted these troubleshooting steps and still experience issues, stop using the system and consult the manufacturer’s manual or official support channels to check for potential hardware faults.
Frequently Asked Questions (FAQ)
Can I hear my acoustic instrument while wearing IEMs?
The physical ear tips of your in-ear monitors act like earplugs, naturally blocking out a significant portion of ambient room sound. Loud acoustic instruments, such as drums, brass, or amplified guitars, will still bleed through this physical barrier, allowing you to hear them clearly enough to practice. However, quieter acoustic instruments, like classical guitars or woodwinds, may sound overly muffled or distant. To resolve this, you can set up an ambient microphone near your instrument, plug it into an external mixer along with your metronome, and send a balanced blend of both signals to your IEM transmitter.
Is it safe to practice with IEMs for long sessions?
Practicing with in-ear monitors is safe as long as you practice responsible volume management. Because the sound source is sealed directly inside your ear canal, high volume levels can cause hearing fatigue and permanent damage over time. Always keep the click track at the lowest volume necessary to hear it clearly over your instrument. Take regular listening breaks—approximately 5 to 10 minutes for every hour of practice—to allow your ears to rest. Additionally, if your bodypack receiver features a built-in volume limiter, ensure it is engaged to protect your ears from sudden, unexpected signal spikes.
Community discussion
Share your experience or ask a question. Comments are reviewed before publication.