
To set up the Yamaha DTX6K2-X electronic drum kit for MIDI triggering in electronic music production, you must establish a reliable data link between the DTX-PRO drum module and your Digital Audio Workstation (DAW). This process transforms your physical drum pads into highly responsive controllers capable of triggering modern electronic samples, synthesized drum racks, and virtual instruments (VSTs). By routing MIDI data instead of raw audio, you gain complete control over note editing, velocity adjustments, and sound selection during post-production.
The transition from playing standard acoustic-style drum kits to producing electronic dance music (EDM) requires a precise configuration of both hardware and software. The DTX-PRO module serves as the translator, converting your physical strikes on the textured cellular silicone (TCS) snare and rubber pads into digital MIDI messages. Achieving a seamless, low-latency connection involves physical cable integration, internal module configuration, and DAW routing. Once these steps are complete, you can bypass the internal drum sounds entirely to trigger custom sample libraries, synth stabs, and complex rhythmic patterns directly within your production environment.
Hardware Connections and Initial Setup
Establishing a stable physical connection is the foundation of a reliable MIDI production setup. The DTX-PRO module, which powers the DTX6K2-X kit, offers two primary methods for transmitting MIDI data to a computer: a standard USB TO HOST port and a traditional 5-pin MIDI OUT port. For most modern home studios and music production setups, the USB TO HOST port is the most efficient choice. This connection transmits multi-channel MIDI data directly over a single USB cable, eliminating the need for a dedicated external MIDI interface.
Products mentioned in this guide
![Yamaha DTX6K2X Electronic Drums DTX6K2-X DTX 6K2 X Digital Drum DTX 6K2X DTX6 The Music Works [PREORDER]](https://img.lazcdn.com/g/p/dbb03d29e0c686e3e39376ae0c45e5e3.jpg_400x400q80.jpg_.webp)
![Yamaha DTX6KX Electronic Drums DTX6K-X DTX 6K X Digital Drum DTX 6KX DTX6 The Music Works Store [LIMITED STOCK]](https://img.lazcdn.com/g/p/b6a8ffb94630b560f5e937d7664610bc.jpg_400x400q80.jpg_.webp)
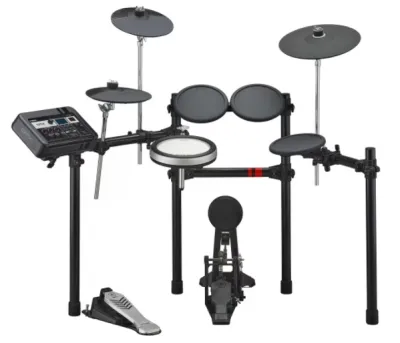
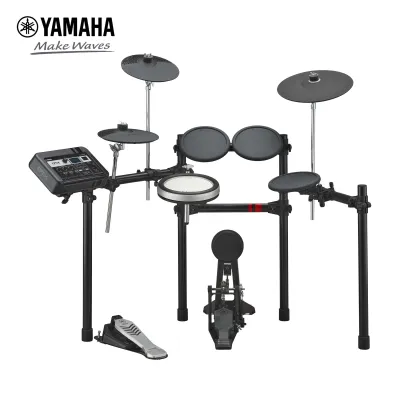
Prices are valid at publication and may change. Please refer to the product page for the latest price.
Before plugging in any cables, ensure that both your computer and the DTX-PRO module are powered off. This precaution prevents accidental electrical surges or connection errors during the initial handshake between devices. Connect a standard USB Type-A to Type-B cable to the USB TO HOST port on the back of the drum module, and plug the other end directly into an available USB port on your computer. Avoid using unpowered USB hubs, as they can introduce data transmission delays or cause intermittent connection drops during intense performance sessions.
If your studio workflow relies on a dedicated audio interface with 5-pin MIDI inputs, you can use a standard 5-pin MIDI cable instead. Connect the cable from the MIDI OUT port on the DTX-PRO module to the MIDI IN port on your audio interface. This method is particularly useful if you are running a complex hardware synthesizer setup or if your computer has limited USB ports. Whichever physical path you choose, power on your computer first, allow your operating system to boot completely, and then switch on the DTX-PRO module.
Once both devices are powered, observe the module’s liquid crystal display (LCD) screen. The DTX-PRO module features visual indicators that confirm when a successful USB connection is established. If the connection is recognized by your computer’s operating system, the module will typically display a USB icon or indicate an active data link in the system settings. On modern operating systems, the DTX-PRO is class-compliant, meaning it should be recognized automatically without requiring manual driver installations, though installing the official Yamaha USB-MIDI driver can provide enhanced stability and multi-client support.
Configuring the Drum Module for MIDI Output
With the physical connection established, you must configure the internal settings of the DTX-PRO module to ensure it transmits MIDI data correctly. By default, the module is set up to play its internal high-definition drum kits through its audio outputs. To use it as a MIDI controller for external software, you must navigate the system menu to adjust how data is routed and processed.

Begin by pressing the MENU button on the front panel of the DTX-PRO module. Use the selection dial to scroll to the “Utility” or “MIDI” settings sub-menu, and press the enter button to access the parameters. Within this menu, locate the setting for MIDI output routing. You will need to verify that the module is set to transmit data via the USB port if you are using a USB cable, or via the 5-pin MIDI port if you are using traditional MIDI cables. Ensuring the correct output path is active prevents the module from sending data to an inactive port.
A critical step in this configuration is adjusting the “Local Control” setting. Local Control dictates whether the drum module’s internal sound generator plays a sound when you strike a pad. When triggering external VST instruments in a DAW, you should turn Local Control “Off.” If Local Control remains on, striking a pad will trigger both the internal module sound (sent to your headphones or monitors connected to the module) and the external VST sound (sent through your computer’s audio system). Turning Local Control off silences the internal engine, allowing you to hear only the virtual instrument you are triggering in your DAW.
Next, check the default MIDI channel assignments within the module’s system settings. By default, electronic drum kits typically transmit MIDI data on Channel 10, which is the industry standard for percussion. Ensure that the DTX-PRO is set to transmit on Channel 10, or note the specific channel if you choose to customize it. Additionally, take a moment to review the basic note mapping parameters. Each pad on the DTX6K2-X is assigned a specific MIDI note number (for example, MIDI Note 36 for the bass drum and Note 38 for the snare). These assignments must align with the input mapping of your virtual instruments to ensure the correct sounds are triggered.
Routing MIDI into Your DAW
Once the drum module is configured to send MIDI data, you must prepare your Digital Audio Workstation to receive and interpret these signals. Whether you use Ableton Live, Logic Pro, FL Studio, or Cubase, the fundamental routing principles remain identical. The goal is to designate the DTX-PRO module as an active MIDI input device and route its signals to a virtual instrument track.
Open your DAW and navigate to the global preferences or settings menu, then locate the “MIDI” or “Link/MIDI” tab. In the list of available MIDI input devices, you should see the DTX-PRO module listed (often appearing as “DTX-PRO” or “Yamaha USB-MIDI”). Check the box or toggle the switch to enable this input. In many DAWs, you will also need to enable specific MIDI options for this device, such as “Track” to allow the recording of MIDI notes, and “Remote” if you plan to use the pads to control DAW transport functions or software parameters.
After enabling the input device, close the preferences menu and return to your main project window. Create a new MIDI track or Instrument track in your session. In the track’s input routing section, which is typically located in the mixer or track header view, set the MIDI input source. Instead of leaving it on “All Ins,” specifically select the DTX-PRO or Yamaha USB-MIDI input port. Set the input channel to Channel 10, matching the transmission channel you verified on the drum module, or leave it on “All Channels” if you are only using one controller.
To test the connection, arm the track for recording by clicking the “Record Arm” or “Track Enable” button (usually represented by a small red circle icon). Strike one of the drum pads on the DTX6K2-X. You should see visual feedback on the track’s MIDI activity meter, indicating that the DAW is receiving data. If the meter lights up but you hear no sound, verify that you have loaded a virtual instrument onto the track. This visual confirmation is an essential troubleshooting step, proving that the physical and digital MIDI paths are functioning correctly before you introduce complex software instruments.
Triggering VSTs and Electronic Samples
With MIDI data flowing successfully into your DAW, you can now harness the power of virtual studio technology (VST) to trigger modern electronic drum sounds. Electronic music genres like techno, house, trap, and drum and bass rely on highly processed, synthesized, or sampled drum sounds that differ significantly from acoustic kits. By loading a dedicated drum sampler or VST instrument onto your armed track, you can map the DTX6K2-X pads to these modern sounds.
Load your preferred drum VST, sampler, or native DAW drum rack (such as Ableton’s Drum Rack or Logic’s Drum Machine Designer) onto the designated instrument track. Once the software interface is open, you will see a grid or keyboard layout representing different sample slots. Because the DTX-PRO module sends standard MIDI note numbers, striking a pad will trigger whichever sample is loaded into the corresponding note slot. For example, if your kick drum pad sends MIDI Note 36, place your electronic sub-bass kick sample into the slot assigned to Note 36.
Mapping specific drum pads to electronic kicks, synthesized snares, and rhythmic synth triggers allows you to customize your performance layout. If the default mapping of the DTX6K2-X does not align with your VST’s layout, you can change the MIDI note output of the individual pads within the DTX-PRO module’s “Kit Edit” menu, or you can drag and drop your samples to match the incoming MIDI notes within your software sampler. For EDM production, mapping auxiliary pads or rim triggers to vocal chops, riser effects, or white noise sweeps can add dynamic performance elements to your live recording sessions.
Adjusting velocity curves is another crucial step in achieving a professional, responsive feel. Electronic drum pads detect how hard you hit them and translate this force into a MIDI velocity value between 1 and 127. Because electronic music often requires consistent, powerful hits (especially for kick drums and main snares), you may find that the default velocity curve feels too dynamic or quiet. You can adjust the velocity curve within the DTX-PRO module settings or use a MIDI velocity effect plugin within your DAW to compress the velocity range. This ensures that even lighter strikes on the pads trigger powerful, consistent electronic samples, maintaining the high-energy drive required for EDM grooves.
Troubleshooting Latency and Missed Triggers
Even with a correct setup, you may encounter technical challenges such as audio latency or missed triggers during recording. Latency is the short delay between the physical moment you strike a pad and the moment you hear the triggered sound from your studio monitors or headphones. This delay can disrupt your timing and make recording natural grooves nearly impossible.
To reduce audio latency, you must optimize your DAW’s audio engine settings. Navigate to your DAW’s audio preferences and check the buffer size. The buffer size determines how much time the computer has to process audio data. For live MIDI triggering, you should set the buffer size as low as possible without causing audio crackles or dropouts. A buffer size of 64 or 128 samples is generally ideal for low-latency performance. Additionally, ensure you are using a high-quality audio driver, such as ASIO on Windows systems or Core Audio on macOS, as these drivers are designed for high-performance real-time audio applications.
If you experience double notes, stuck notes, or echo effects when striking a pad, the culprit is often a MIDI loop. This occurs when MIDI data is sent from the module to the DAW, and then routed back from the DAW to the module, triggering the sound engine a second time. To resolve this, double-check that Local Control is turned off on the DTX-PRO module. Furthermore, disable any “MIDI Echo,” “MIDI Thru,” or “Software Monitoring” settings within your DAW’s MIDI preferences that might be reflecting the incoming data back to the drum module.
Inconsistent or missing triggers can occur if the physical pad settings are not calibrated to your playing style. If fast rolls or light ghost notes are not registering in your DAW, access the “Trigger” menu on the DTX-PRO module. Here, you can adjust the minimum trigger threshold and pad sensitivity. Lowering the threshold allows the module to detect lighter vibrations, ensuring that delicate hits are converted into MIDI data. Conversely, if striking one pad accidentally triggers an adjacent pad (a phenomenon known as crosstalk), you can increase the crosstalk rejection settings in the module to isolate each pad’s signal.
Frequently Asked Questions (FAQ)
Can I use the DTX6K2-X to control non-drum synthesizers?
Yes, you can use the DTX6K2-X to control melodic synthesizers, sampler instruments, and soundscapes within your DAW. Because each pad on the kit transmits a standard MIDI note, any virtual synthesizer loaded onto your instrument track will interpret these signals as musical notes. You can assign specific pads to custom MIDI notes corresponding to a particular musical scale, allowing you to play basslines, chord stabs, or lead melodies by striking different pads.
To make melodic playing easier, you can use octave shift functions within your DAW’s MIDI effects or adjust the MIDI note output directly on the DTX-PRO module. This allows you to shift the pitch range of the pads to match the key of your EDM track. Ensure that your DAW routing is configured so that the target synthesizer track is receiving MIDI data on the correct channel, enabling you to perform complex electronic arrangements using your drum sticks.
Do I need an audio interface to record internal sounds alongside MIDI?
Yes, if you want to record the high-quality internal drum sounds of the DTX-PRO module alongside your MIDI data, you will need a dedicated audio interface and standard audio cables. MIDI connections only transfer digital control data—such as note numbers, velocity, and timing—and do not transmit actual audio signals. To capture the module’s internal sound engine, you must connect the Left and Right audio outputs on the back of the DTX-PRO module to the inputs of an audio interface using standard 1/4-inch instrument cables.
Once connected, you can create a dedicated audio track in your DAW alongside your MIDI track. This dual-track setup allows you to record the raw MIDI performance for editing or VST triggering while simultaneously capturing the stereo audio output of the module. In your DAW mixer, you can then blend, pan, and apply effects to both the internal drum sounds and your external VST instruments, giving you the ultimate flexibility during the mixing and production stages of your electronic music tracks.
Community discussion
Share your experience or ask a question. Comments are reviewed before publication.