
Practicing a musical instrument at home is a deeply rewarding pursuit, but in high-density residential environments, it often comes with the stress of disturbing your neighbors. Whether you are practicing the violin, playing an electric guitar through an amplifier, or setting up an acoustic drum kit, sound waves easily travel through shared walls, floors, and ceilings. To practice freely without the constant fear of receiving noise complaints, establishing an effective sound proof environment is essential.
Achieving true sound isolation requires a systematic approach that addresses the physical pathways of acoustic energy. By understanding how sound travels and applying targeted modifications to your space, you can significantly reduce the level of noise that escapes. This guide provides a comprehensive, step-by-step roadmap to planning, sourcing, and installing a reliable sound isolation setup in your home.
Soundproofing vs. Acoustic Treatment: Knowing the Difference
Before purchasing any materials, you must understand the fundamental difference between soundproofing and acoustic treatment. Misunderstanding these two concepts is the most common reason homeowners waste money on ineffective solutions. While they both deal with sound control, they serve entirely different purposes and require completely different materials.
Products mentioned in this guide
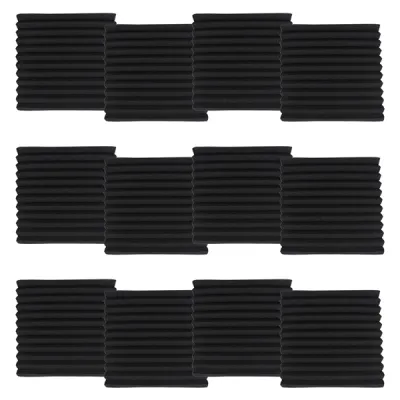


![[Slatwall]🌳 600x600mm - 1pc Sound Proof Acoustic Panel Self-Adhesive Studio Office Home Wall Karaoke Restaurant](https://img.lazcdn.com/g/p/b314f78fb4f8b4431272aadf02da4498.jpg_400x400q80.jpg_.webp)
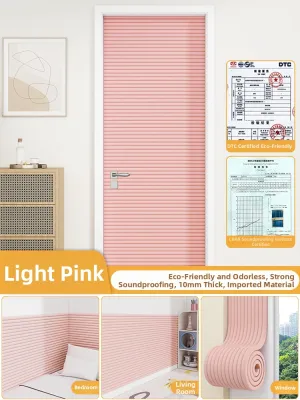


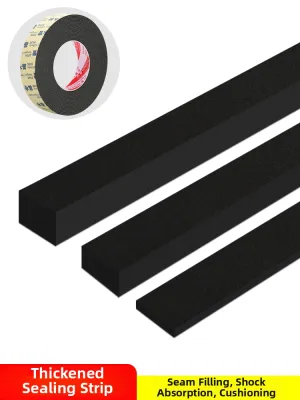
Prices are valid at publication and may change. Please refer to the product page for the latest price.
Soundproofing, or sound isolation, is the process of preventing acoustic energy from entering or leaving a room. This is the primary solution you need to avoid neighbor complaints. Sound isolation relies on heavy, dense, and airtight barriers that physically block sound waves from passing through walls, windows, doors, and floors.
Acoustic treatment, on the other hand, is designed to control internal sound reflections within a room to improve recording or listening quality. This is achieved using lightweight, porous materials such as foam panels, fabric-wrapped fiberglass boards, diffusers, and bass traps. While these treatments are excellent for reducing echo and making your instrument sound better inside the room, they do almost nothing to stop sound from traveling through the walls to your neighbors.
The physical difference lies in how sound waves interact with these materials. High-frequency sounds have short wavelengths and can be easily absorbed by the open-cell structure of acoustic foam. However, low-frequency sounds, such as the bass notes of a piano, a bass guitar, or a kick drum, have long, powerful wavelengths. These waves pass through lightweight foam completely unaffected, requiring dense mass and structural decoupling to stop them.
To keep your practice noise contained, your primary investment must be in soundproofing materials and techniques. Once the sound isolation barrier is established, you can then introduce acoustic treatment to optimize the internal sound quality of your practice space.
Assess Your Room: Finding Noise Leaks and Structural Limits
Every soundproofing project must begin with a thorough assessment of the existing space. Sound behaves much like water; it will always find and escape through the path of least resistance. In acoustics, these pathways are known as flanking paths, and they represent any gap, crack, or weak point in your room’s structure.

To identify these flanking paths, perform a meticulous visual and auditory inspection of your practice room. Close all doors and windows, turn off any noisy appliances, and sit quietly in the center of the room. Listen closely for external sounds, such as traffic, corridor footsteps, or plumbing noise, which indicate exactly where sound is leaking into—and out of—your room.
Next, inspect the door frame and window seals visually. Look for any visible light passing through the gaps when the room is dark and the adjacent spaces are illuminated. You can also hold a lit incense stick near the edges of doors, windows, and electrical outlets; any flickering of the smoke reveals active air currents, which are direct pathways for airborne sound.
When planning your soundproofing project, you must carefully consider the structural limits and regulations of your living environment. In Singapore, the vast majority of residents live in Housing & Development Board (HDB) flats or private condominiums. These buildings feature robust concrete structures, but they also have strict renovation guidelines and shared structural elements.
It is helpful to understand the difference between structural concrete walls and lightweight partition walls. Concrete walls are excellent at blocking airborne sound due to their immense mass, but they easily transmit structure-borne vibrations, such as the hum of a bass amp or the impact of a drum pedal. Lightweight partition walls, common in newer HDB layouts, leak both airborne and structure-borne sound easily. Reviewing your flat’s floor plan will help you identify which walls are non-load-bearing partitions that can be safely reinforced.
Never attempt to alter, drill deeply into, or remove load-bearing walls, structural columns, or fire-rated doors. In many HDB layouts, the main entrance door and certain internal walls serve as critical fire barriers or structural supports, and modifying them without authorization is illegal. Always consult HDB guidelines or your condominium’s building management before planning any structural modifications, such as building a heavy “room-within-a-room” structure, to ensure compliance and structural safety.
Essential Tools and Materials for Blocking Sound
To successfully block sound, your construction and installation efforts must rely on three core physical principles: mass, damping, and decoupling. Understanding these principles will help you select the right materials and avoid low-quality alternatives.
Mass refers to the thickness and weight of the barriers you place between the sound source and the outside world. Heavy materials, such as dense drywall, plasterboard, and concrete, make it difficult for sound waves to physically vibrate the barrier.
Damping involves converting vibrational energy into trace amounts of heat before it can pass through a structure. This is typically achieved using specialized viscoelastic damping compounds sandwiched between rigid layers of drywall.
Decoupling is the process of physically separating two structural elements to interrupt the transmission of mechanical vibrations. By creating an air gap or using flexible isolation mounts, you prevent sound vibrations from traveling directly from one side of a wall to the other.
When sourcing materials for your project, compile a checklist of essential tools and supplies:
- Acoustic Sealant: A non-hardening, flexible caulking compound used to seal joints and gaps without cracking over time.
- Heavy-Duty Weatherstripping: High-density silicone or rubber seals to close gaps around door and window frames.
- Automatic Door Bottoms or Heavy Door Sweeps: Mechanical seals that drop down to seal the threshold when the door is closed.
- Mass Loaded Vinyl (MLV): A thin, highly dense, flexible vinyl sheet designed to add substantial mass to walls, ceilings, and doors.
- Resilient Channels or Acoustic Isolation Clips: Metal rails and rubber mounts used to decouple drywall from studs.
- Dense Drywall: High-density plasterboard or acoustic-grade drywall to maximize mass.
Before purchasing any of these products, verify the manufacturer’s product labels for specific fire safety ratings and moisture resistance. Given Singapore’s highly humid tropical climate, moisture resistance is critical. Standard materials can trap humidity, leading to mold growth and structural rot inside sealed wall cavities. Ensure all materials are rated for humid environments and meet local fire code regulations.
When comparing heavy barriers, do not rely on generic claims or invent specific Sound Transmission Class (STC) numbers. Instead, look for manufacturer-tested STC ratings on the packaging to verify performance. Keep in mind that while a higher STC rating indicates better performance in a laboratory setting, real-world performance (Field Sound Transmission Class or FSTC) is often lower due to installation gaps or flanking paths, highlighting why meticulous installation is just as important as material selection.
Step-by-Step Installation: From Sealing Gaps to Adding Mass
With your room assessed and your materials gathered, you can begin the installation process. It is best to work systematically, starting with the easiest, most cost-effective fixes before moving on to advanced structural modifications.
Step 1: Seal Doors, Windows, and Air Gaps
The most common and easily fixable noise leaks are found around doors and windows. Because sound travels through the air, even a tiny gap can compromise the effectiveness of an otherwise solid wall.
Begin by applying heavy-duty silicone or cellular rubber weatherstripping along the entire perimeter of your door and window frames. Ensure that when the door or window is closed, the seal is compressed tightly to create an airtight barrier.
Next, address the gap at the bottom of the door, which is often the single largest contributor to sound leakage. Install an automatic door bottom or a heavy-duty rubber door sweep. Automatic door bottoms are highly effective because they feature a mechanical plunger that drops a neoprene seal tightly against the floor only when the door is fully closed, preventing wear on your flooring.
If your practice room has a standard hollow-core door, consider upgrading it to a solid-core wood or composite door. Hollow doors act as acoustic resonators, easily transmitting mid and high frequencies. A standard hollow-core door typically has an STC rating of around 20, whereas a solid-core wood door can achieve an STC rating of 30 to 35. Replacing the door adds immediate mass to the opening, significantly improving sound isolation.
Finally, cover windows with heavy, multi-layer acoustic curtains. These specialized curtains are woven with dense fibers and often feature internal layers of mass-loaded material to dampen high-frequency sound waves before they hit the glass. They also provide excellent thermal insulation, helping to keep your practice space cool in tropical weather.
Step 2: Upgrade Walls with Mass and Decoupling
If sealing gaps is not sufficient to contain lower-frequency instrument noise, such as acoustic guitars, brass instruments, or vocals, you will need to reinforce your walls. This step focuses on adding mass and decoupling the wall structure.
To add mass to an existing wall, you can apply Mass Loaded Vinyl (MLV) directly over the existing drywall. Secure the MLV to the studs using staples or screws, ensuring the sheets overlap slightly. Next, apply a secondary layer of dense drywall directly over the MLV, sandwiching it in place. Use a generous amount of non-hardening acoustic sealant along all perimeter edges, seams, and joint lines to maintain a completely airtight seal.
For advanced setups where high isolation is required, implement structural decoupling. Install resilient channels horizontally across the wall studs before mounting the new layer of drywall. These metal channels act as shock absorbers, flexing slightly to prevent mechanical vibrations from passing directly from the drywall into the wooden or metal studs. Resilient channels must be installed with the open flange facing upward so that gravity pulls the drywall away from the stud, maintaining the isolation gap.
During this process, safety and compliance must remain your top priorities. If you encounter electrical wiring, plumbing pipes, or are unsure about the structural integrity of the wall, stop immediately and consult a licensed contractor. If a screw accidentally penetrates through the resilient channel and into the wooden or metal stud behind it, it creates a “short circuit” that completely ruins the decoupling effect. Drilling into or modifying walls in private condominiums or HDB flats without verifying what lies behind them can lead to severe structural damage, utility disruptions, or violations of housing regulations.
Step 3: Manage Floor Vibrations and Ceiling Noise
Structure-borne noise, or impact noise, occurs when physical vibrations travel directly through the building’s framework. This is a critical issue for instruments that make direct contact with the floor, such as drum kits, grand pianos, or amplifiers.
To manage floor vibrations, install high-density acoustic underlayments made of recycled rubber or dense cork beneath your flooring. If you are unable to replace the flooring, place a thick, heavy rug over a dense, high-quality carpet underlay.
For drummers, a specialized isolation platform is highly recommended to decouple the drum kit from the concrete slab. You can construct a simple DIY tennis ball riser by sandwiching tennis balls between two sheets of heavy plywood. Lay down a sheet of 18mm plywood, use a spade drill bit to cut shallow recesses or holes slightly smaller than a tennis ball, place the tennis balls in the recesses, and lay a second sheet of plywood on top, securing it with heavy-duty straps or brackets without creating a rigid mechanical bridge. The flexibility of the tennis balls absorbs the kinetic energy of the bass drum pedal, preventing the low-frequency thud from traveling through the floor to the neighbors below.
Treating a ceiling is the most challenging and expensive aspect of DIY soundproofing due to gravity and structural constraints. If your ceiling height and local building regulations permit, you can install a suspended or dropped ceiling using acoustic hangers and dense insulation. However, for most residential spaces, a more practical approach is to focus on decoupling your instruments from the floor and managing the direction of your sound. Position speakers and amplifiers on isolation pads, and avoid pointing directional instruments directly at the ceiling or shared walls.
Test Your Setup and Set Realistic Expectations
Once you have completed the installation steps, it is time to verify the effectiveness of your soundproofing efforts and adjust your expectations. Understanding what your setup can realistically achieve will help you maintain good relations with your neighbors.
To test your room, place a speaker inside the practice space and play a loud backing track or a recording of your instrument at your typical practice volume. Step outside the room, close the door, and walk into the adjacent hallway or corridor. Listen carefully for any remaining sound leakage, paying close attention to the door frame, windows, and shared walls.
For a more objective measurement, download a decibel meter app on your smartphone. Take a baseline reading of the sound level inside the room while playing, and then take a reading outside the closed door. Compare these numbers to quantify the reduction in decibels. A reduction of 10 to 15 decibels is noticeable, while a reduction of 30 decibels or more represents a highly effective residential soundproofing job.
It is important to manage your expectations realistically. Achieving 100% absolute silence—similar to a professional recording studio or anechoic chamber—is virtually impossible in a standard residential flat or condominium without spending tens of thousands of dollars on professional construction. The realistic goal of DIY soundproofing is to reduce the sound transmission to a level that blends into the ambient background noise of your neighborhood, thereby preventing complaints.
To complement your physical soundproofing, consider integrating smart behavioral practices into your routine. Respect local quiet hours by scheduling your loudest practice sessions during the middle of the day. For late-night practice, utilize low-volume practice amplifiers, electronic drum kits equipped with mesh heads, or silent brass mute systems for wind instruments. Combining physical sound isolation with thoughtful scheduling ensures you can pursue your musical passion while remaining a respectful member of your community.
Frequently Asked Questions (FAQ)
Can I soundproof a room without major renovations?
Yes, you can achieve significant sound reduction without undergoing major construction or permanent renovations. If you are renting your home or cannot make structural changes, focus on non-destructive, removable methods. Start by sealing the gaps around your doors and windows with removable weatherstripping and draft stoppers. Hang heavy, multi-layer acoustic curtains over windows and shared walls to absorb mid-to-high frequencies. Additionally, place thick rugs with dense rubber underlays on the floor, and position heavy furniture, such as bookshelves packed tightly with books, against shared walls to add temporary mass.
Do egg cartons or foam panels block sound from leaving the room?
No, egg cartons and standard acoustic foam panels do not block sound from leaving a room. This is one of the most persistent myths in the beginner music community. Egg cartons are thin, lightweight, and have no acoustic mass or damping properties, making them completely useless for sound isolation. Standard acoustic foam panels are designed solely for acoustic treatment; they are porous and lightweight, meaning they absorb high-frequency reflections inside the room to reduce echo, but sound waves pass directly through them and through your walls. To block sound from escaping, you must use dense, heavy, and airtight materials like Mass Loaded Vinyl or thick drywall.
Community discussion
Share your experience or ask a question. Comments are reviewed before publication.